Thank you for purchasing our app. If you have any questions that are beyond the scope of this help file, please feel free to email via my user page contact form here :
To edit this project, you must have Flutter and Dart successfully installed and configured on
your machine. Install flutter
Set up your editor Install a fileExstantion Flutter
و Dart
Start
Download and unzip the fileapp Flutter, Use your preferred IDE(Android
Studio / Visual Code / IntelliJ) to open the project.
Config Android
Import Project
Extract
.zip
, the project location inside
android_studio
folder.
When your Android Studio you download from Codecanyon, you will see some files and folders. We named the project folder “ ready you can open it and you will see Select
"Open"
. a display like this
Flowing below steps:
Open project
Go →
Setting and Check Flutter is correct 35 sec>
then click Ok
Open Terminal
Open Terminal
write
flutter pub get
press enter key from keyboard
same as before one
flutter gen-l10n
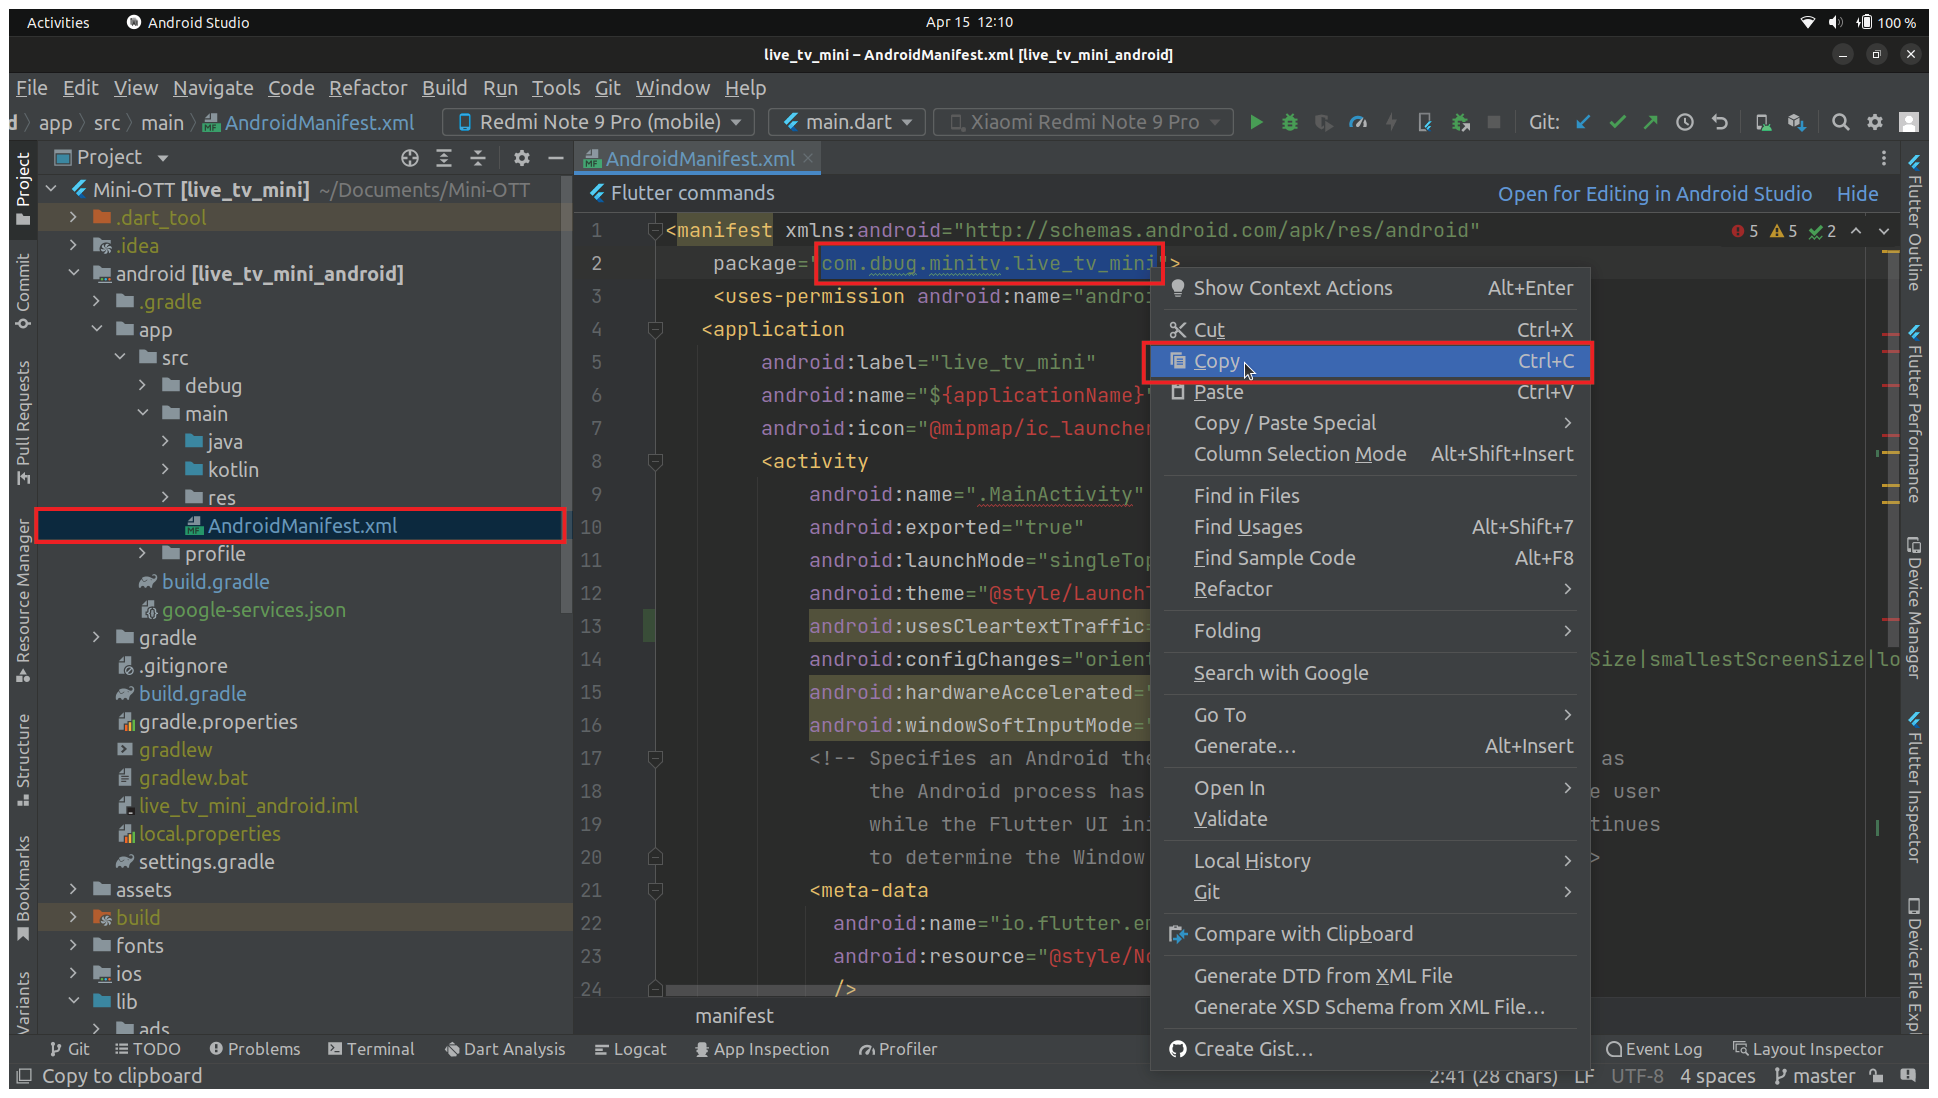
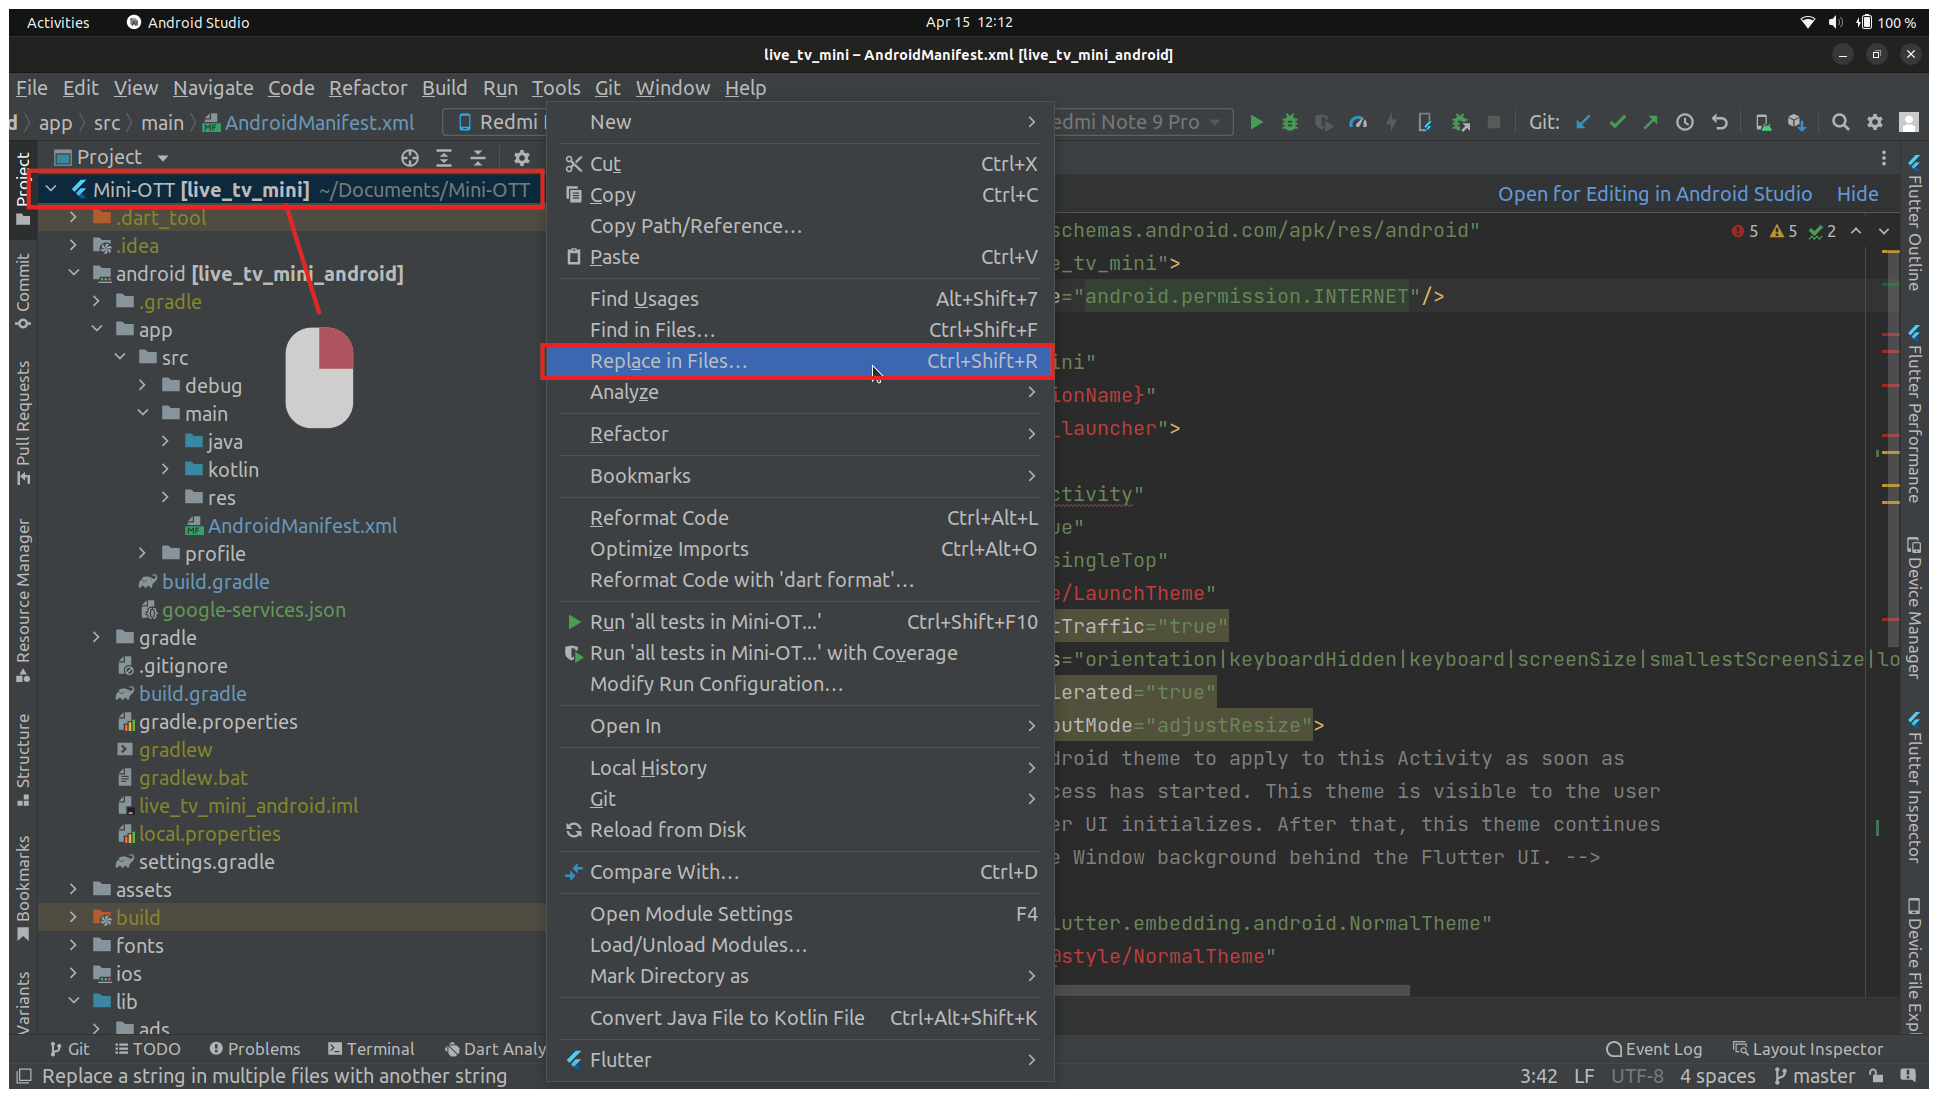
Package Name
Step 1
GO to
AndroidManifest.xml
and copy package
Select the indicated position and then left-click on your mouse to advance to the next step.
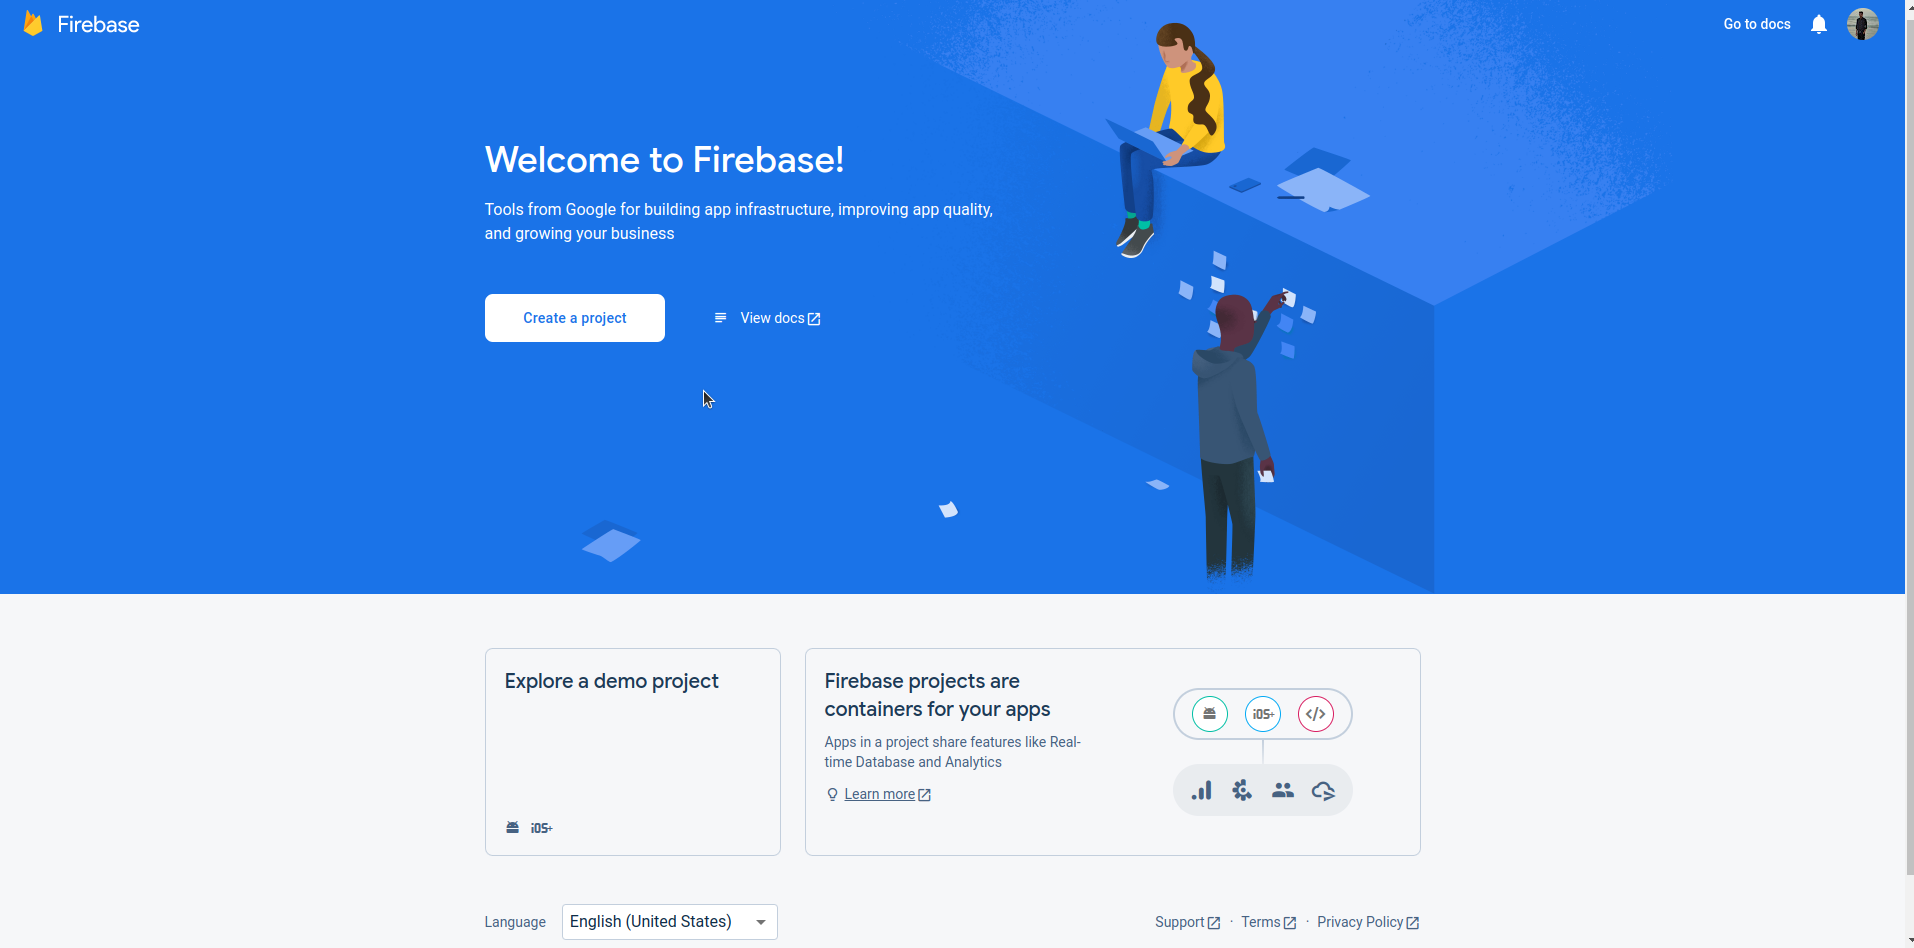
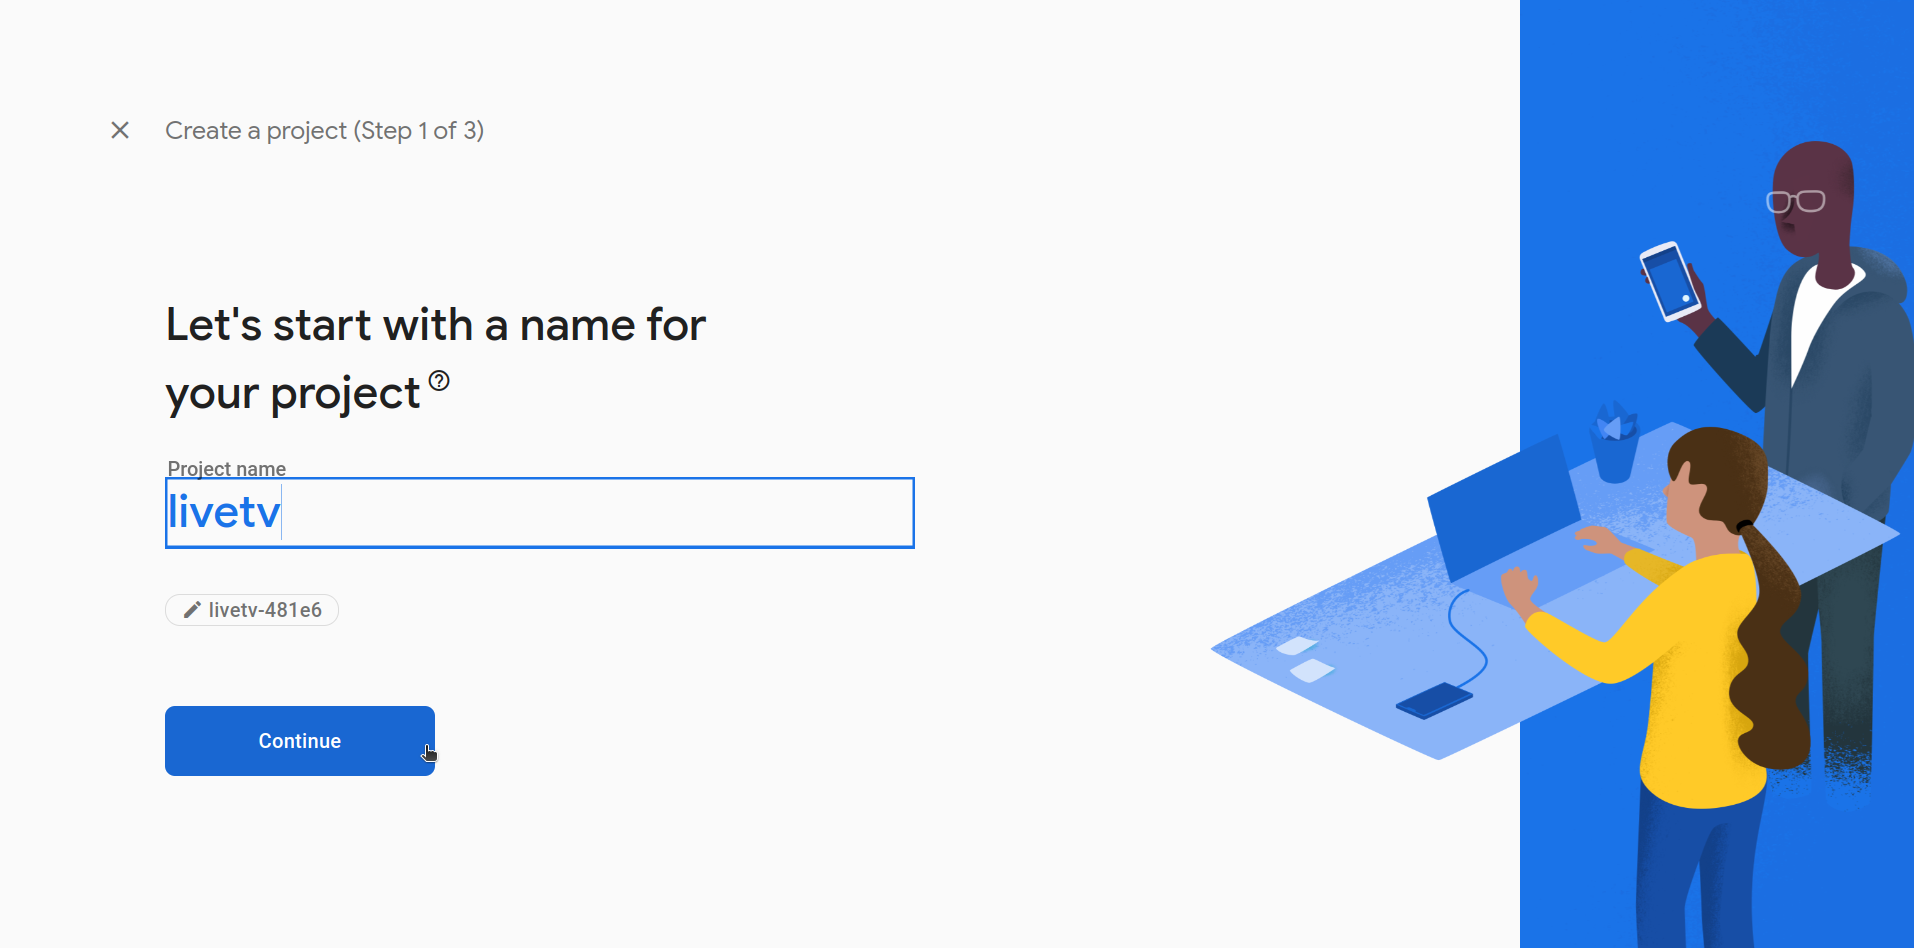
Please register or log in first and then select create new project. In the dialog window enter the name of the project that will be created and the contents of the state and then click the create project to continue.
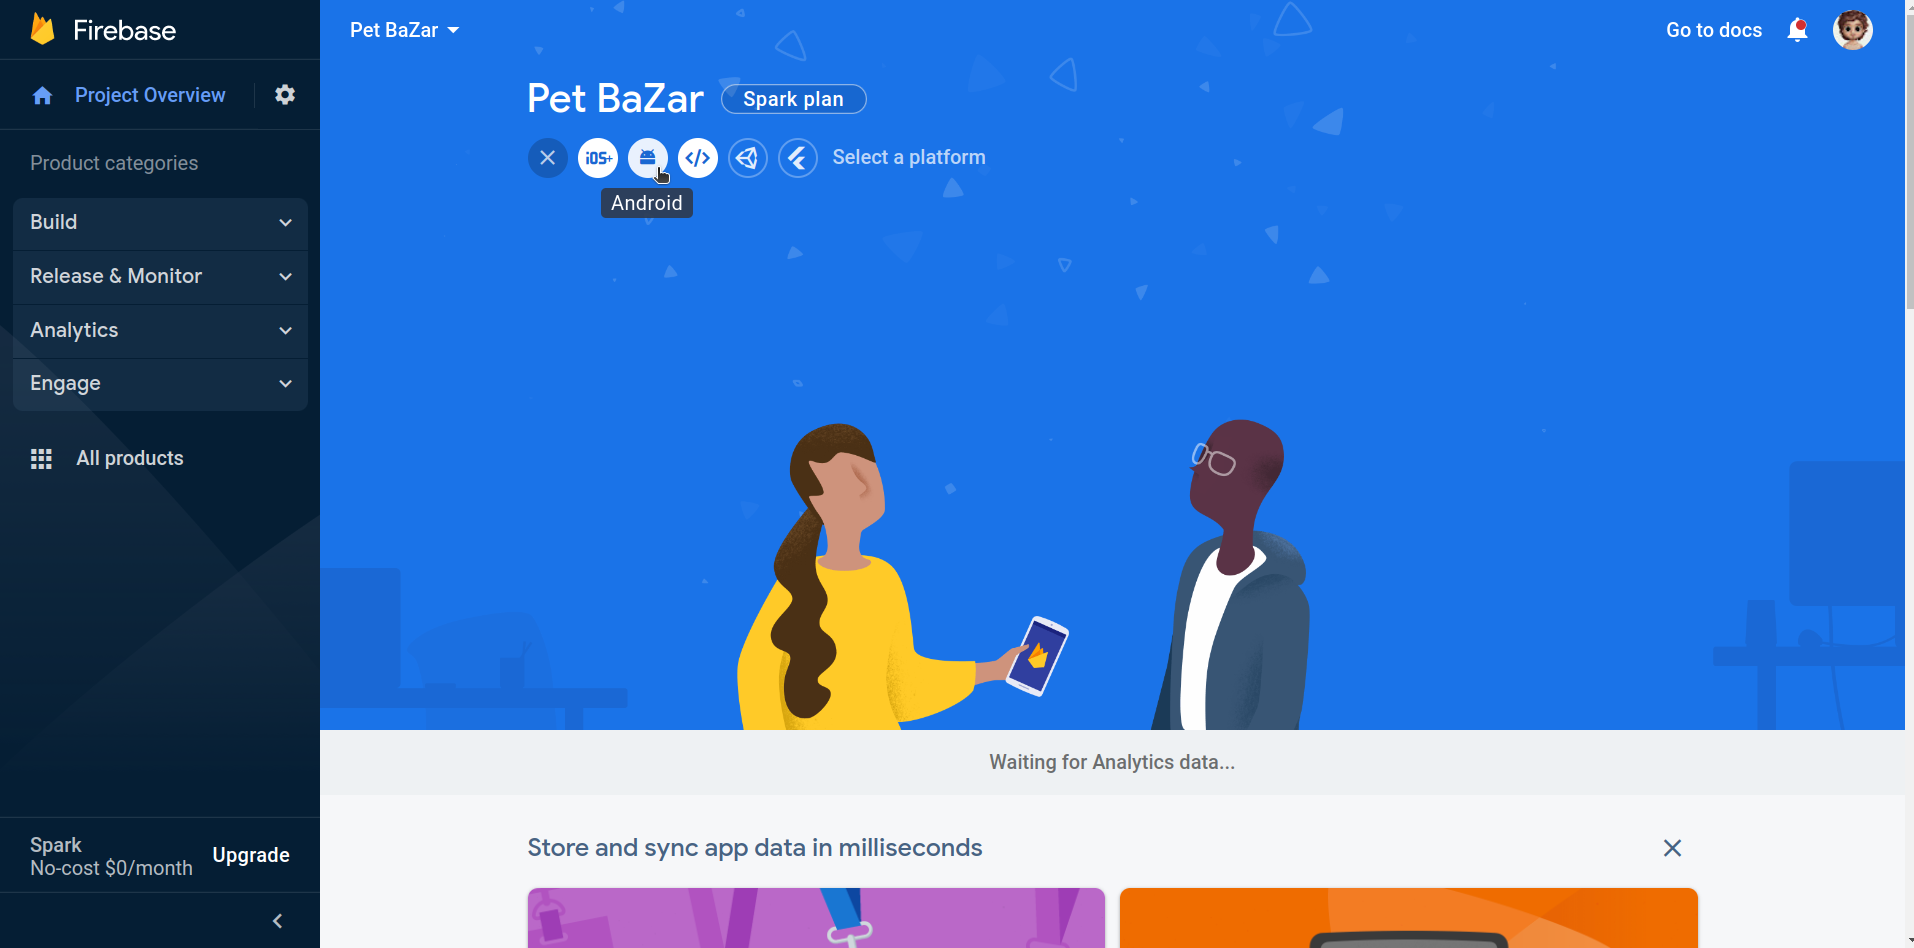
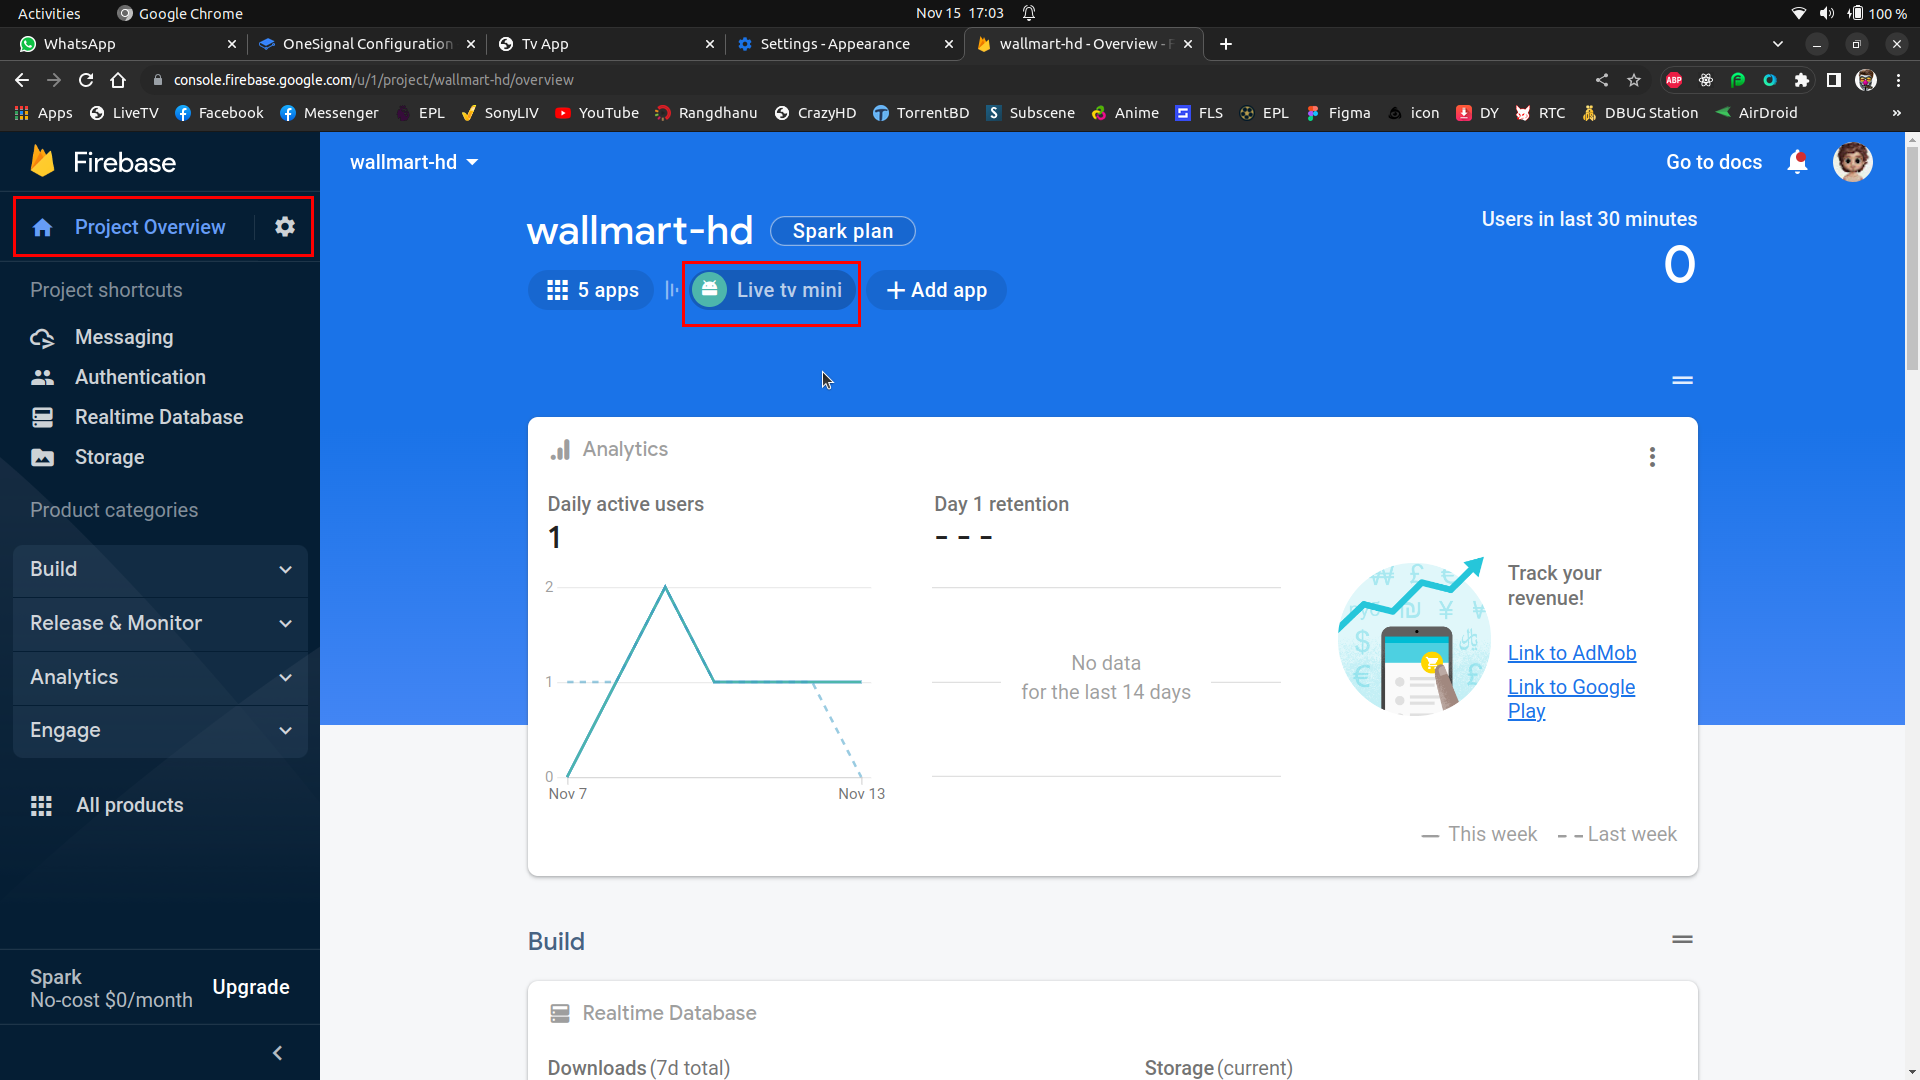
After successfully creating a project on Firebase then the page will be redirected to the dashboard project that has been made.
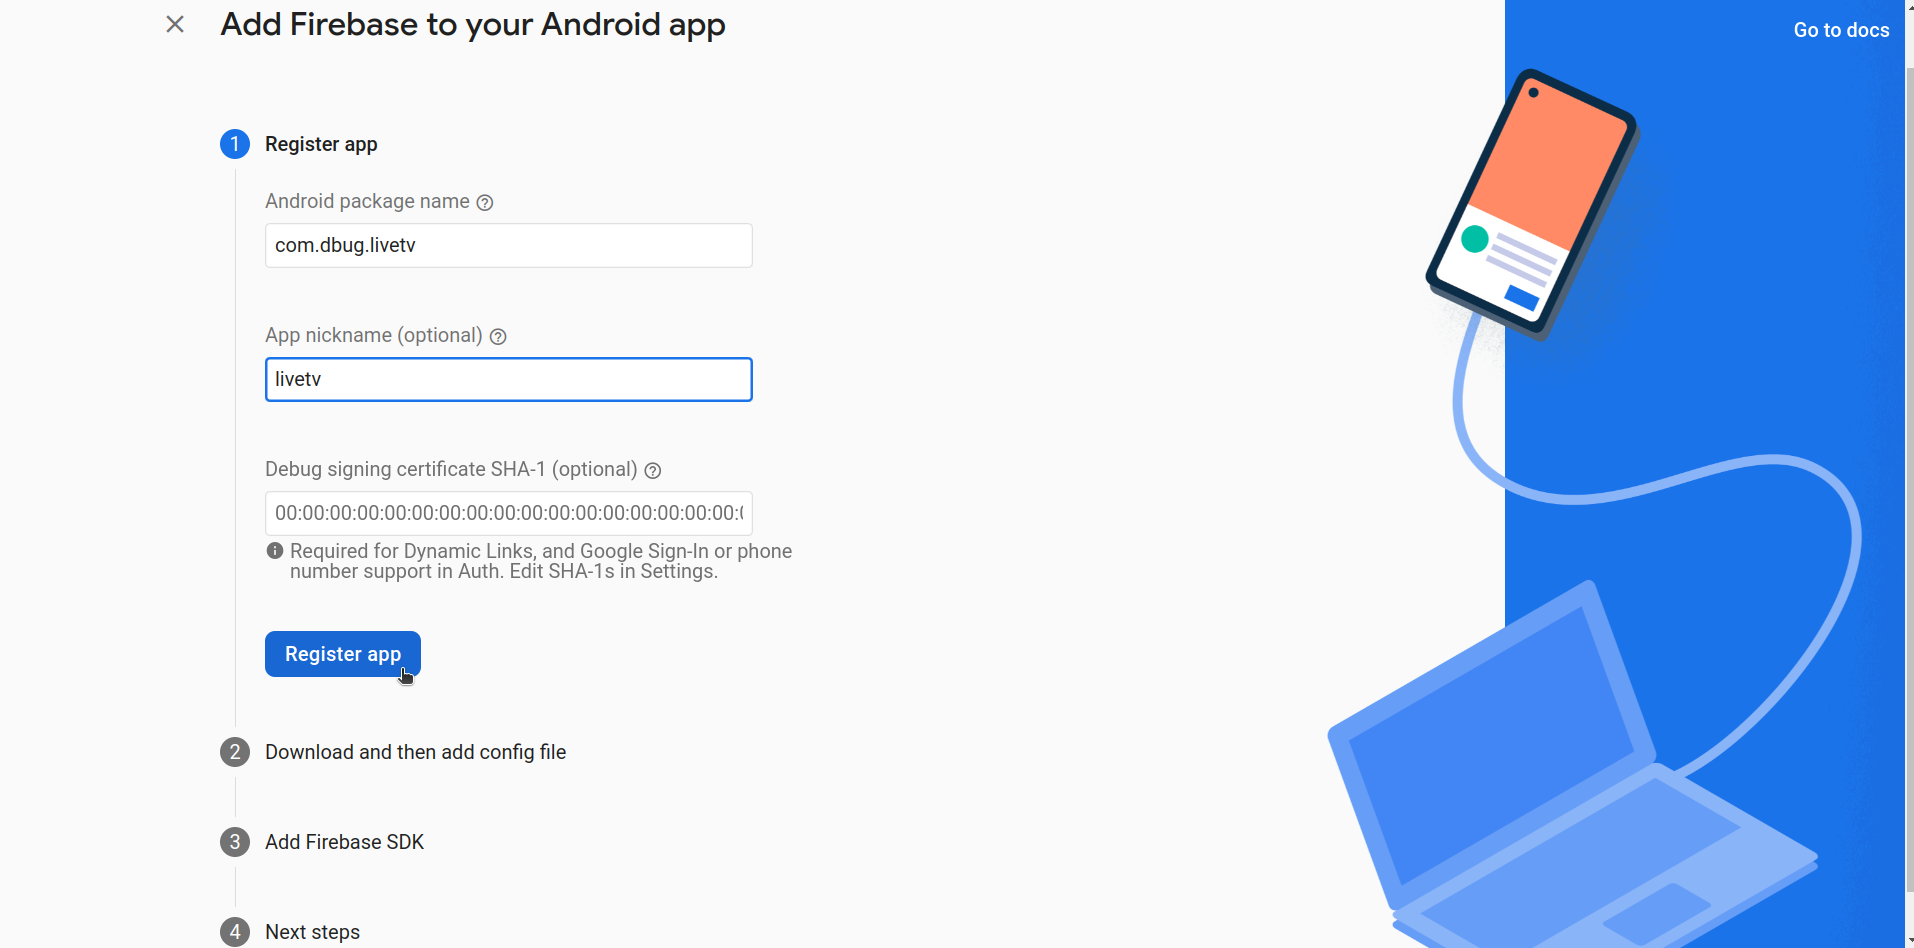
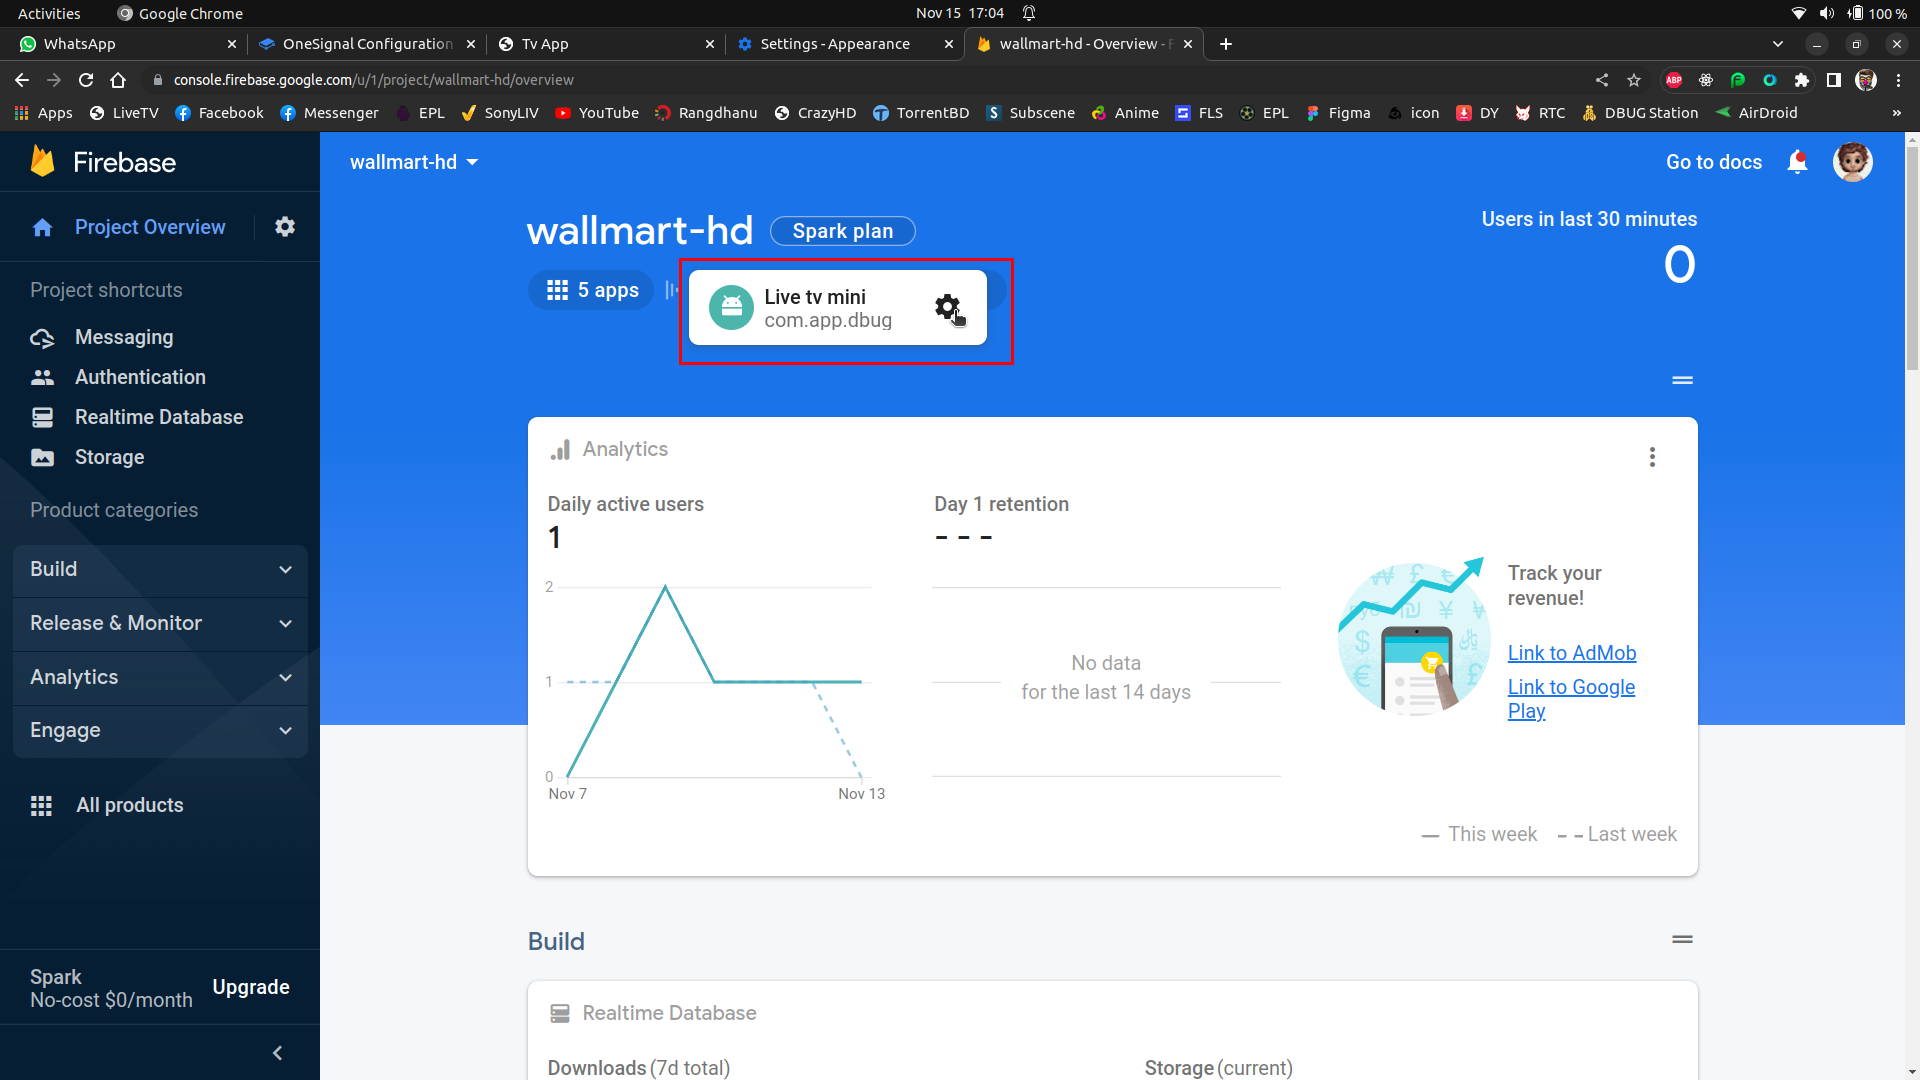
Then on the dashboard Firebase select Add Firebase to your Android app. In the next dialog window enter the name of the Android application package and SHA1 of fingerprints Certificate (optional).
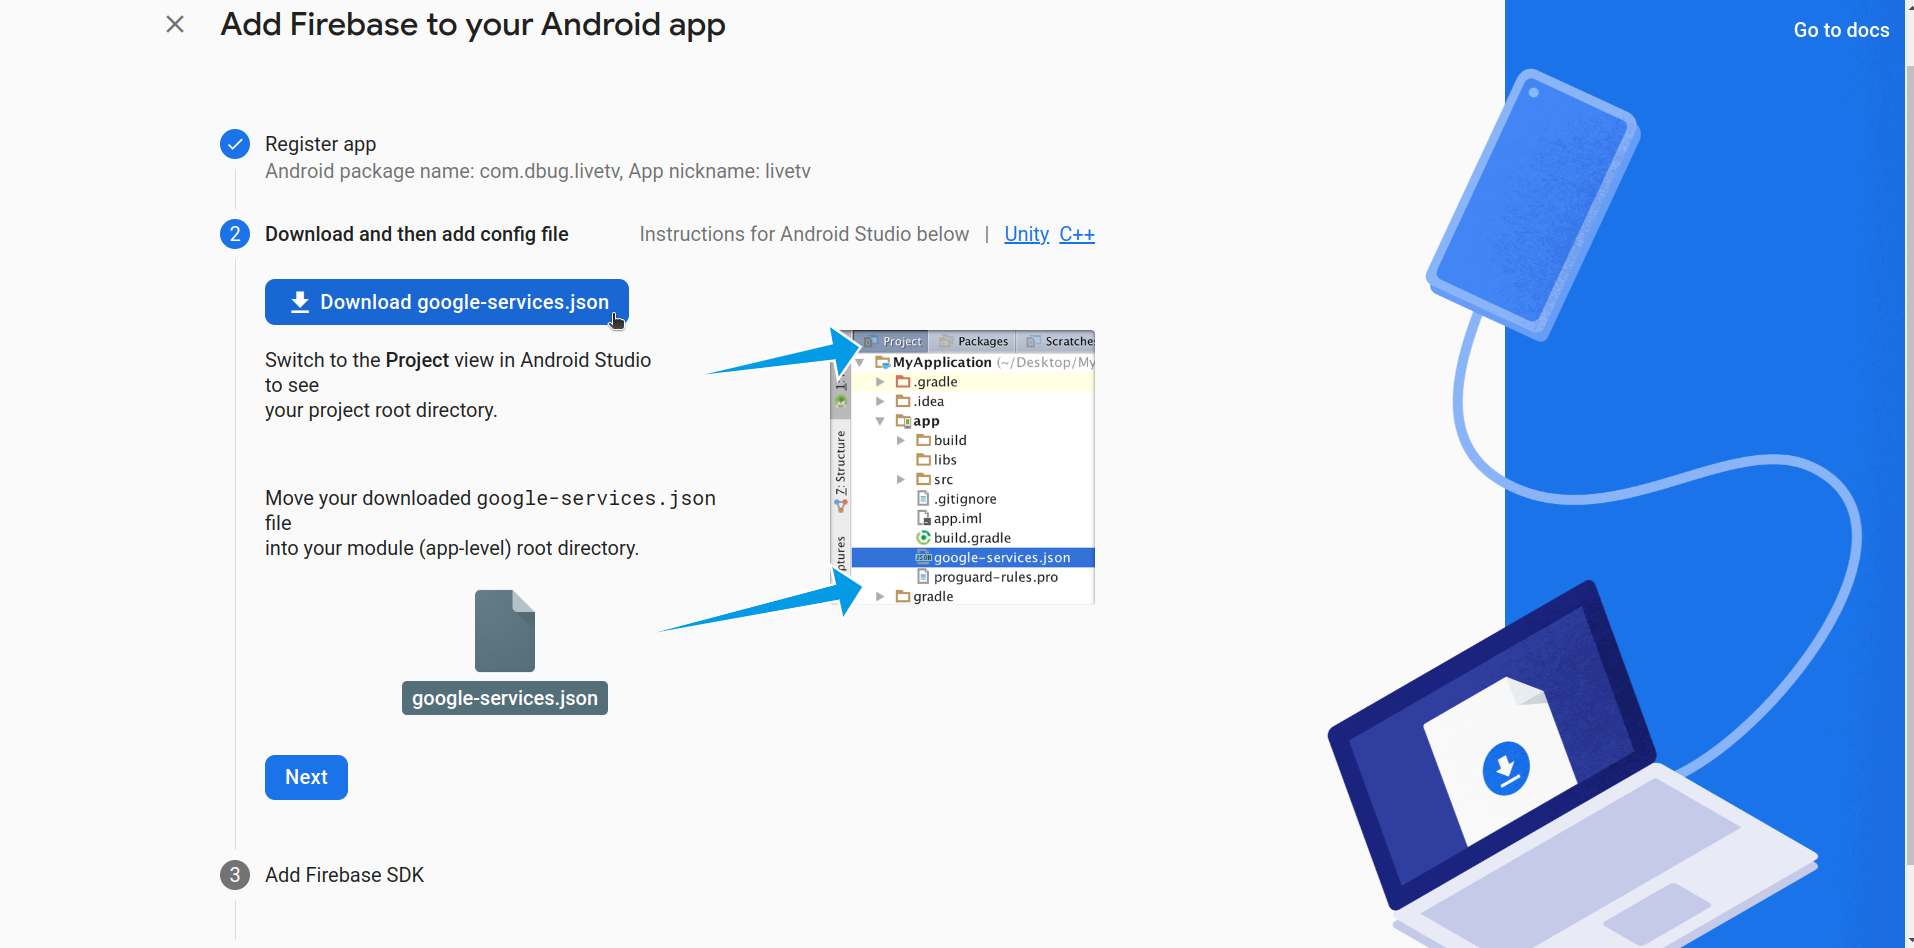
Next will download the configuration file json
google-services.json
automatically, which will be added in the directory app in the Android project.
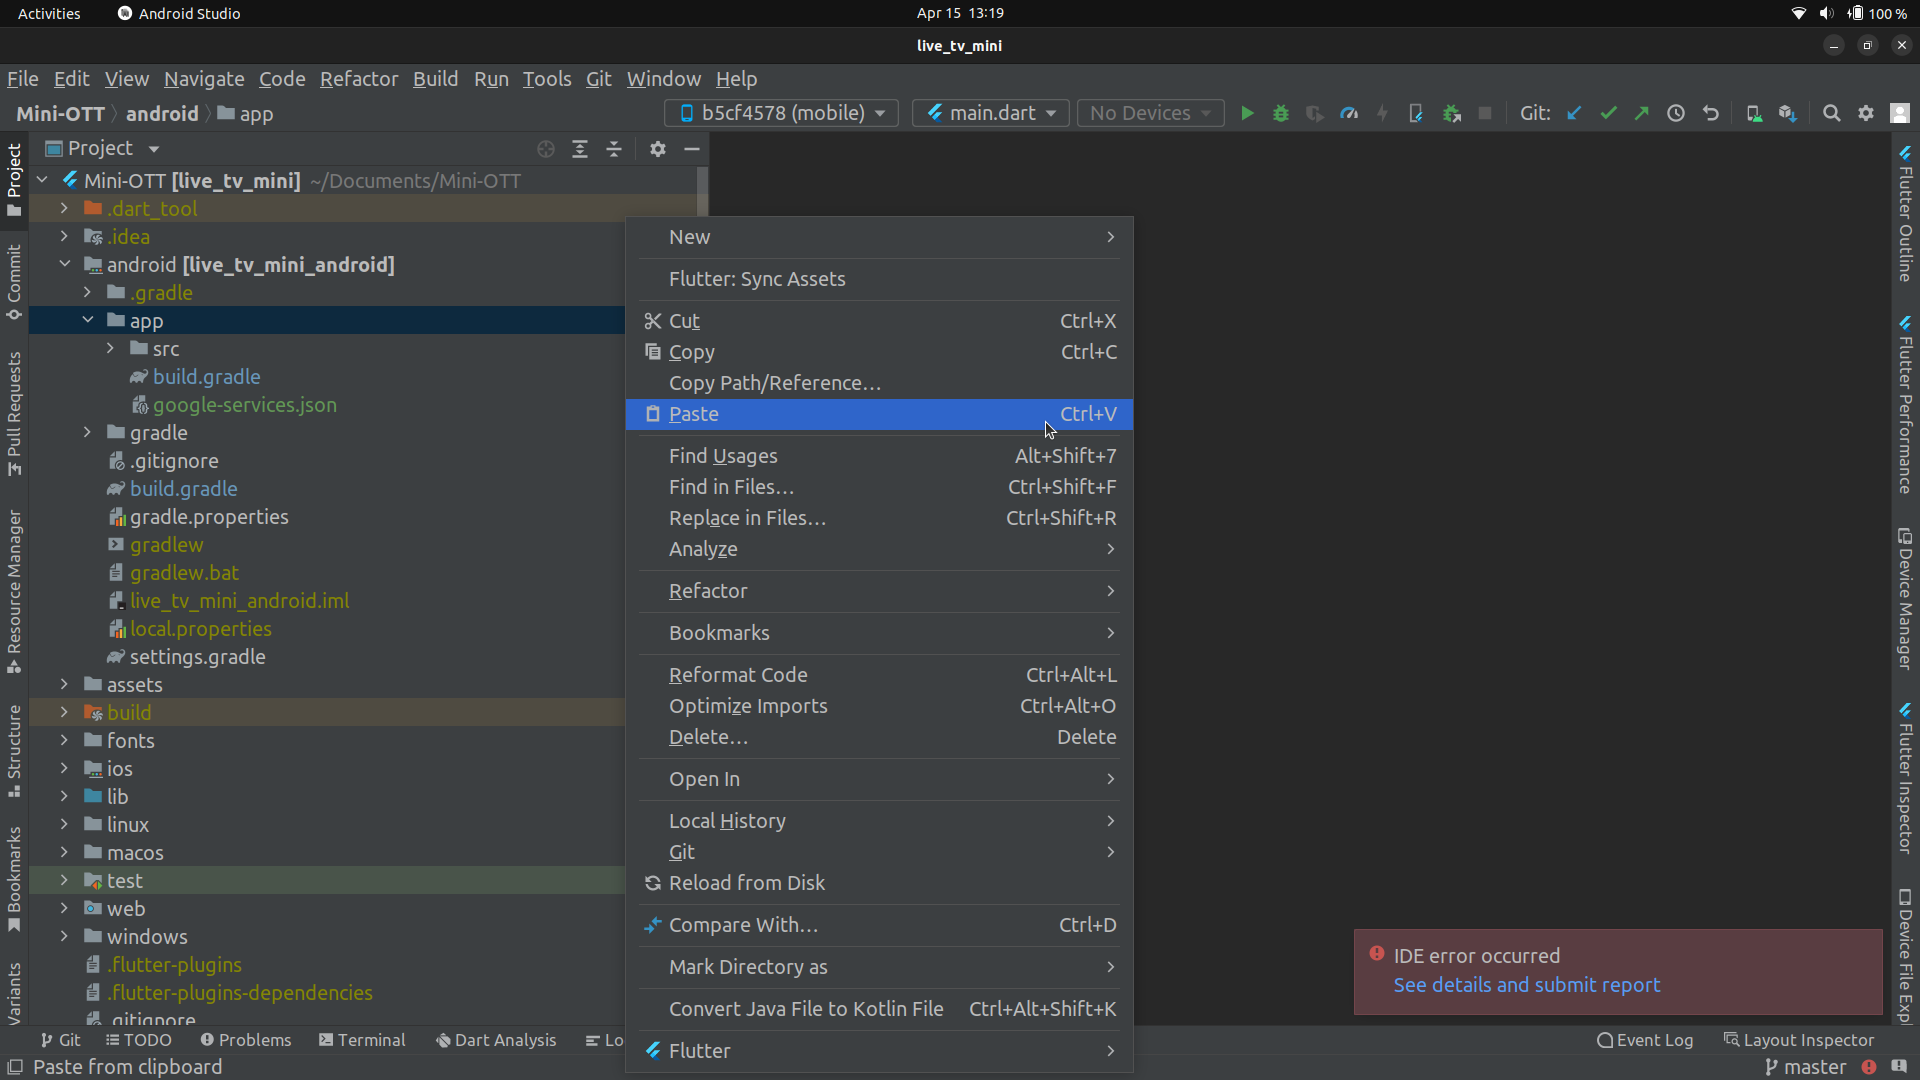
Now copy
google-services.json
Go →
android[.....]
→
app
select app and paste here
google-services.json
Server Connection
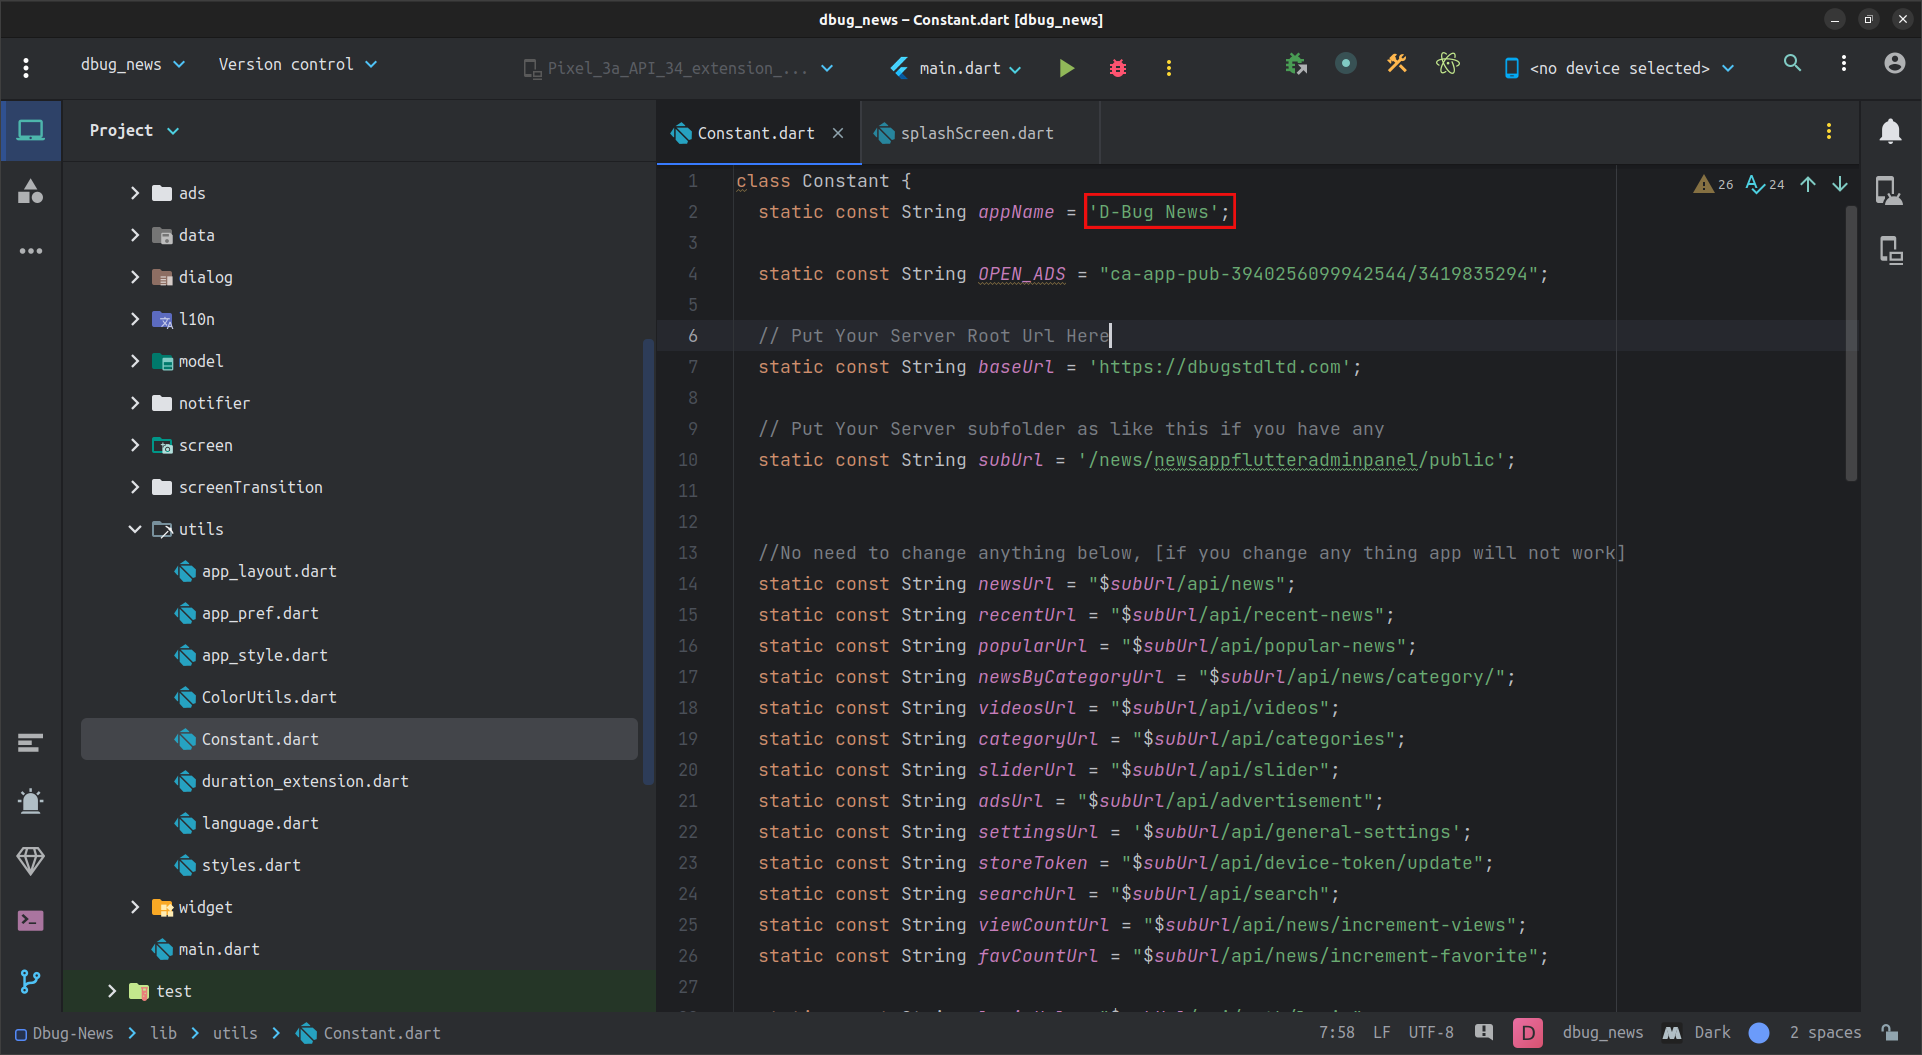
When your admin panel is already configured properly, you can connect it to your Flutter app, select Project
lib/utils/Constant.dart
, and put your admin panel
URL
and
API key
in the
baseUrl & API_KEY
string tag for server connection and security purpose.
Example :
your url is
https://test_url.com/path1/path2/public/admin
Insert on baseUrl
'https://test_url.com'
How to know what is your
subUrl
?
condition 1
https://test_url.com
and
/public/admin
between 2 of them which part is left that is your
subUrl
Insert on subUrl
'/path1/path2'
condition 2 if nothing left
Insert on subUrl
''
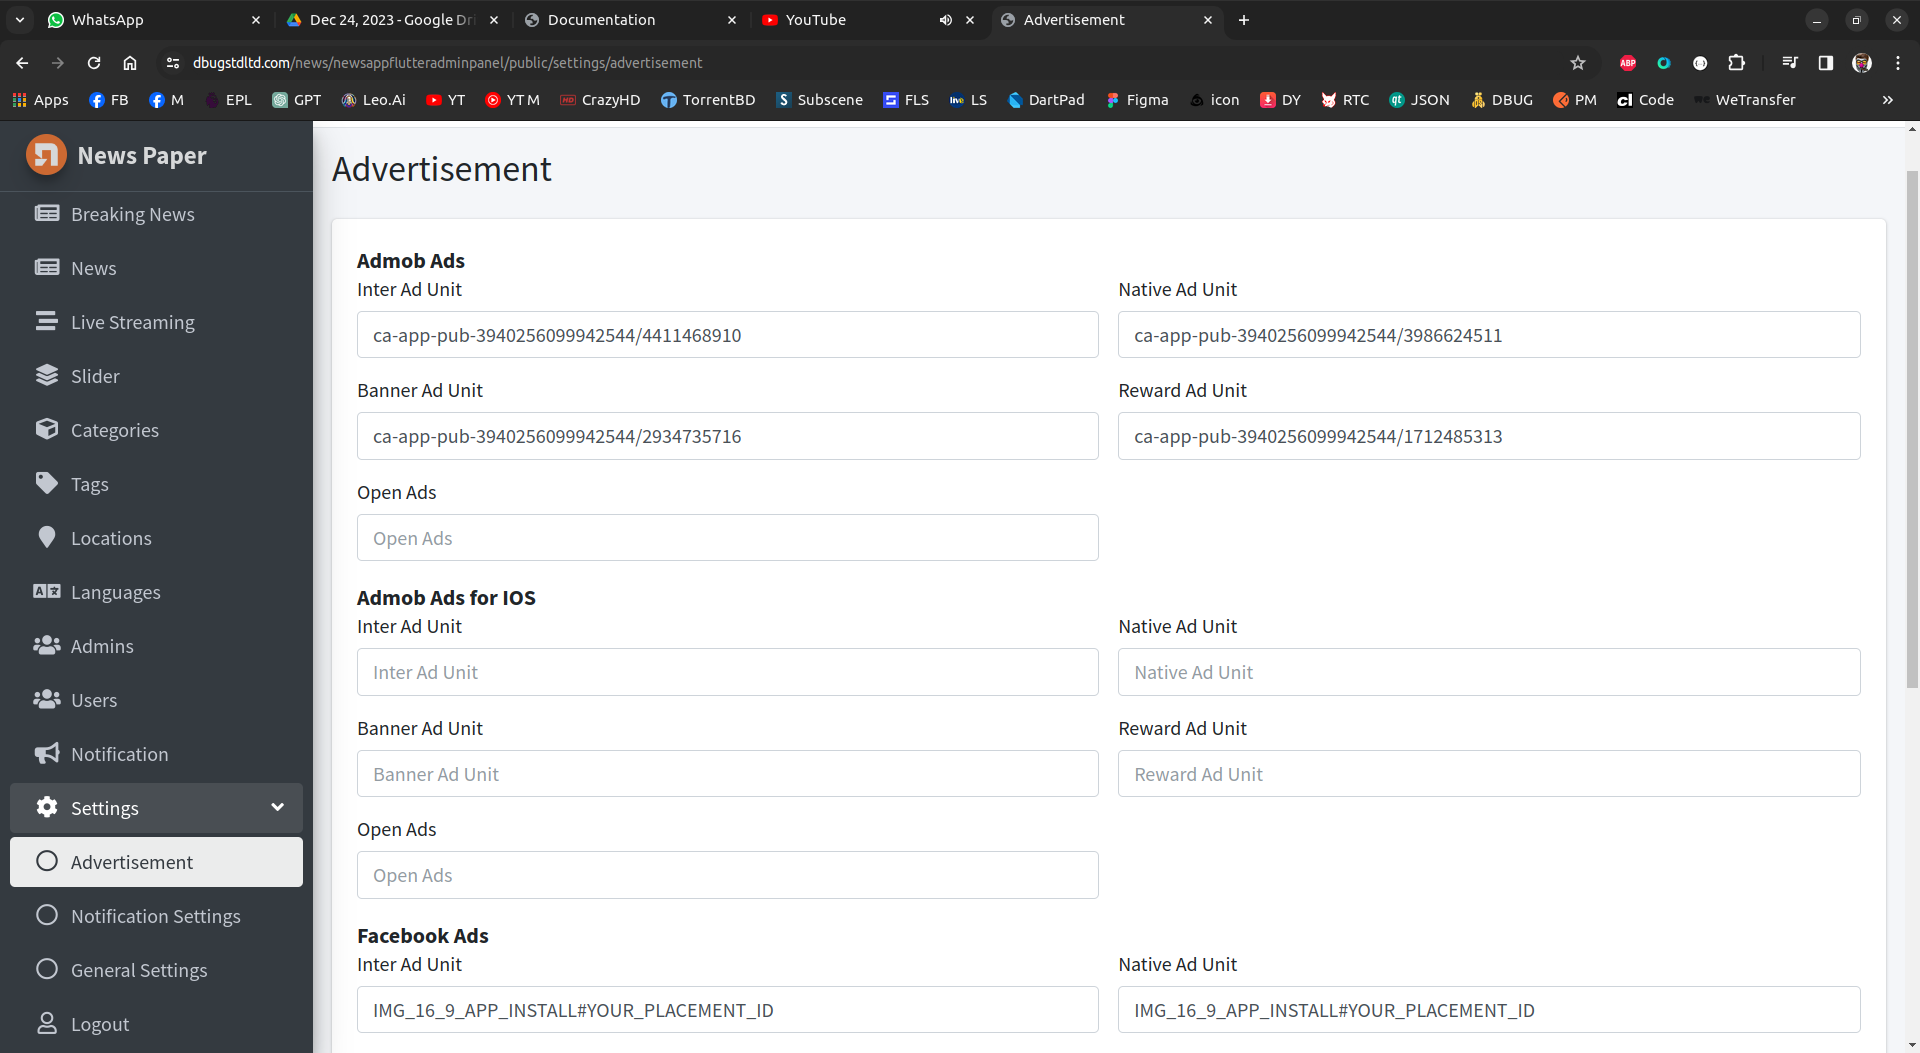
Ad Network
go there and change those from the admin panel Settings Tab will be avail to change those ads unit
Click
Update
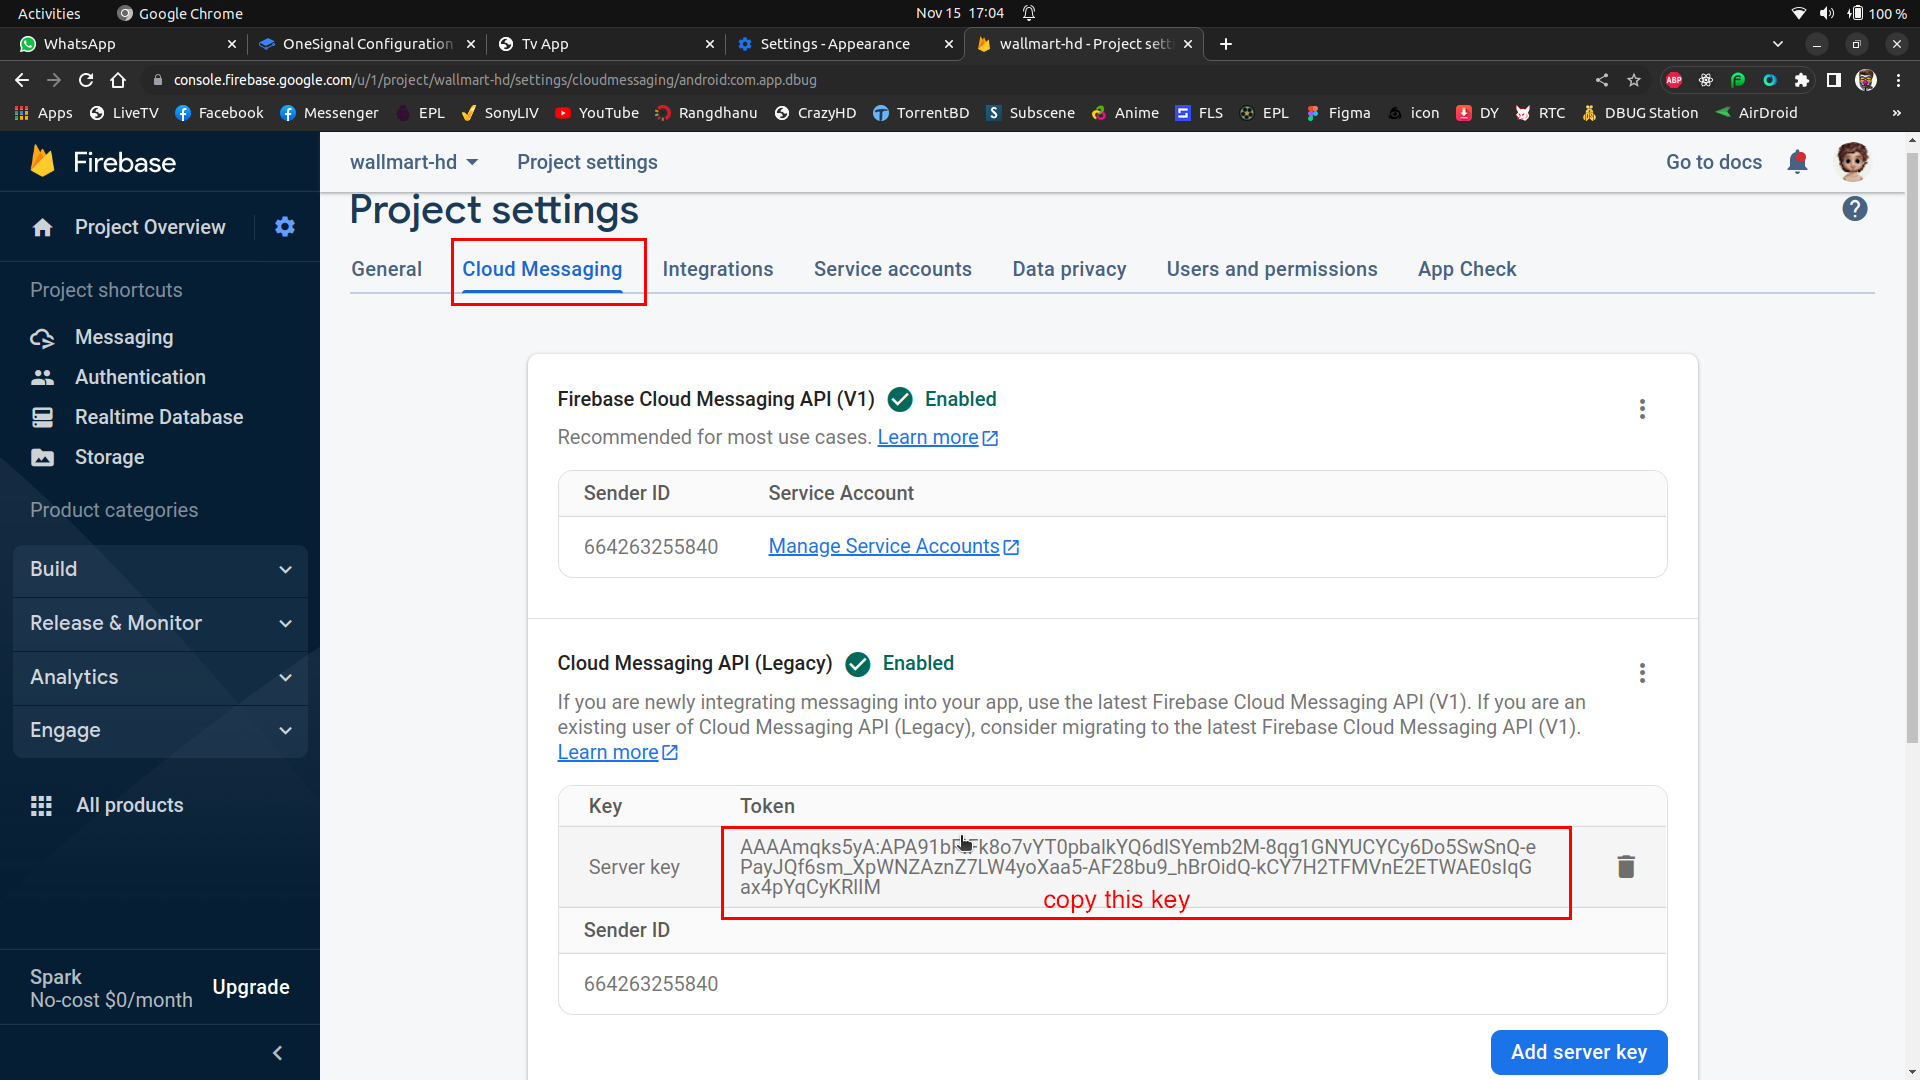
Notification
Change your Server Key For the Notification system
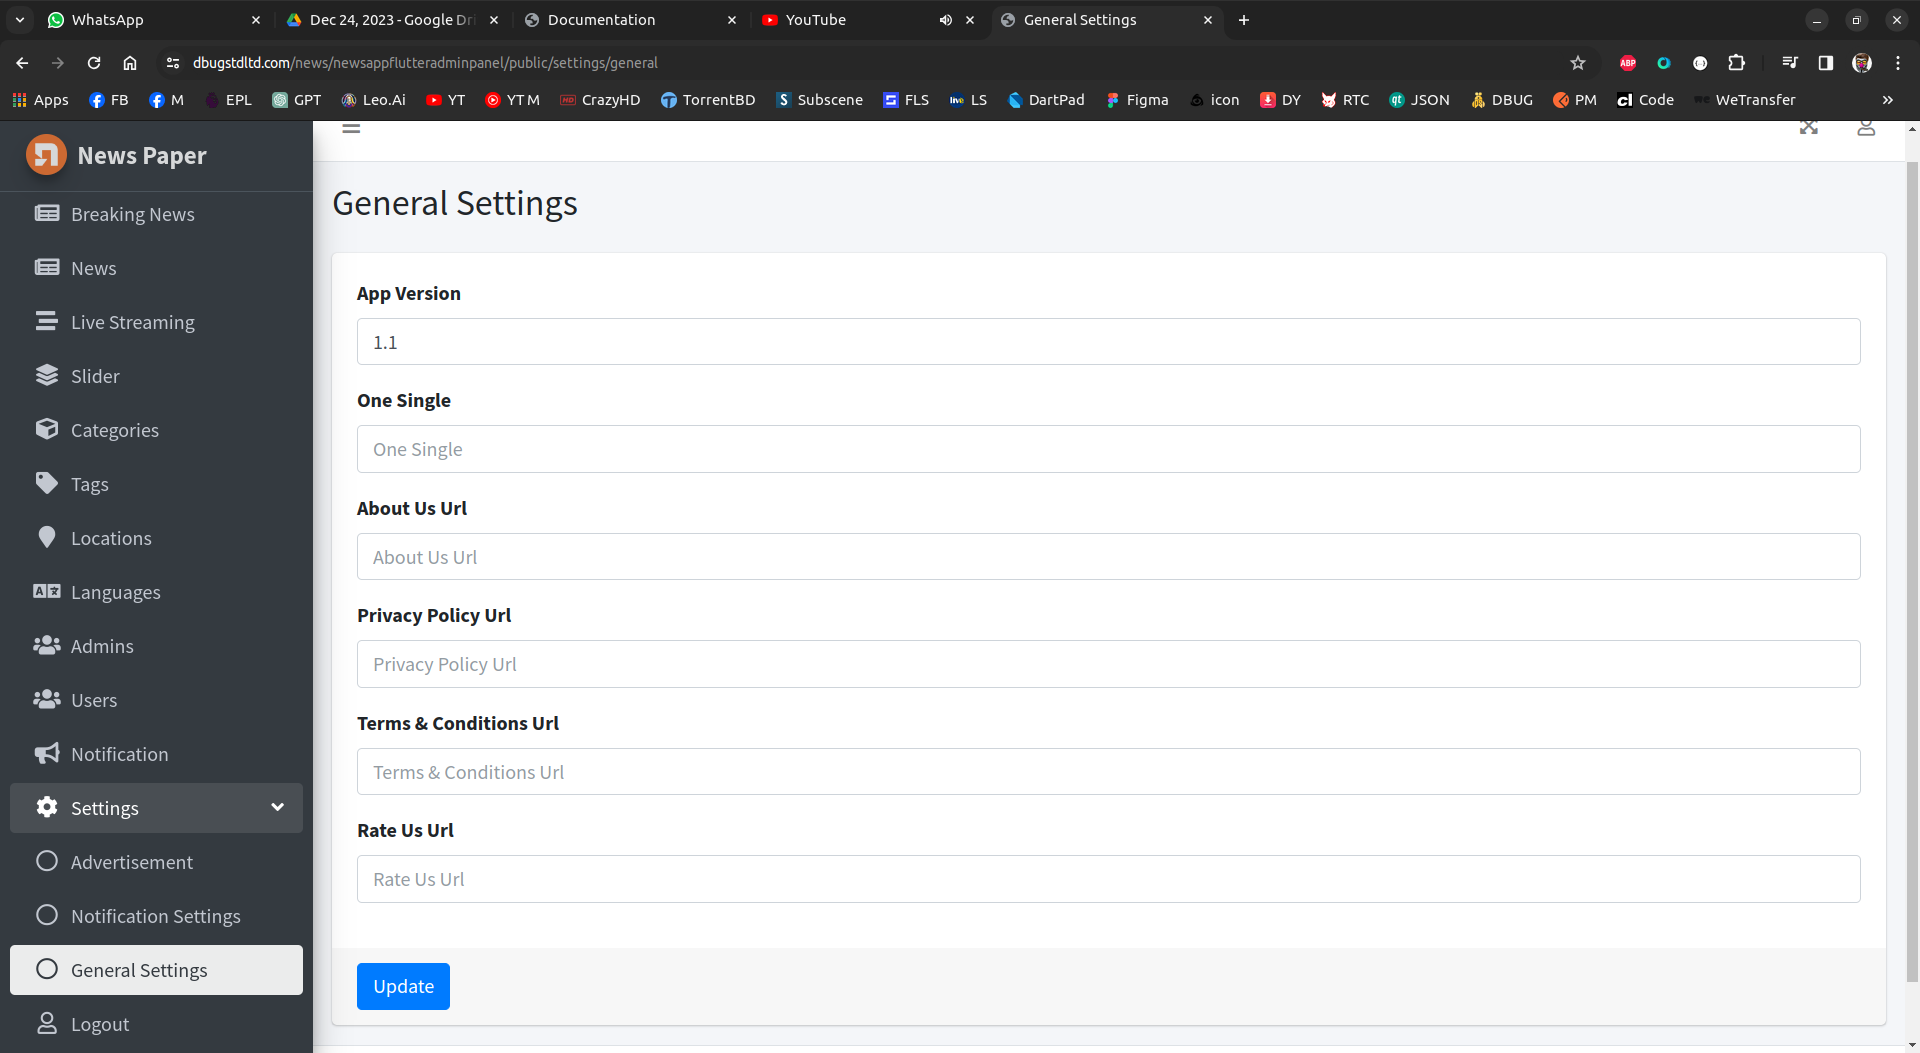
Setup Settings URLs
and also change the privacy policy, terms, faq, and feedback URLs
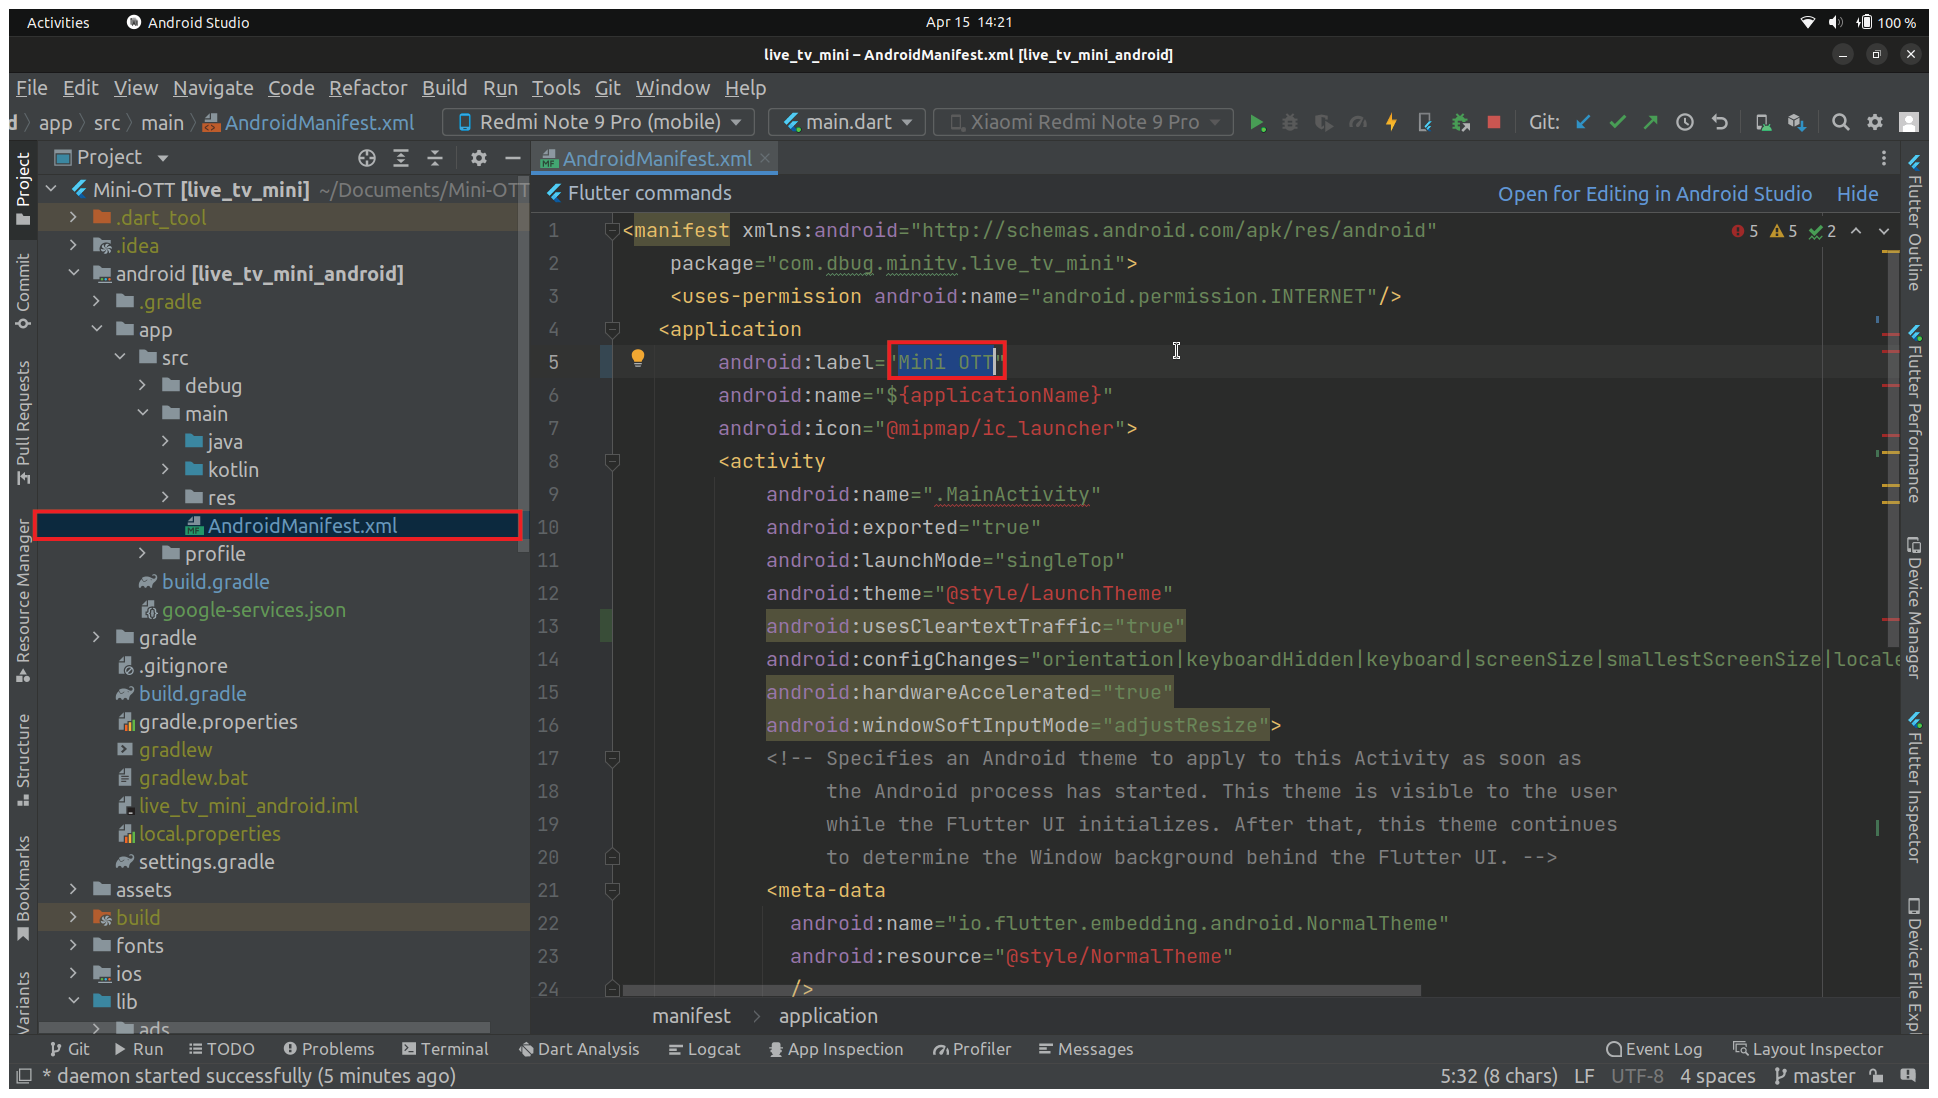
Change App Name
Go →
AndroidManifest.xml
and change
android:label
For Splash Screen App Name update from here
Change App Logo
1- Create your application iconic_launcher Files How to create an app icon?After creating the symbols
file, replace the following files:
/mipmap-hdpi in /android/app/src/main/res/ folder
/mipmap-mdpi in /android/app/src/main/res/ folder
/mipmap-xhdpi in /android/app/src/main/res/ folder
/mipmap-xxhdpi in /android/app/src/main/res/ folder
/mipmap-xxxhdpi in /android/app/src/main/res/ folder
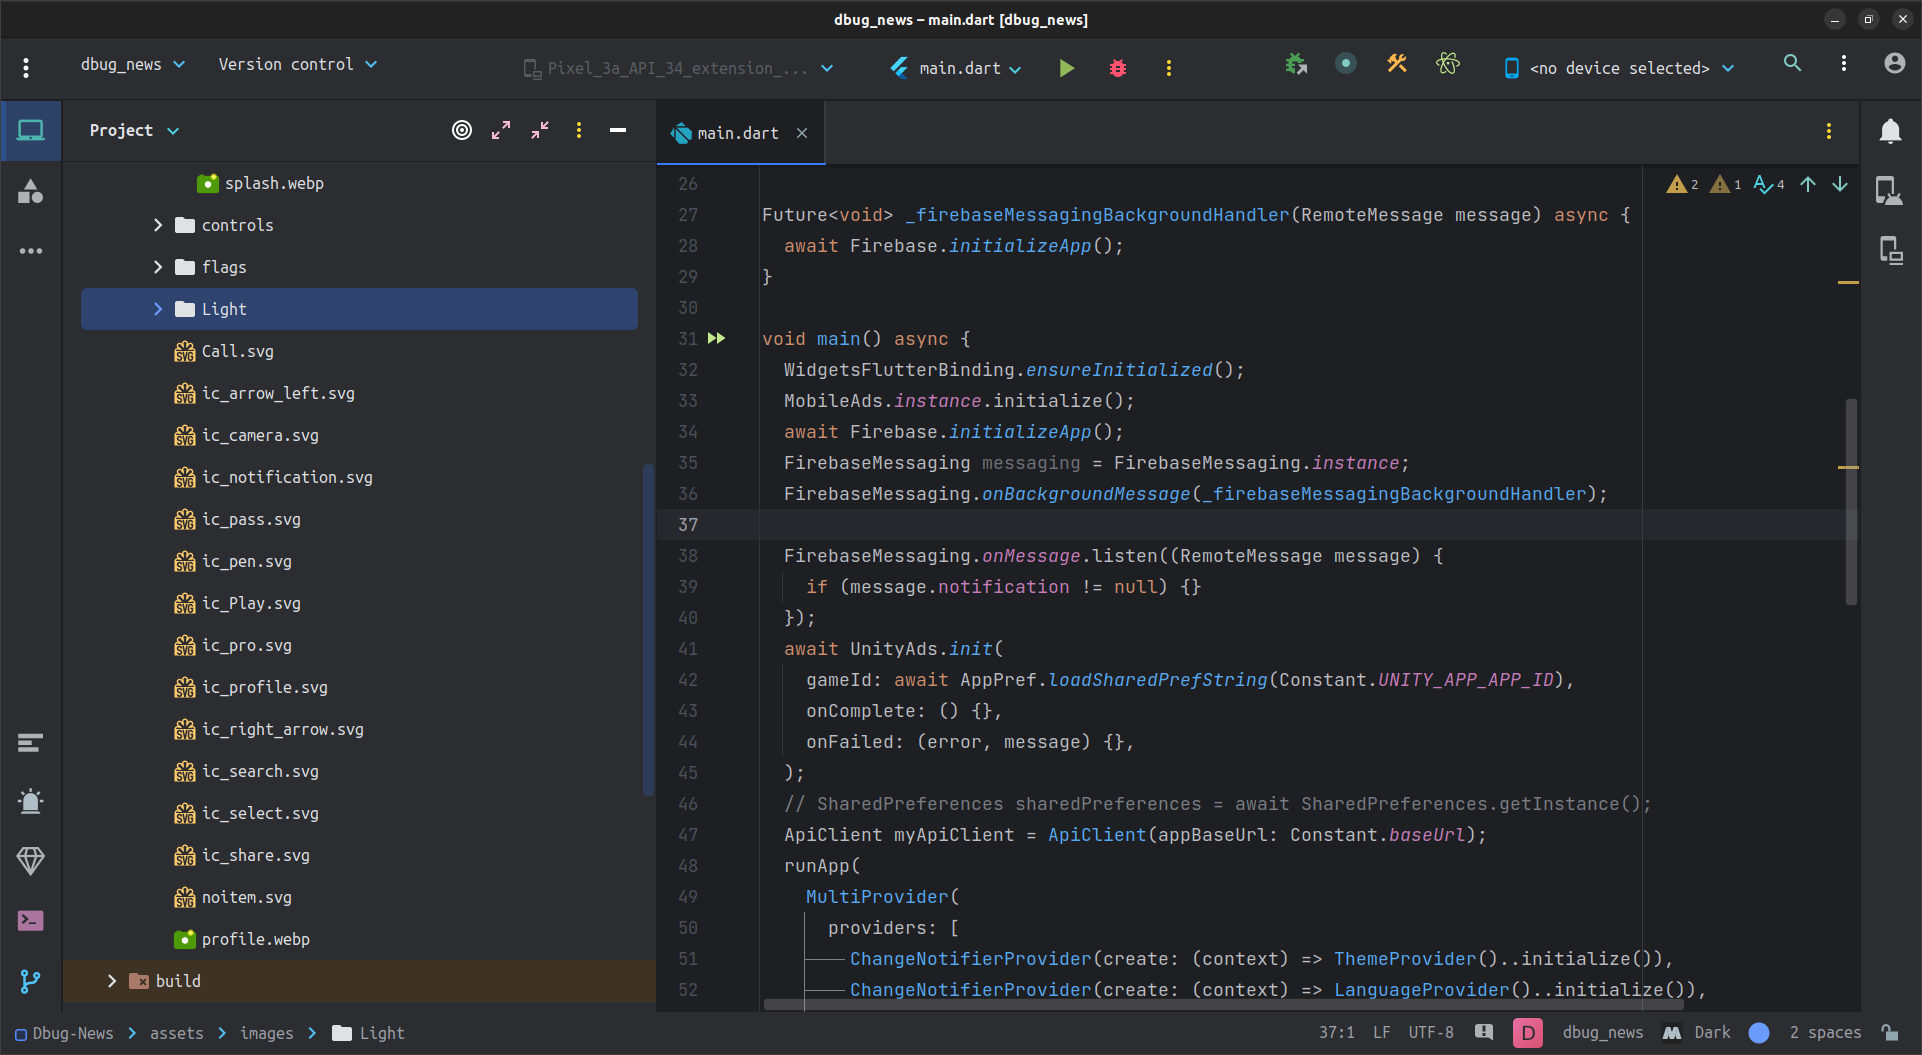
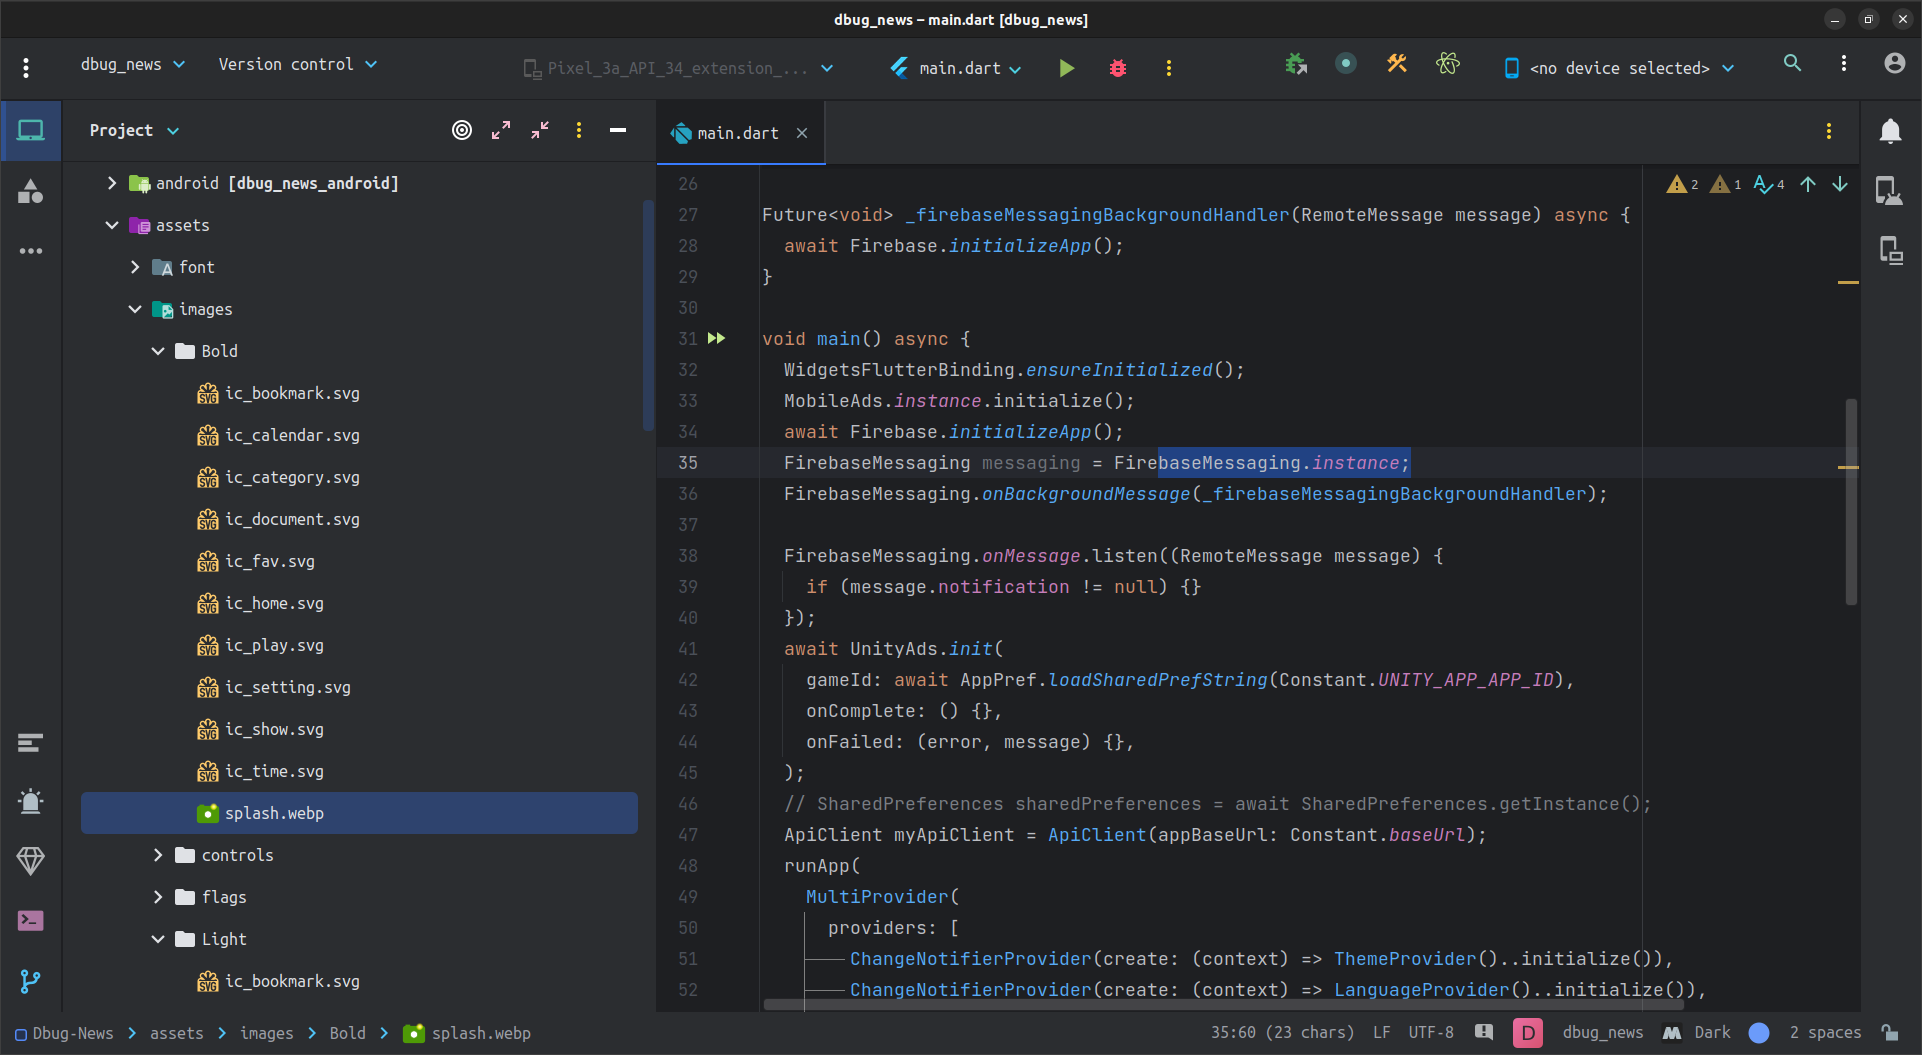
Change App Splash
Go →
assets/images/Light
and paste your new splash.webp
Note:
Image name must be exactly the same
(splash.webp) for light theme
& for dark theme
Go →
assets/images/Bold
and paste your new splash.webp
Image name must be exactly the same
(splash.webp)
Get dependencies
And just run the following command
flutter pub get
Admin Panel
Getting Started
Before doing the installation, you need to do the following things :
Have a web hosting to store admin panel files and MySQL Database to run this admin panel, web hosting that you use must have the following requirements :
PHP Version =>7.2
bcMath PHP Extensions
Ctype
PHP Extensions
Fileinfo
PHP Extensions
mbString
PHP Extensions
open ssl
PHP Extensions
PDO
PHP Extensions
tokenizer
PHP Extensions
xml
PHP Extensions
json
PHP Extensions
curl
PHP Extensions
http
PHP Extensions
Support .htaccess
Support MySQL
Apache Server (Install PuTTY)
Hosting with VPS
Support WinSCP (Install this software)
Install Composer Latest version
Because this documentation uses VPS, web hosting with VPS is recommended. If you don’t have web hosting or a domain, you can check on this sample site which provides hosting and domain service:
For Hosting Purchasing we recommended:
1.
Hostinger
You can sign up using our referral link and get 100usd free credit for 60 days period.
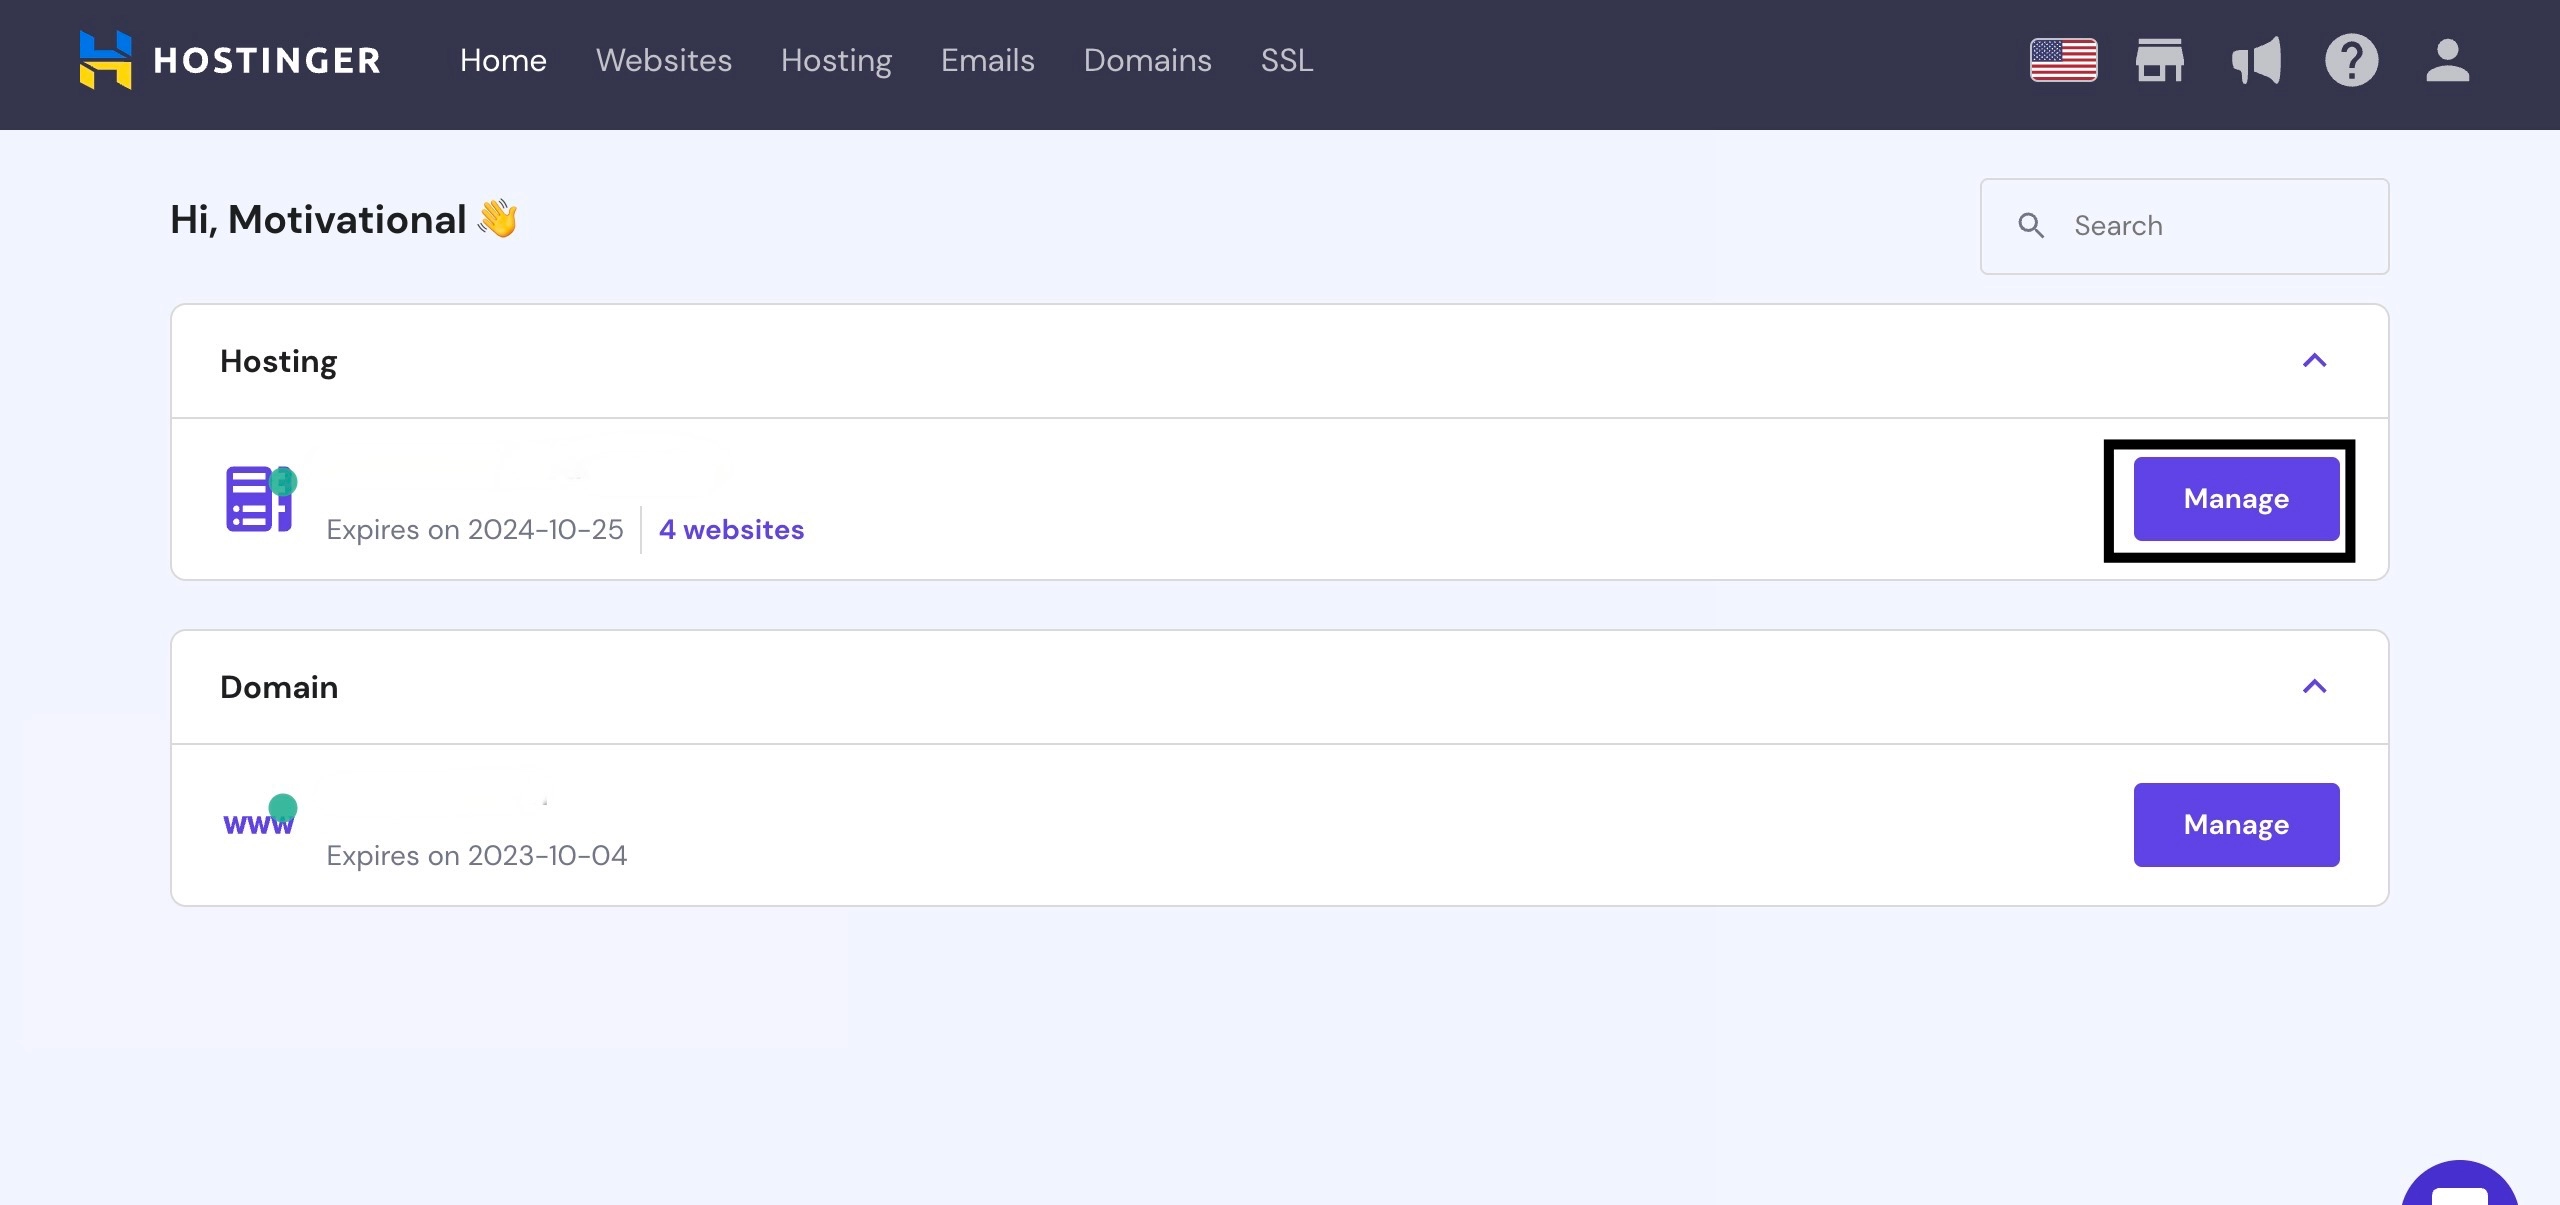
Login first with your valid
Email
and
Password
Click on
manage
to enter your file manager.
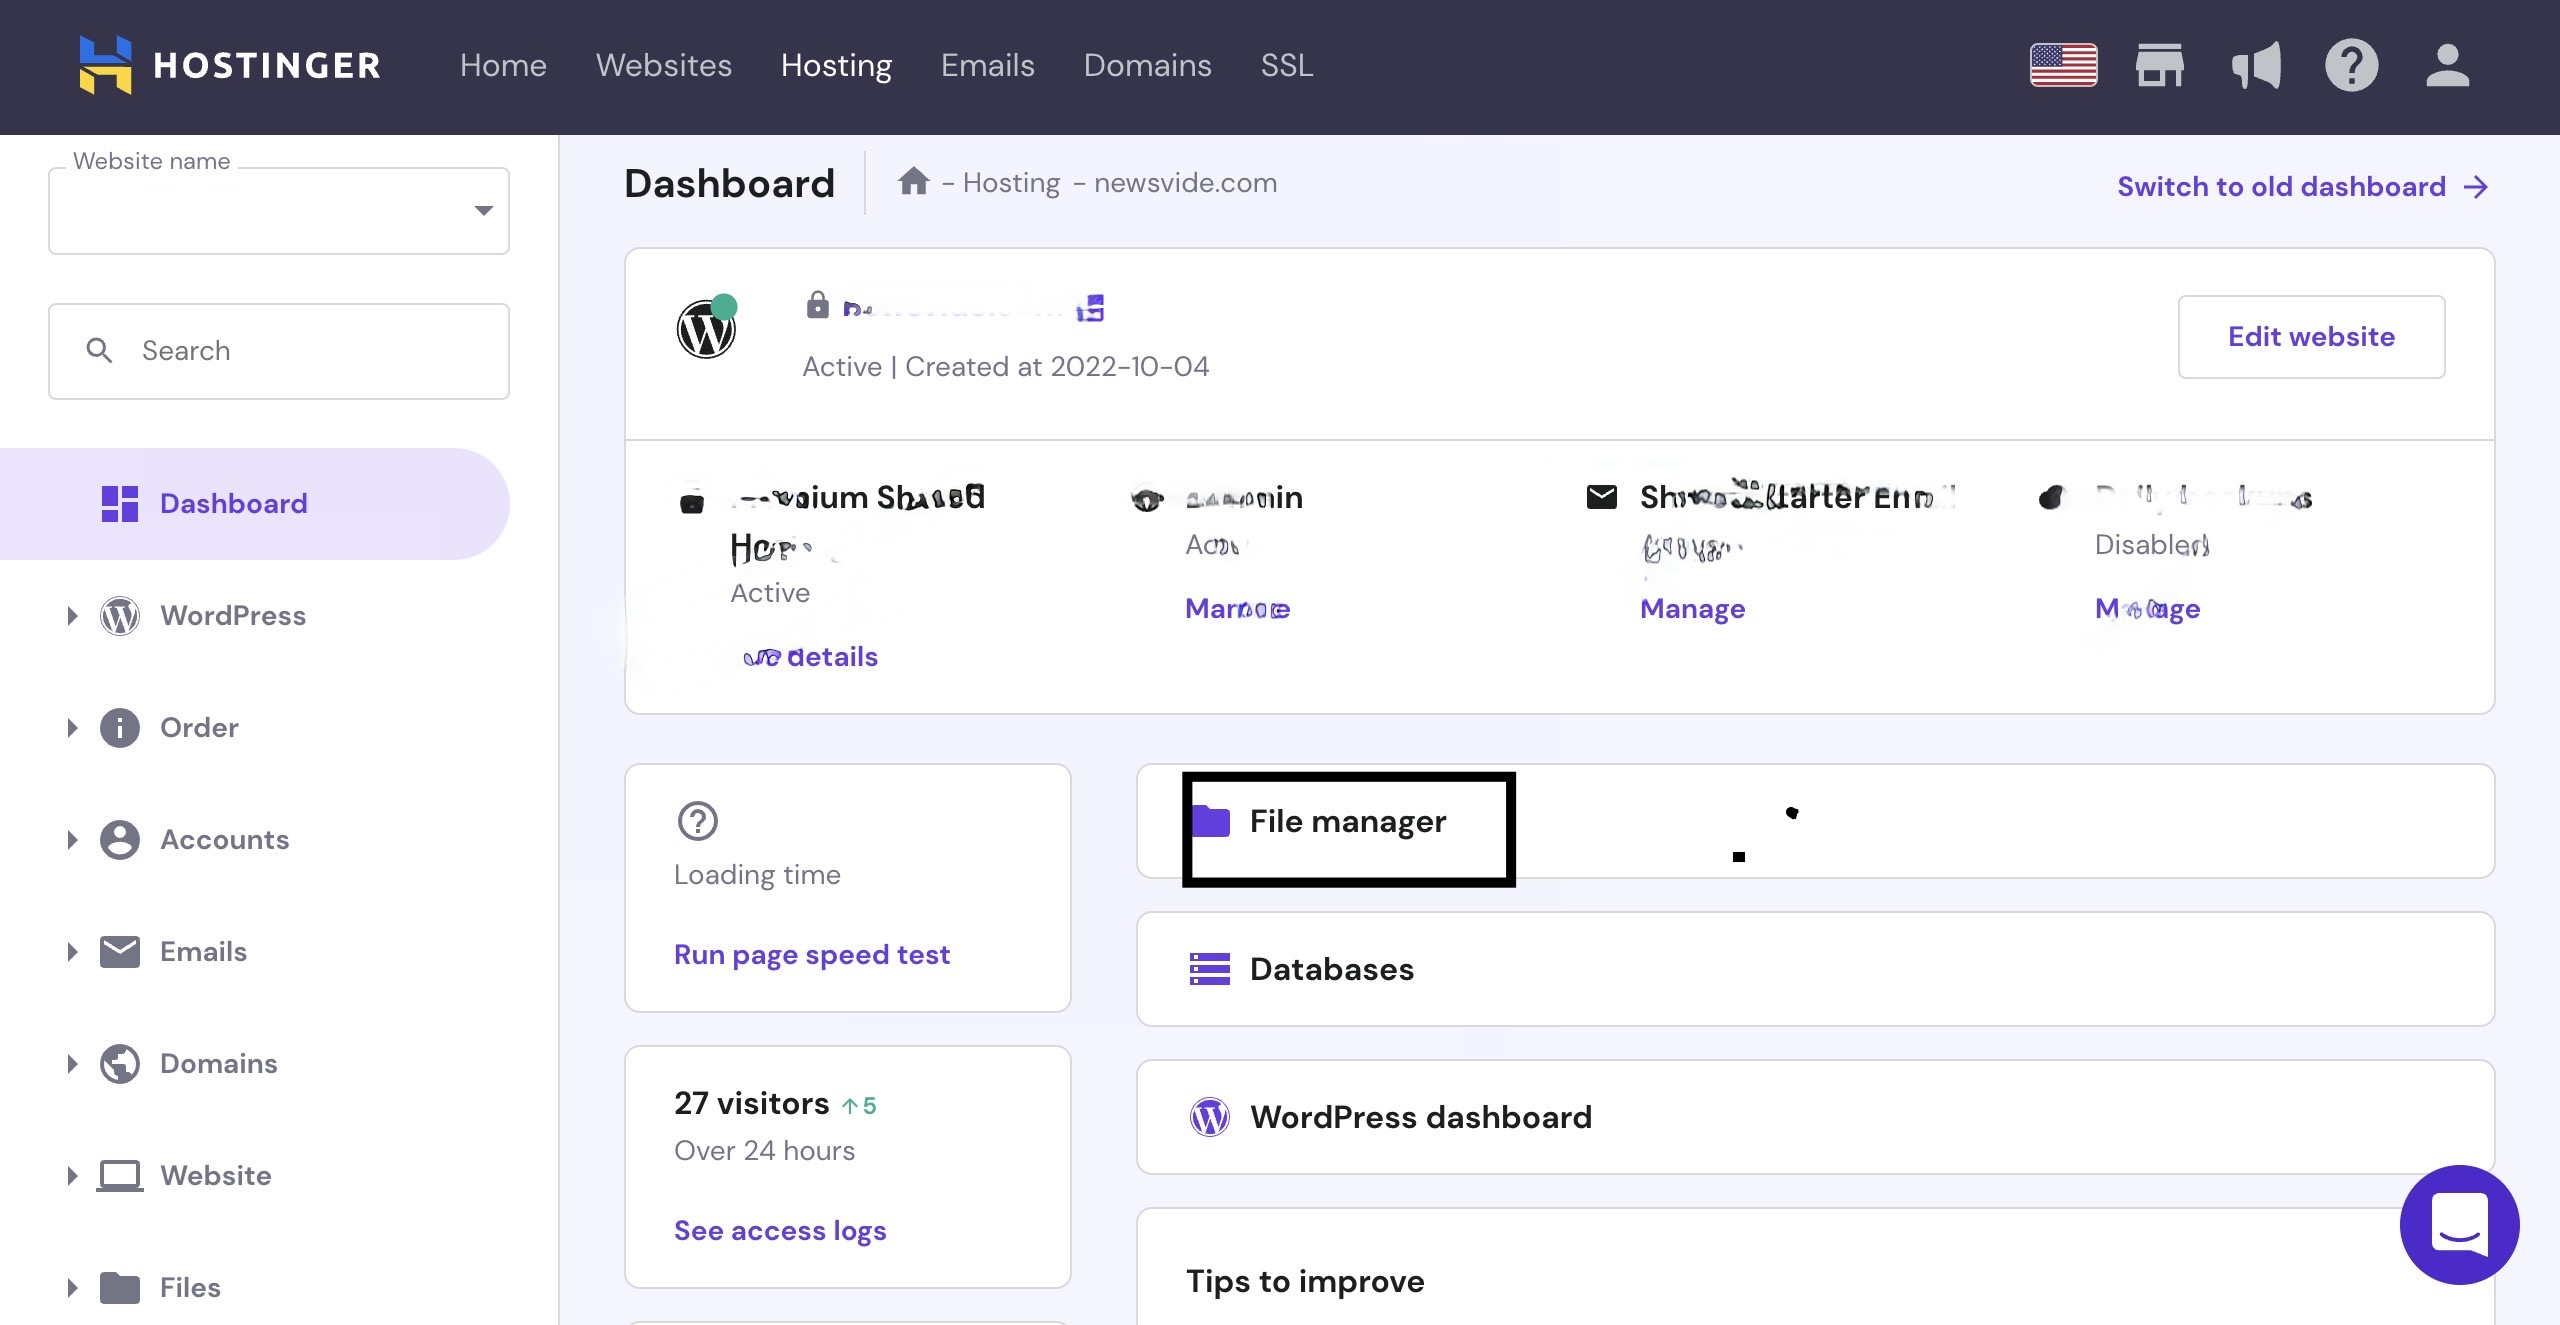
Click on
File Manager
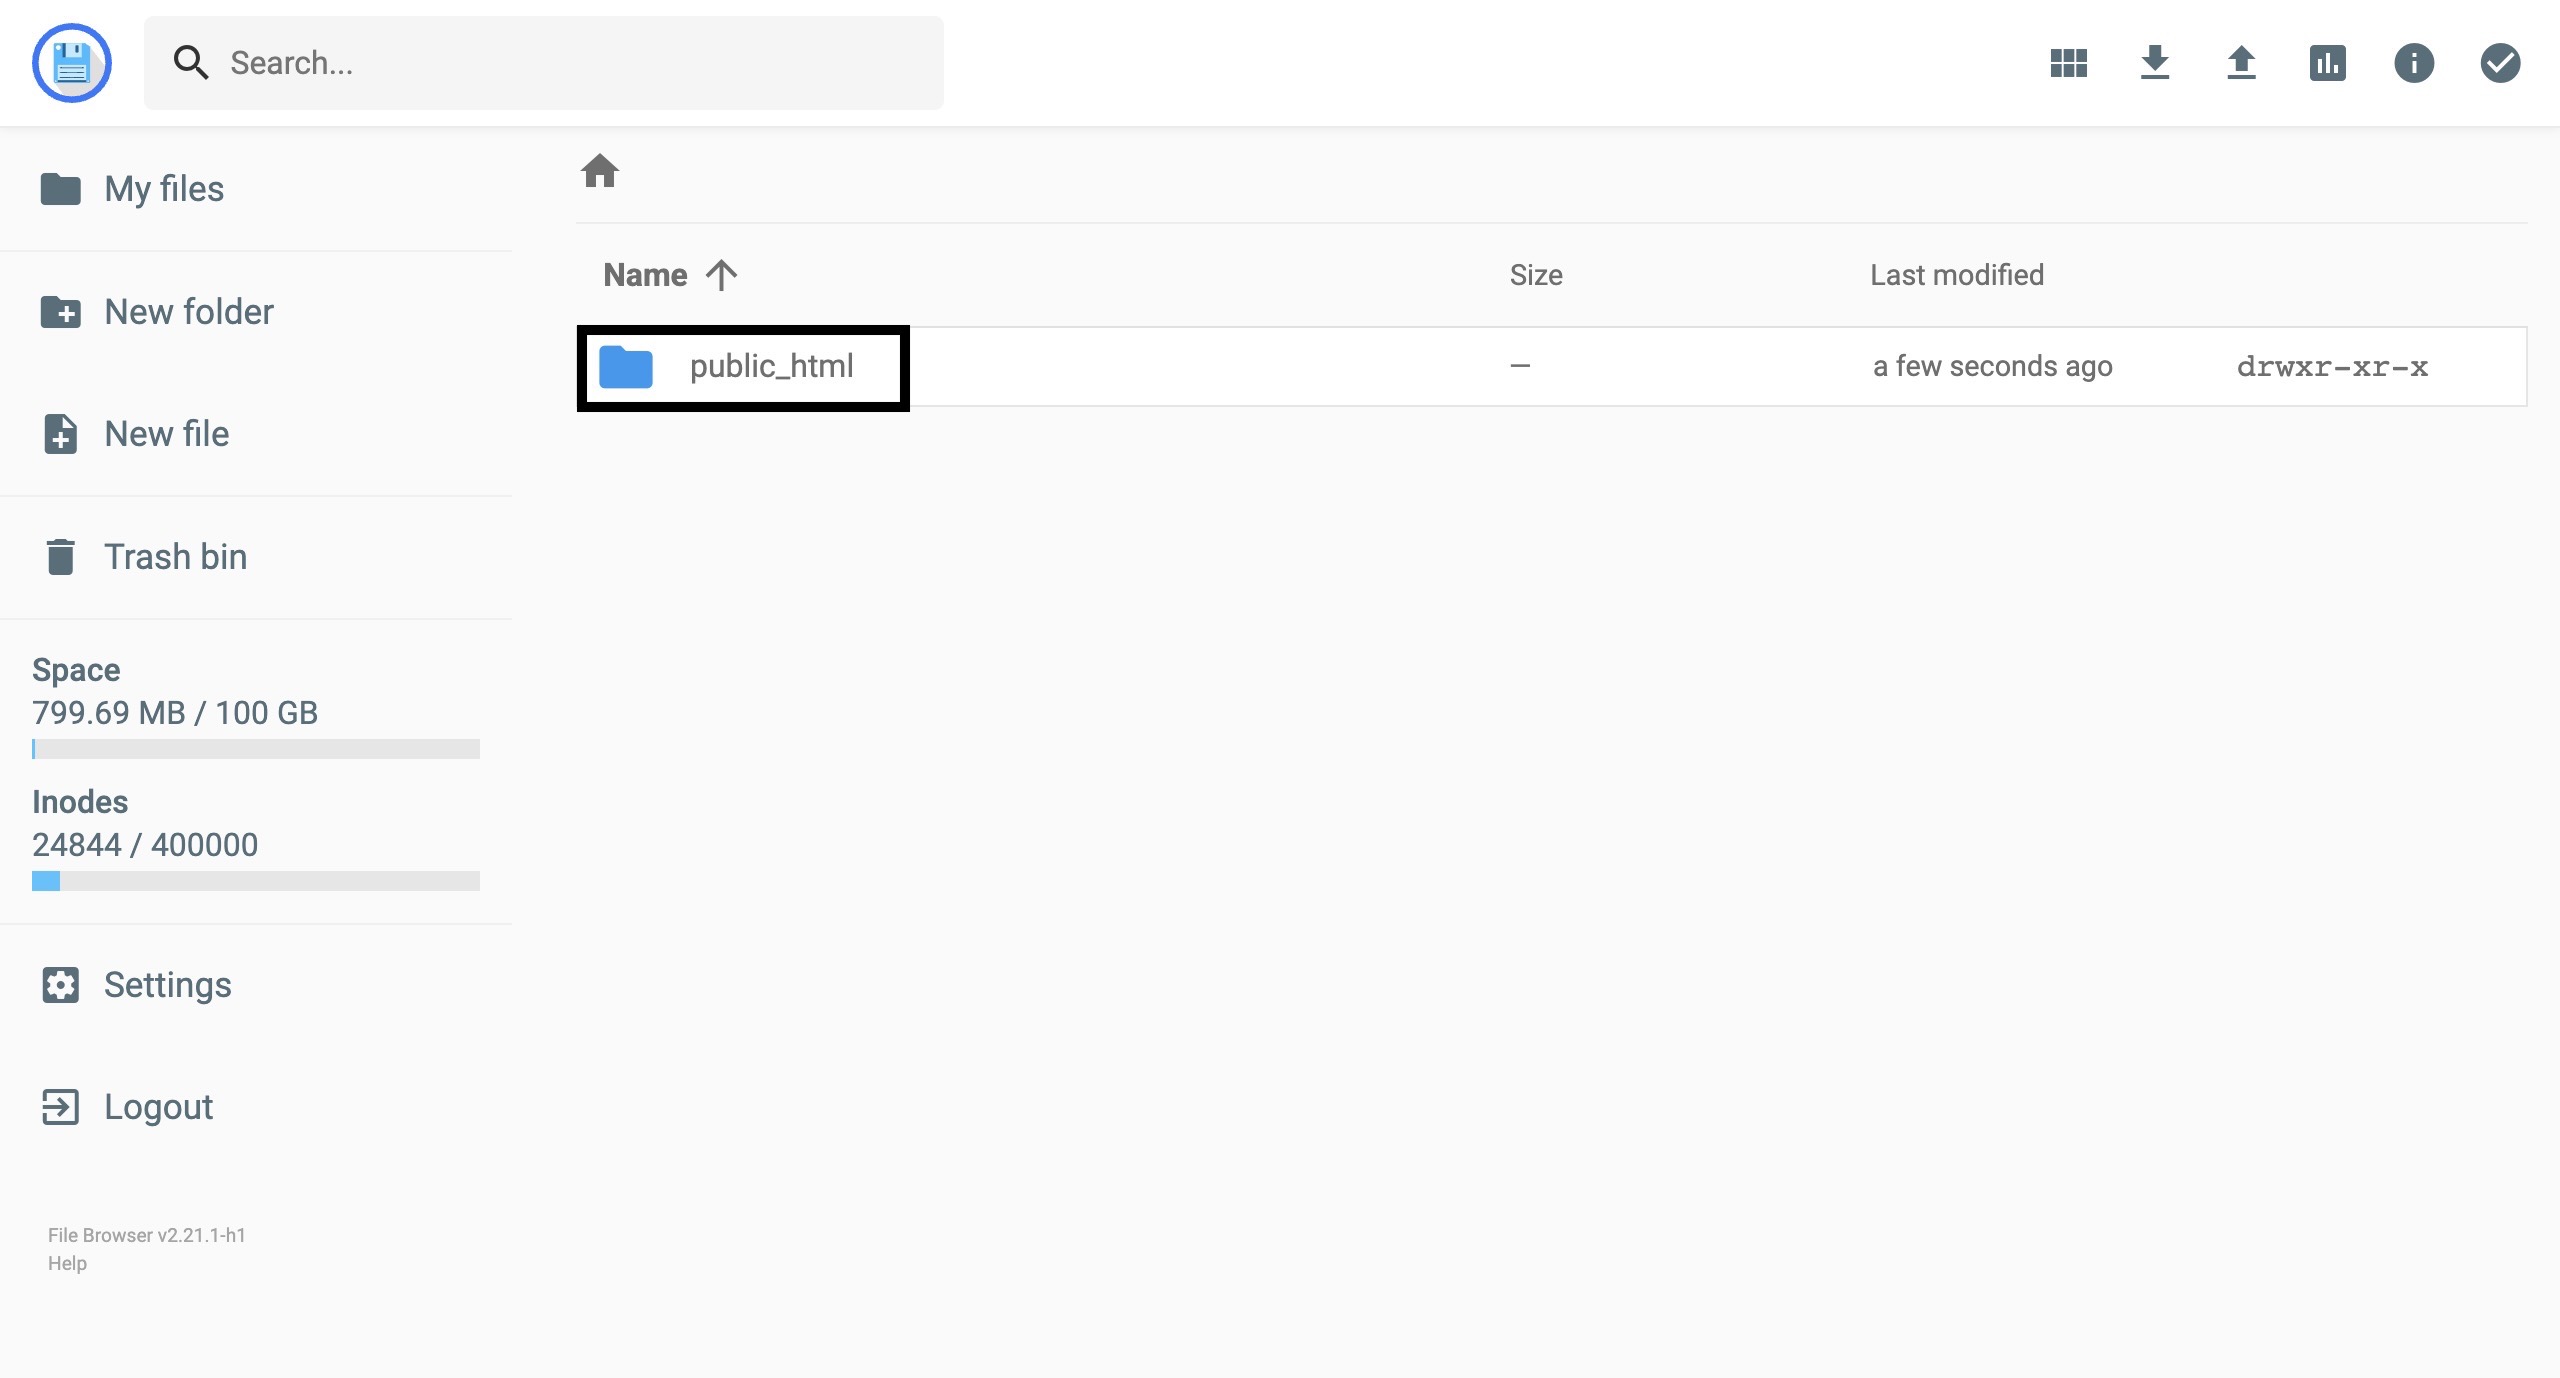
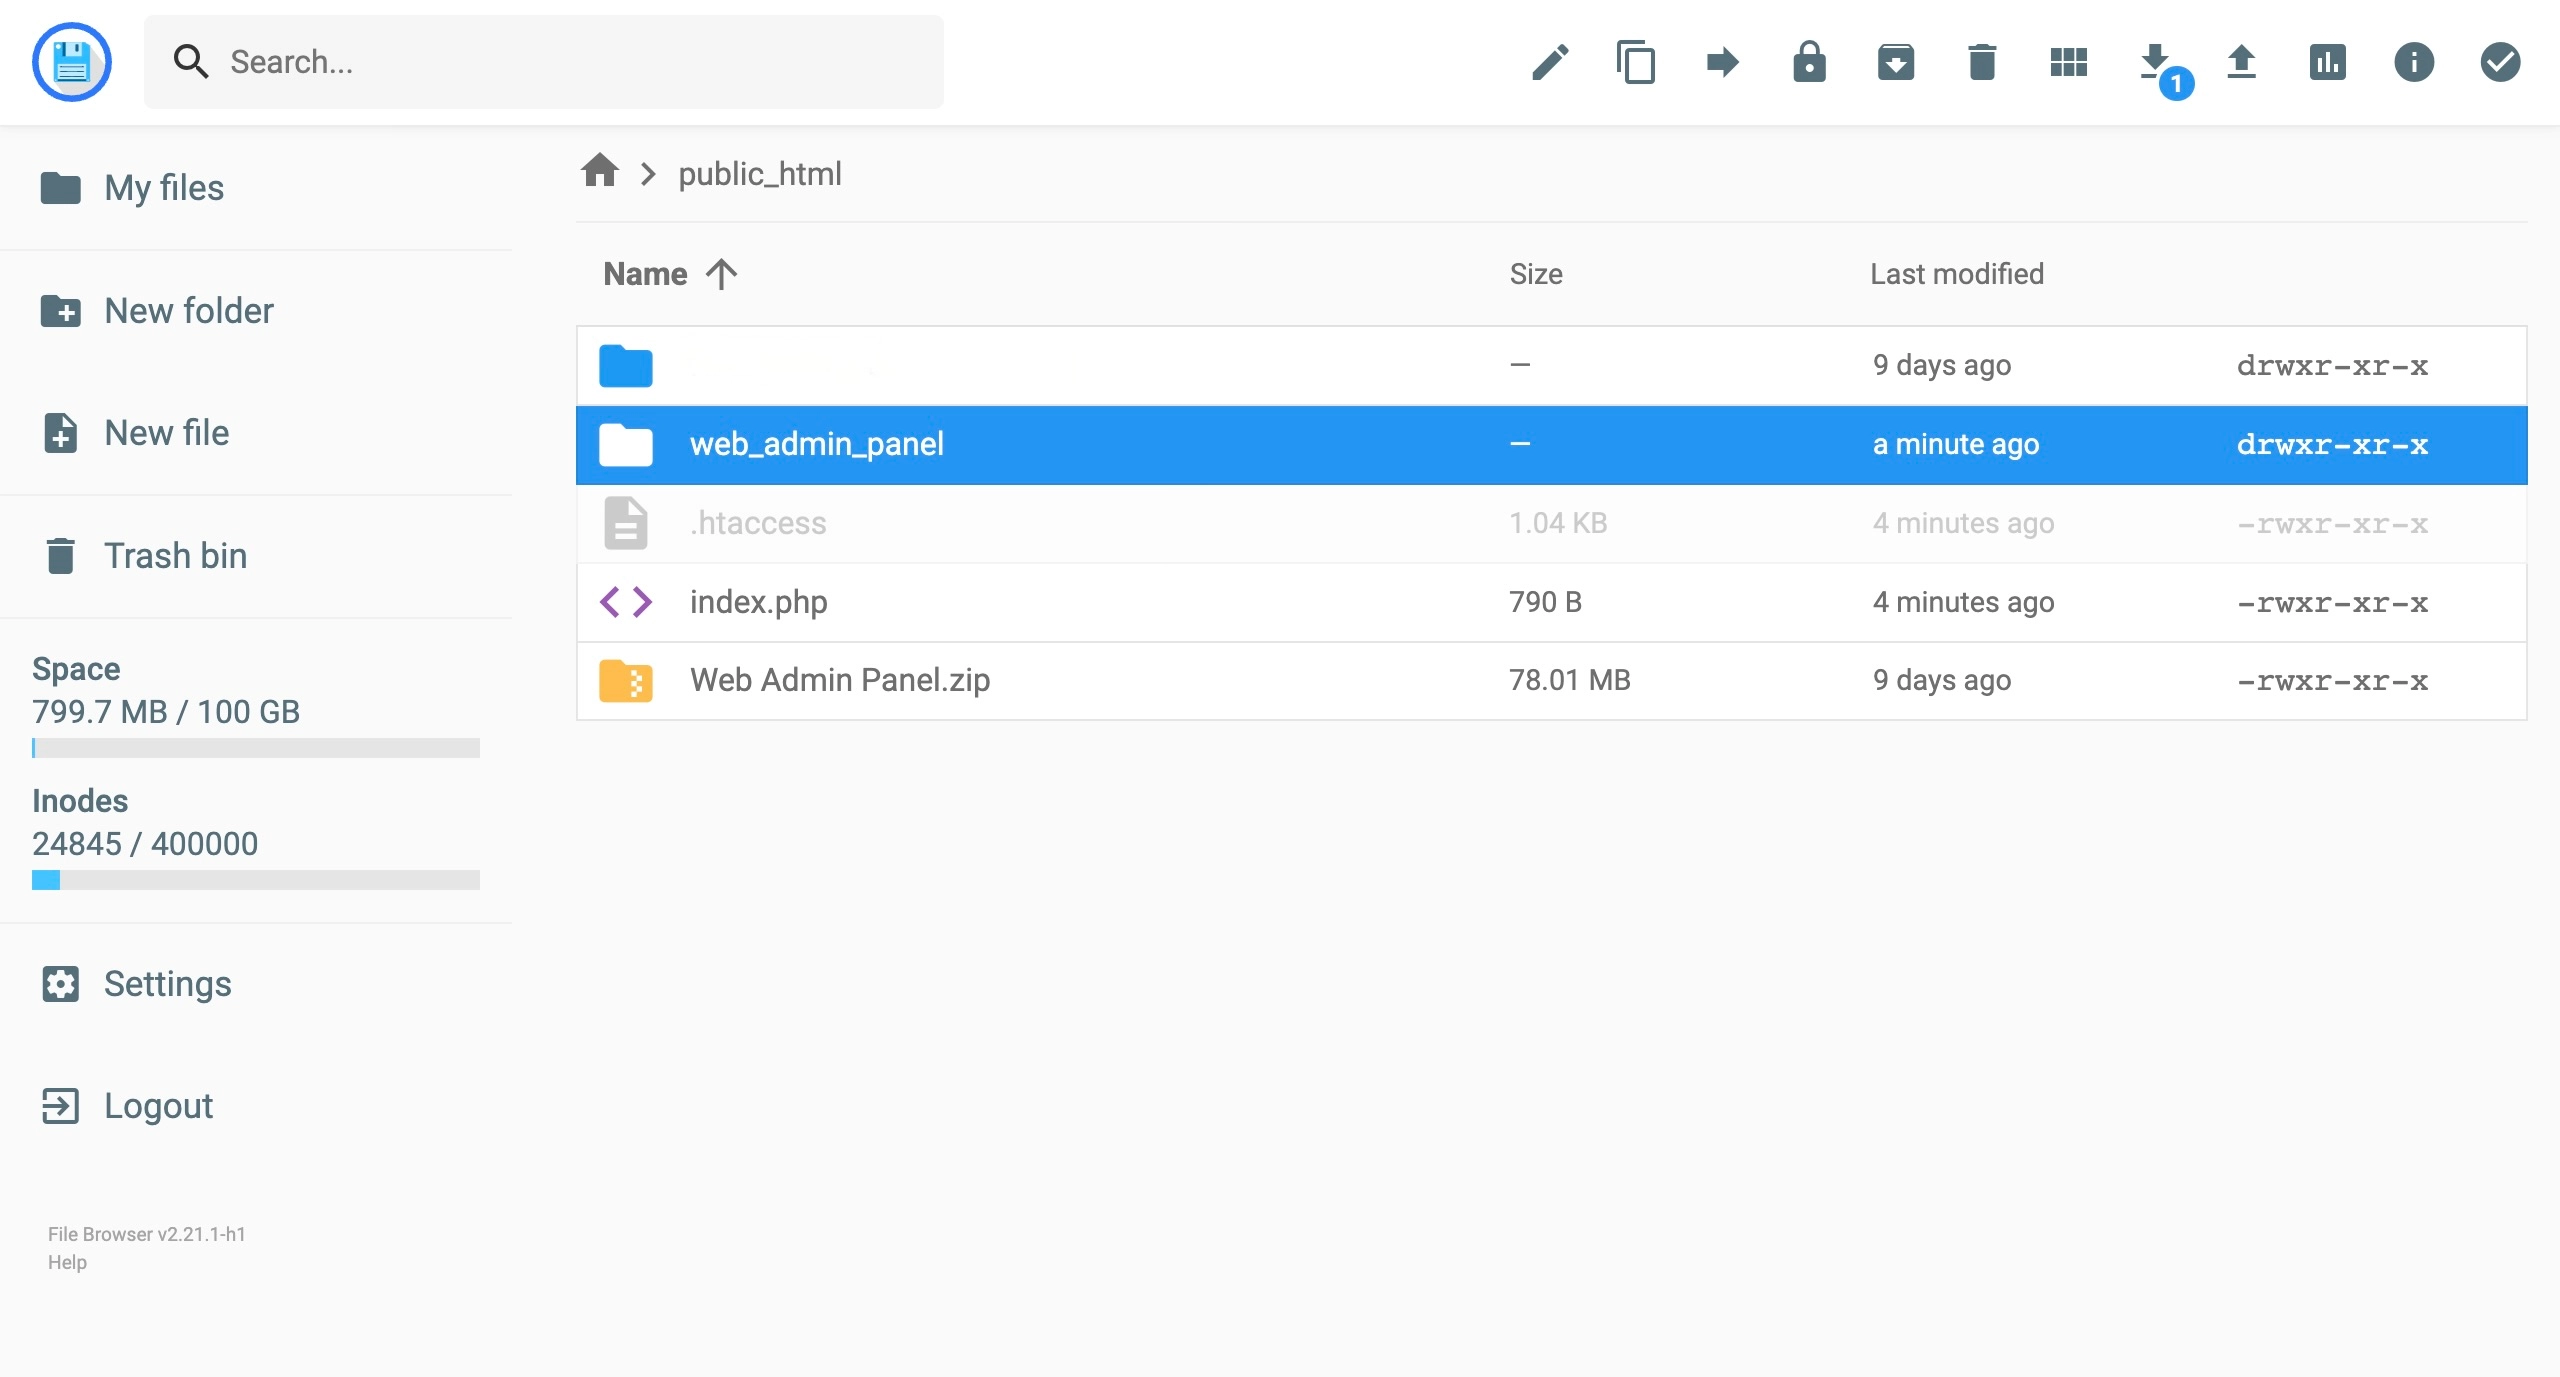
Go to public_html to upload your project.
Note:
If there is no public_html folder then create new one with name public_html.
Upload a your
laravel script.zip
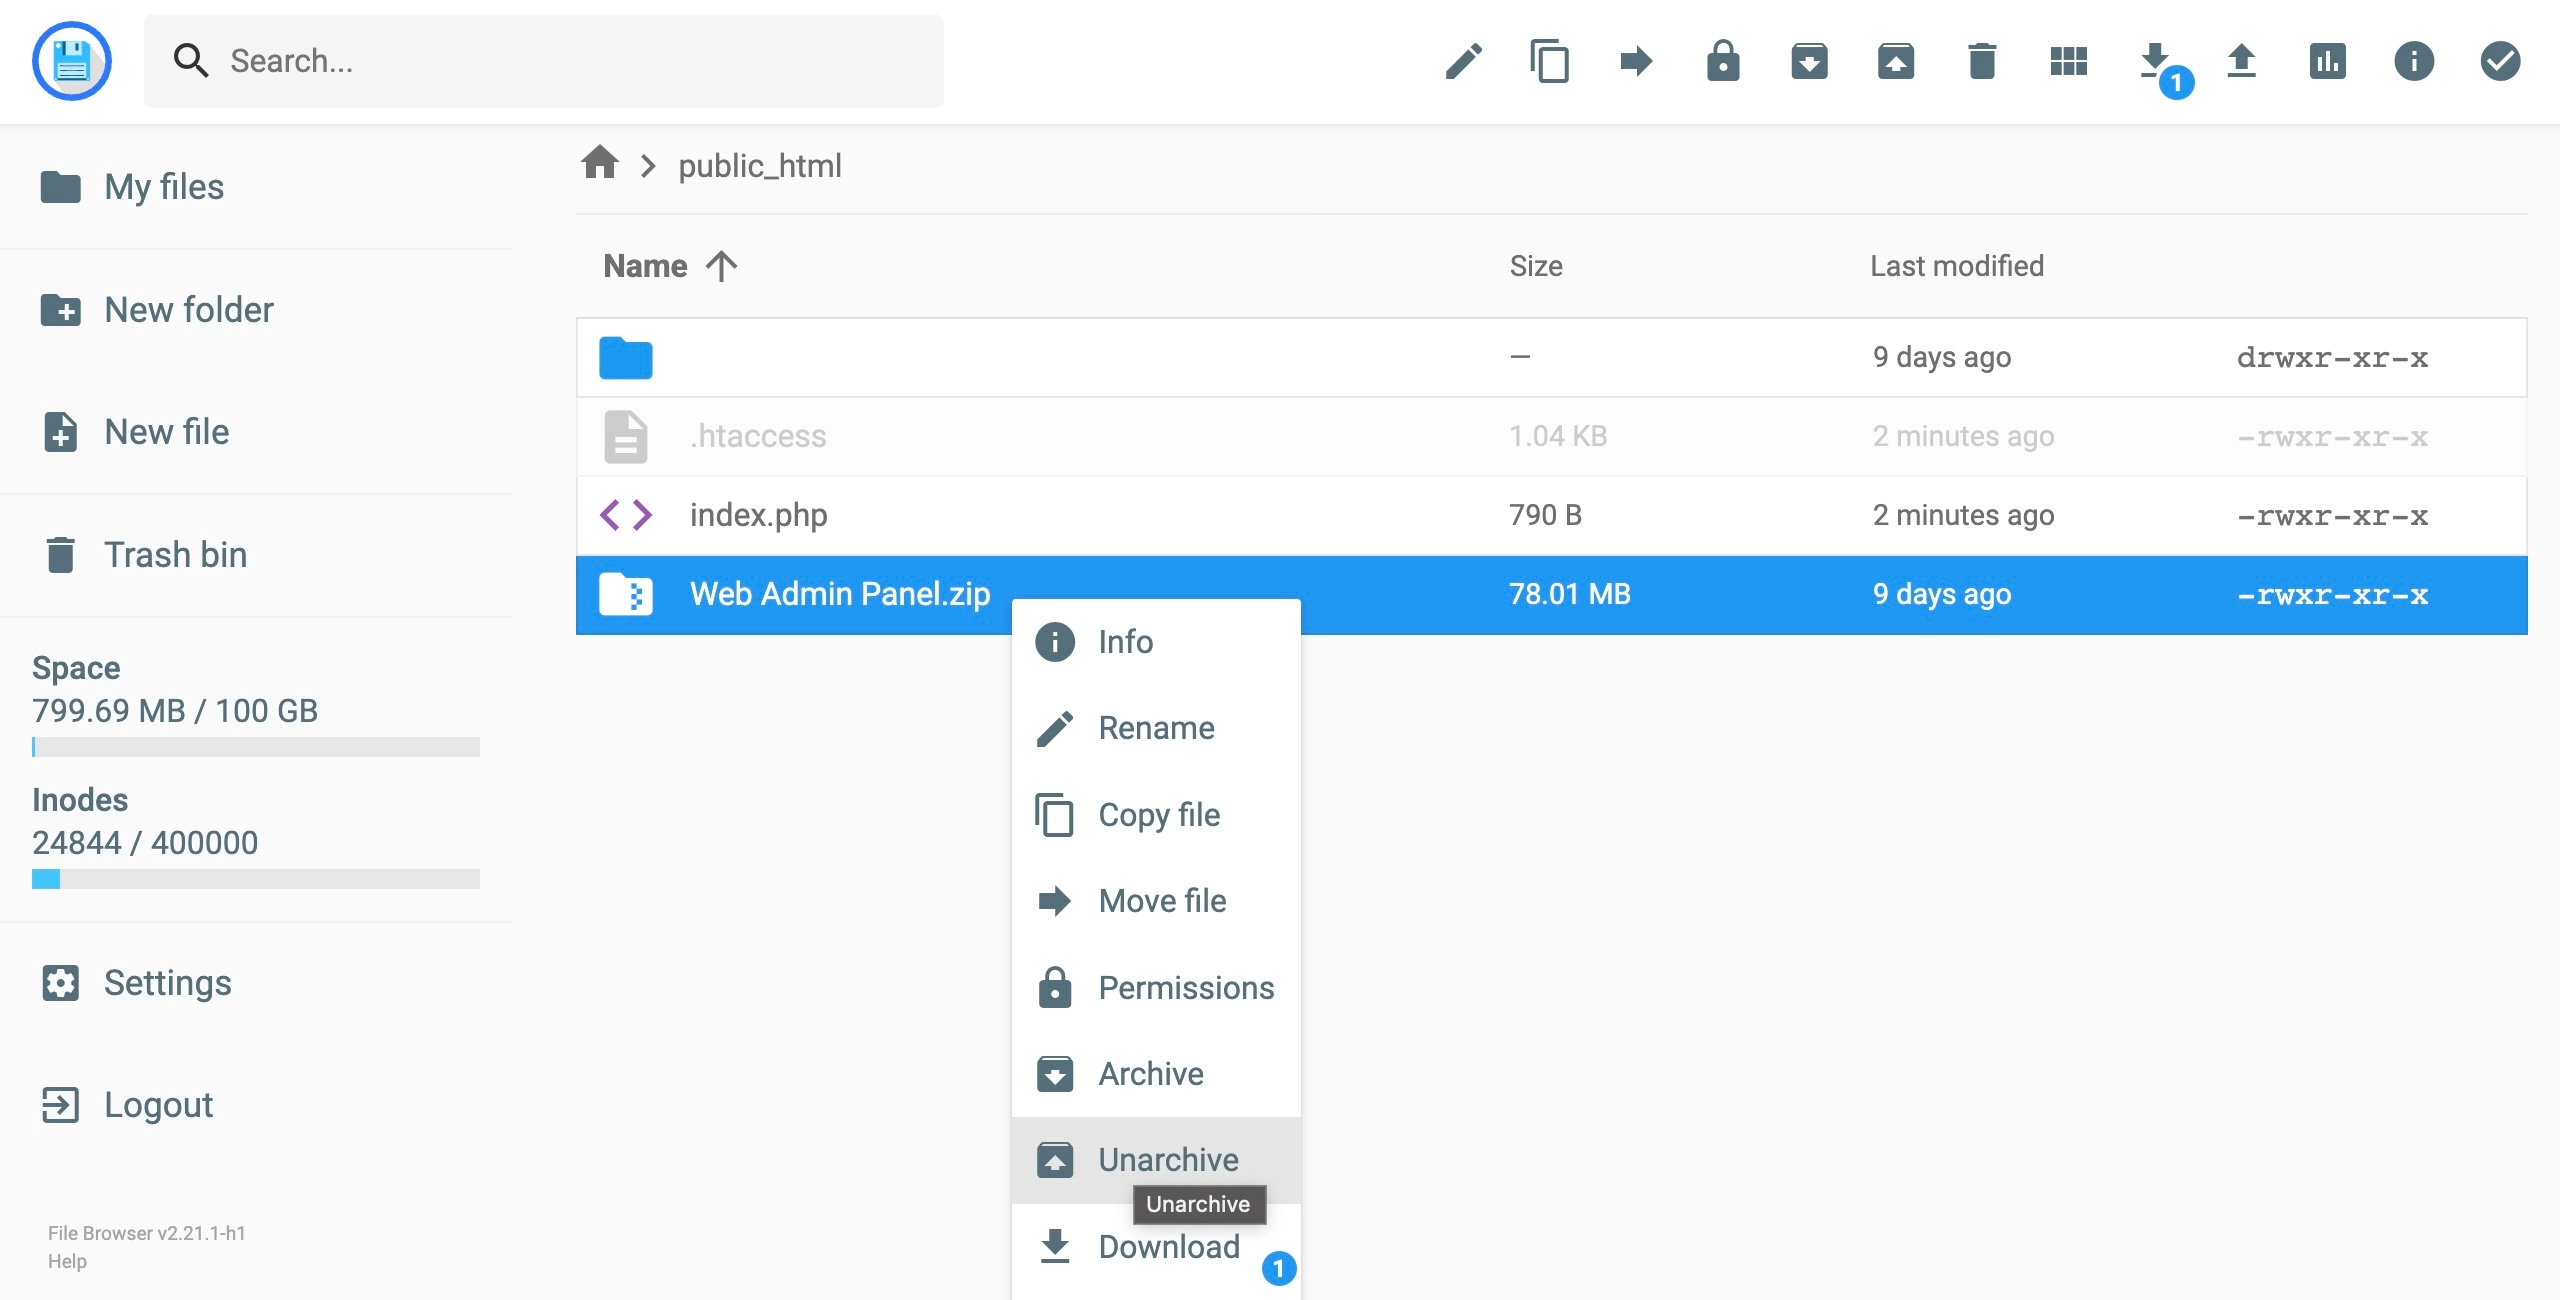
file and unzip the project.
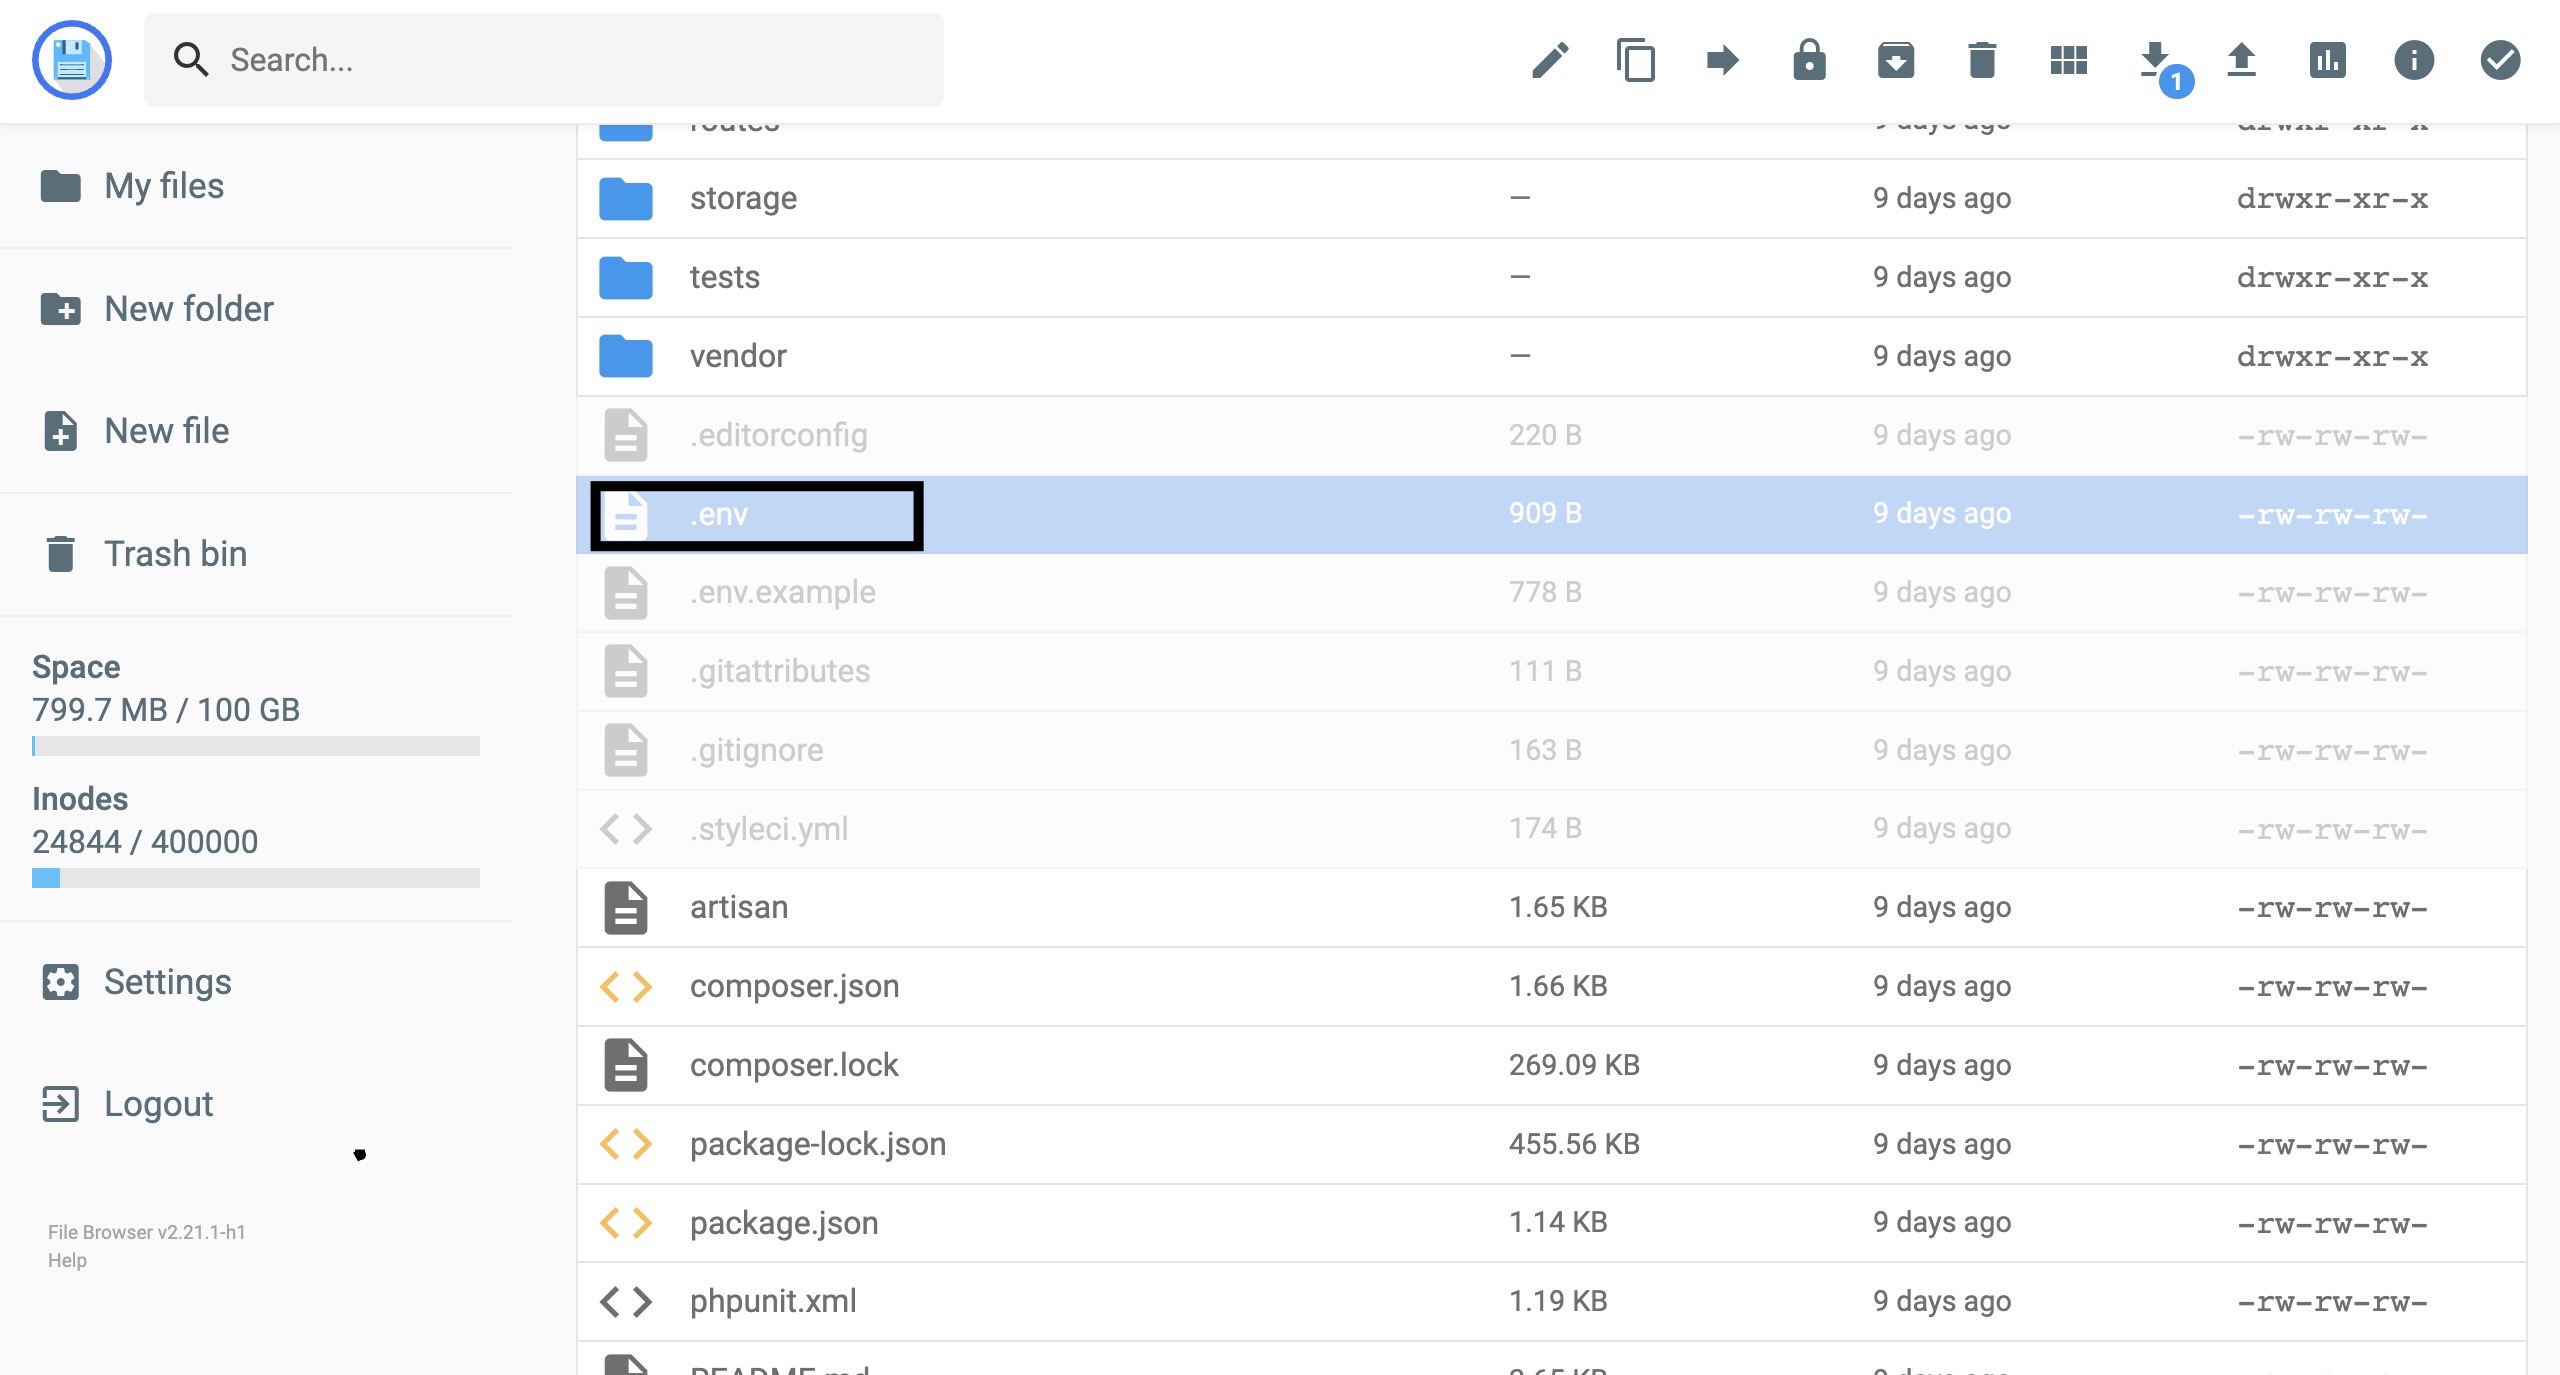
After unzip project go to unzipped folder to setup project environment.
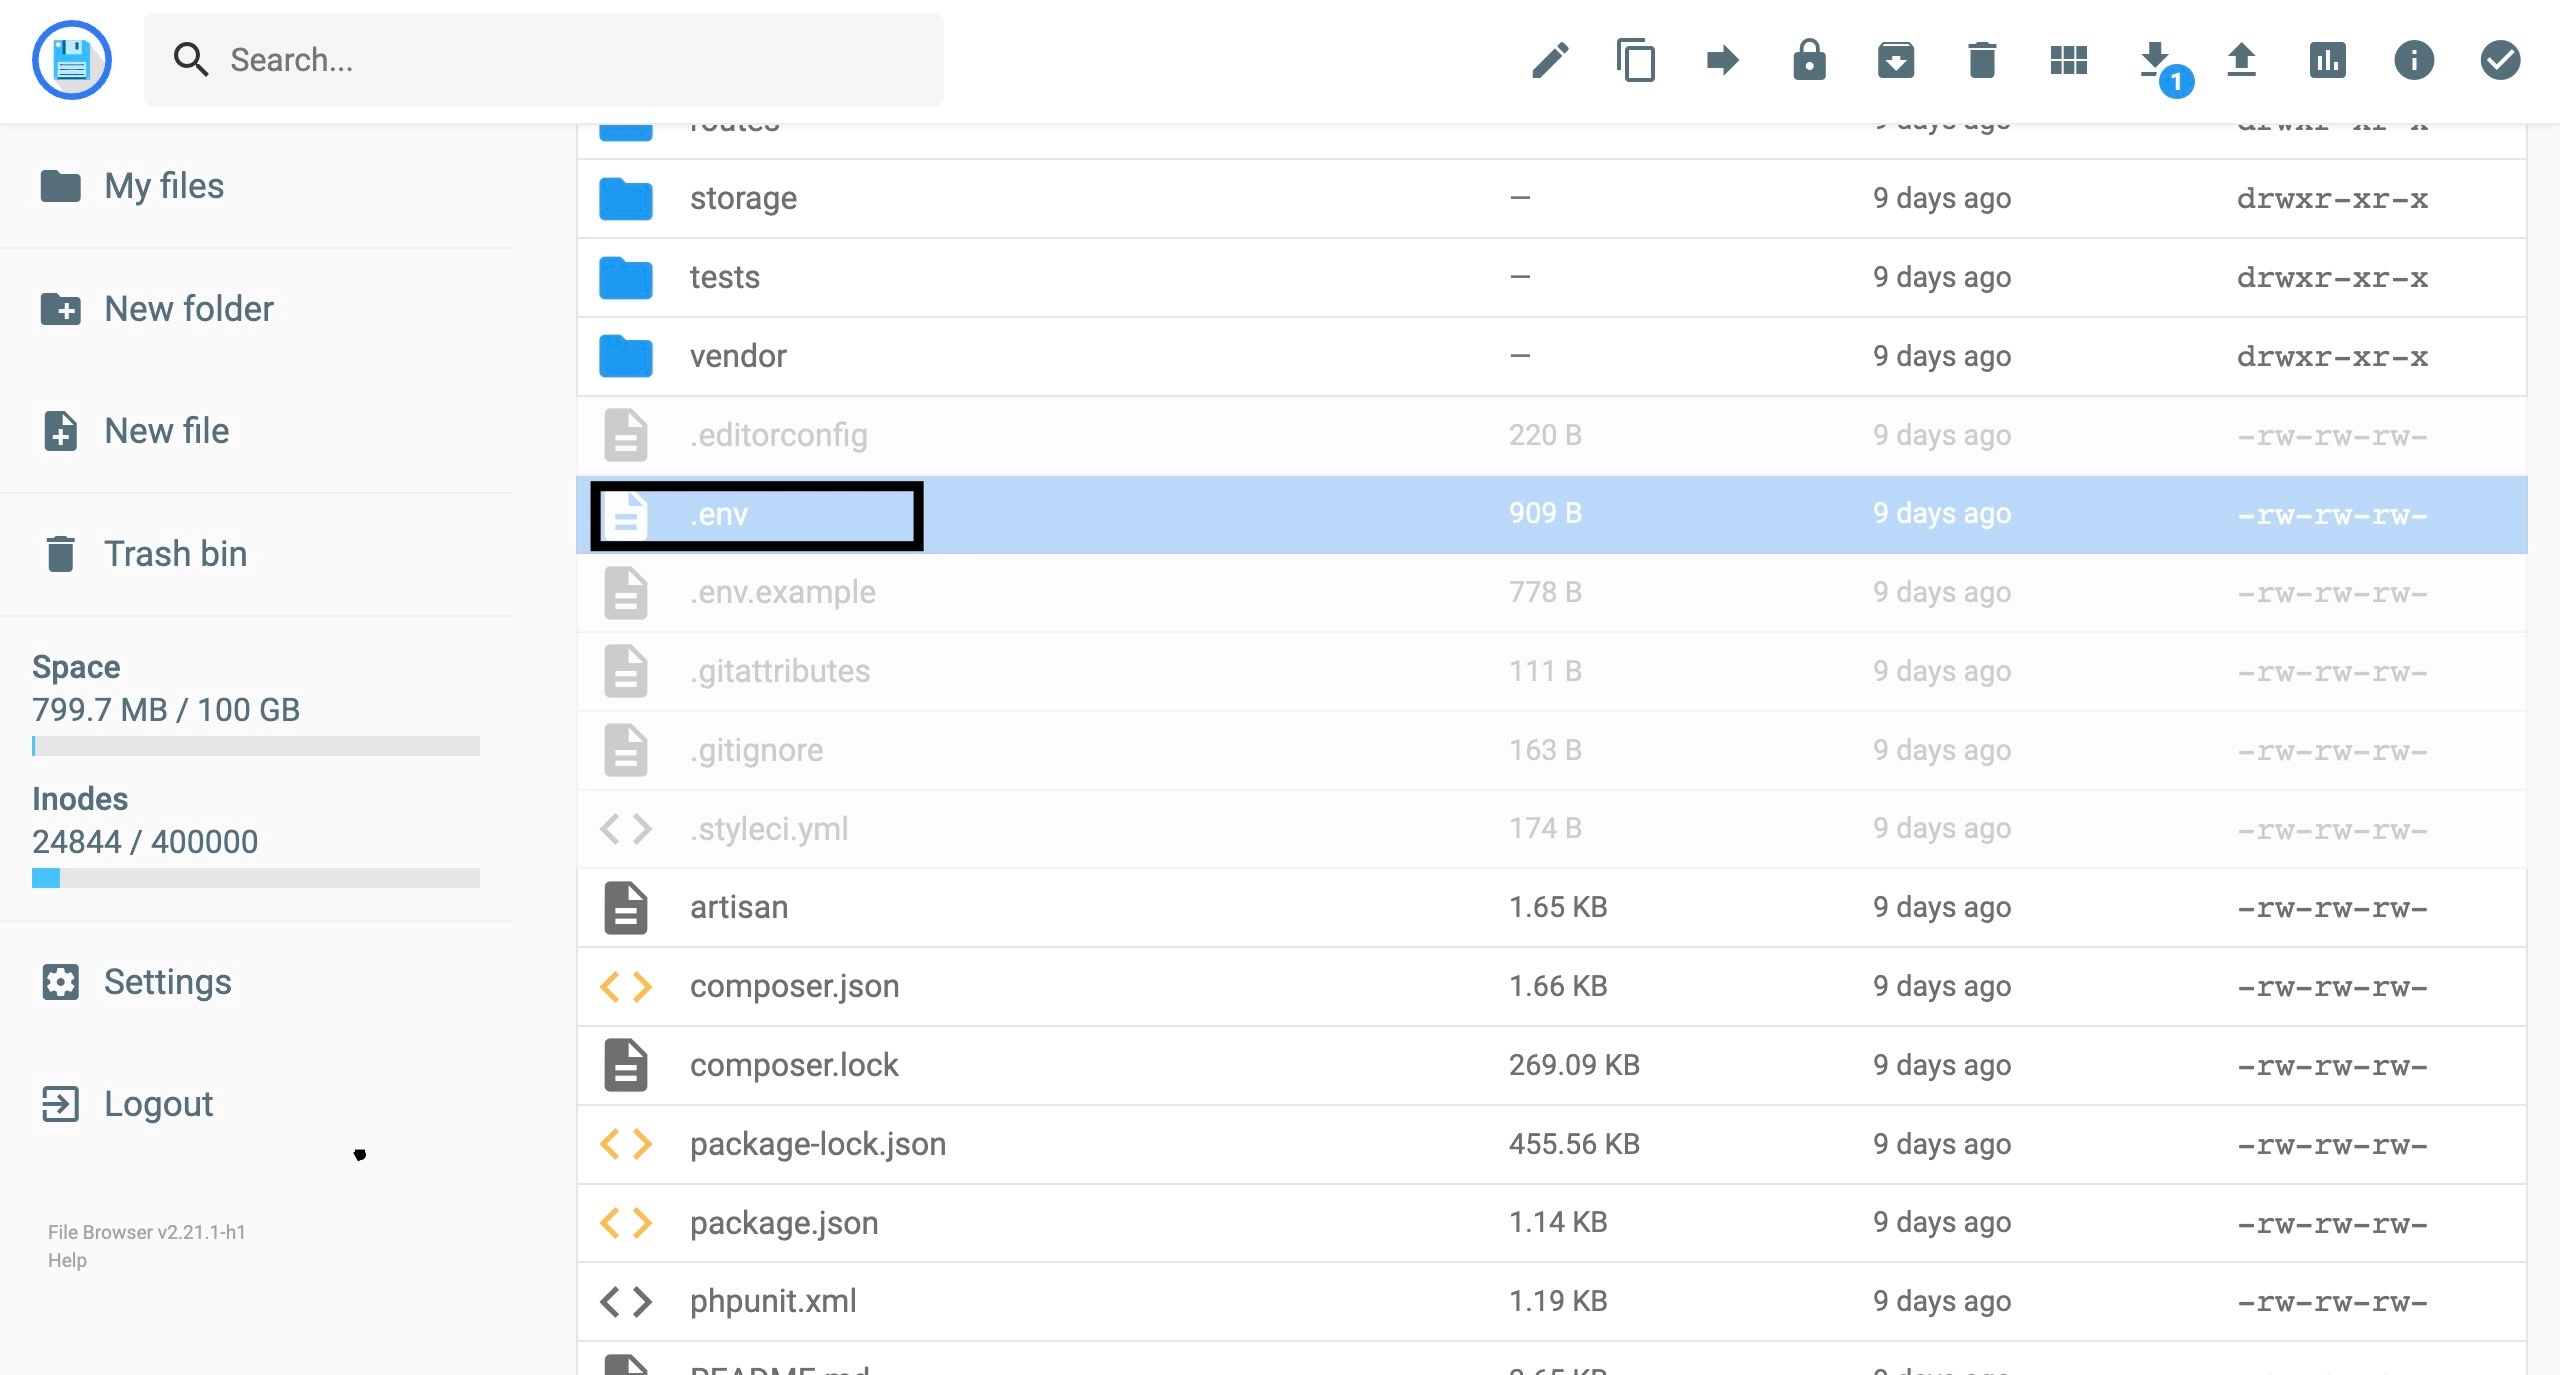
Click
.env
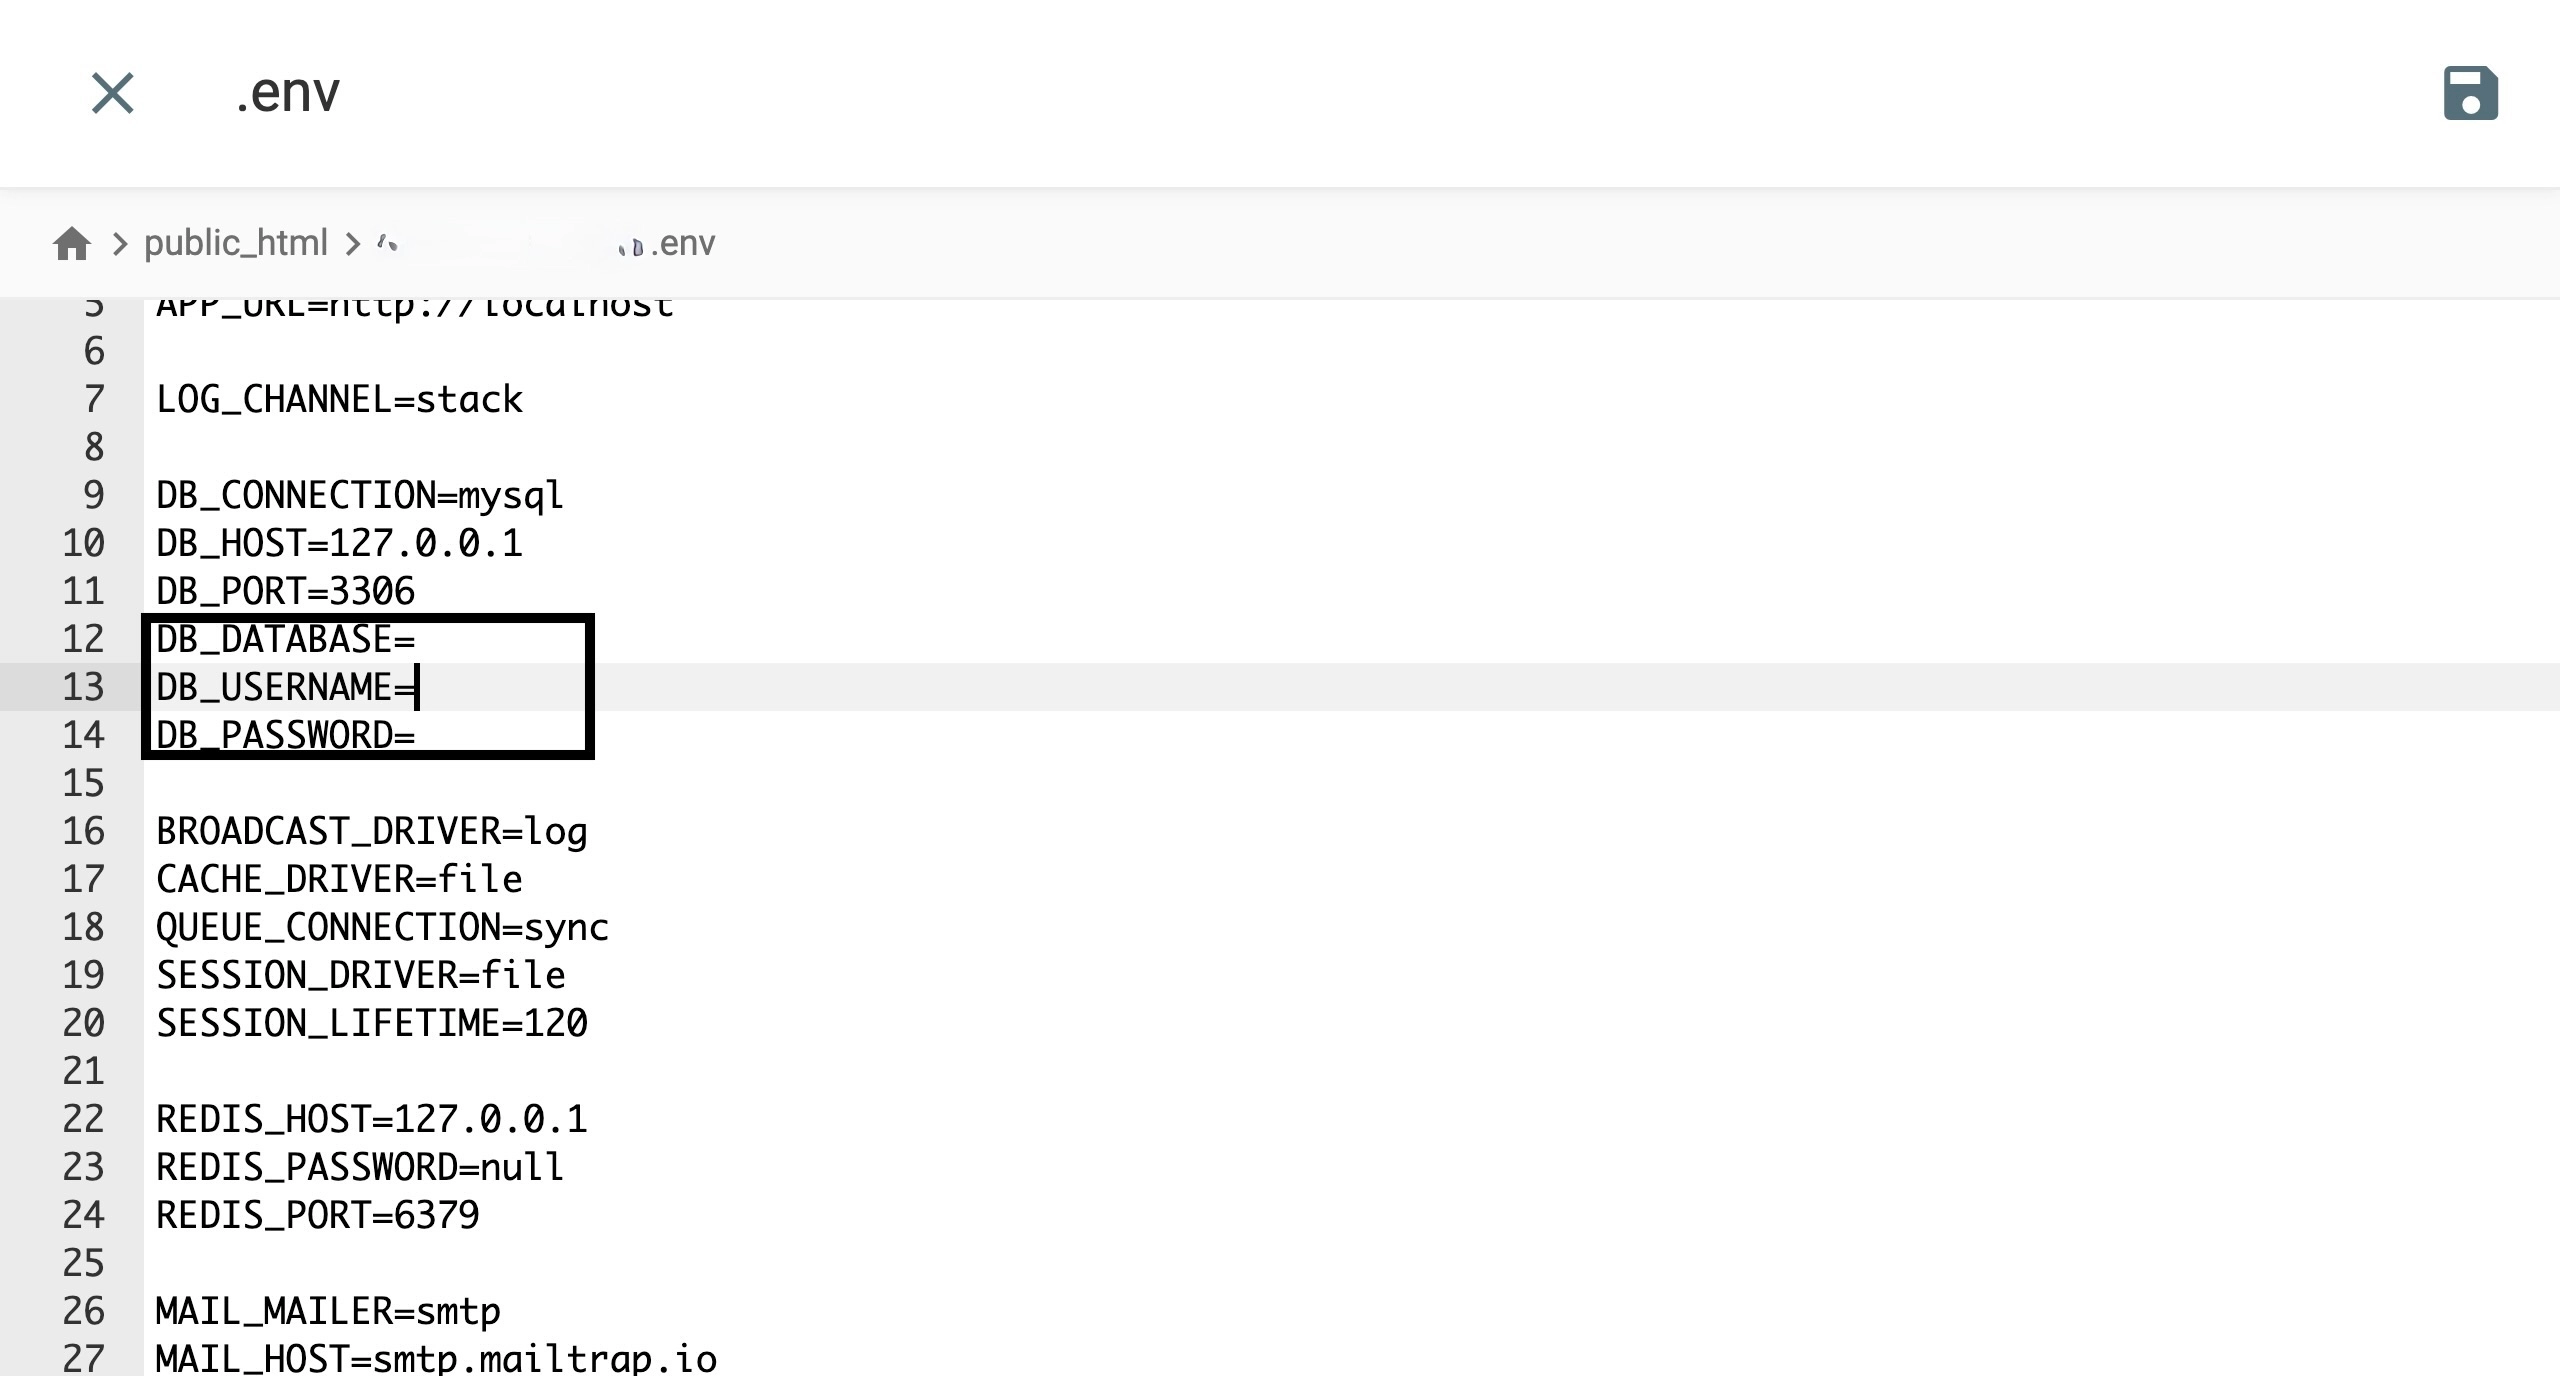
to edit environment and add your database credentials.
Put here your database name, database user name database password.
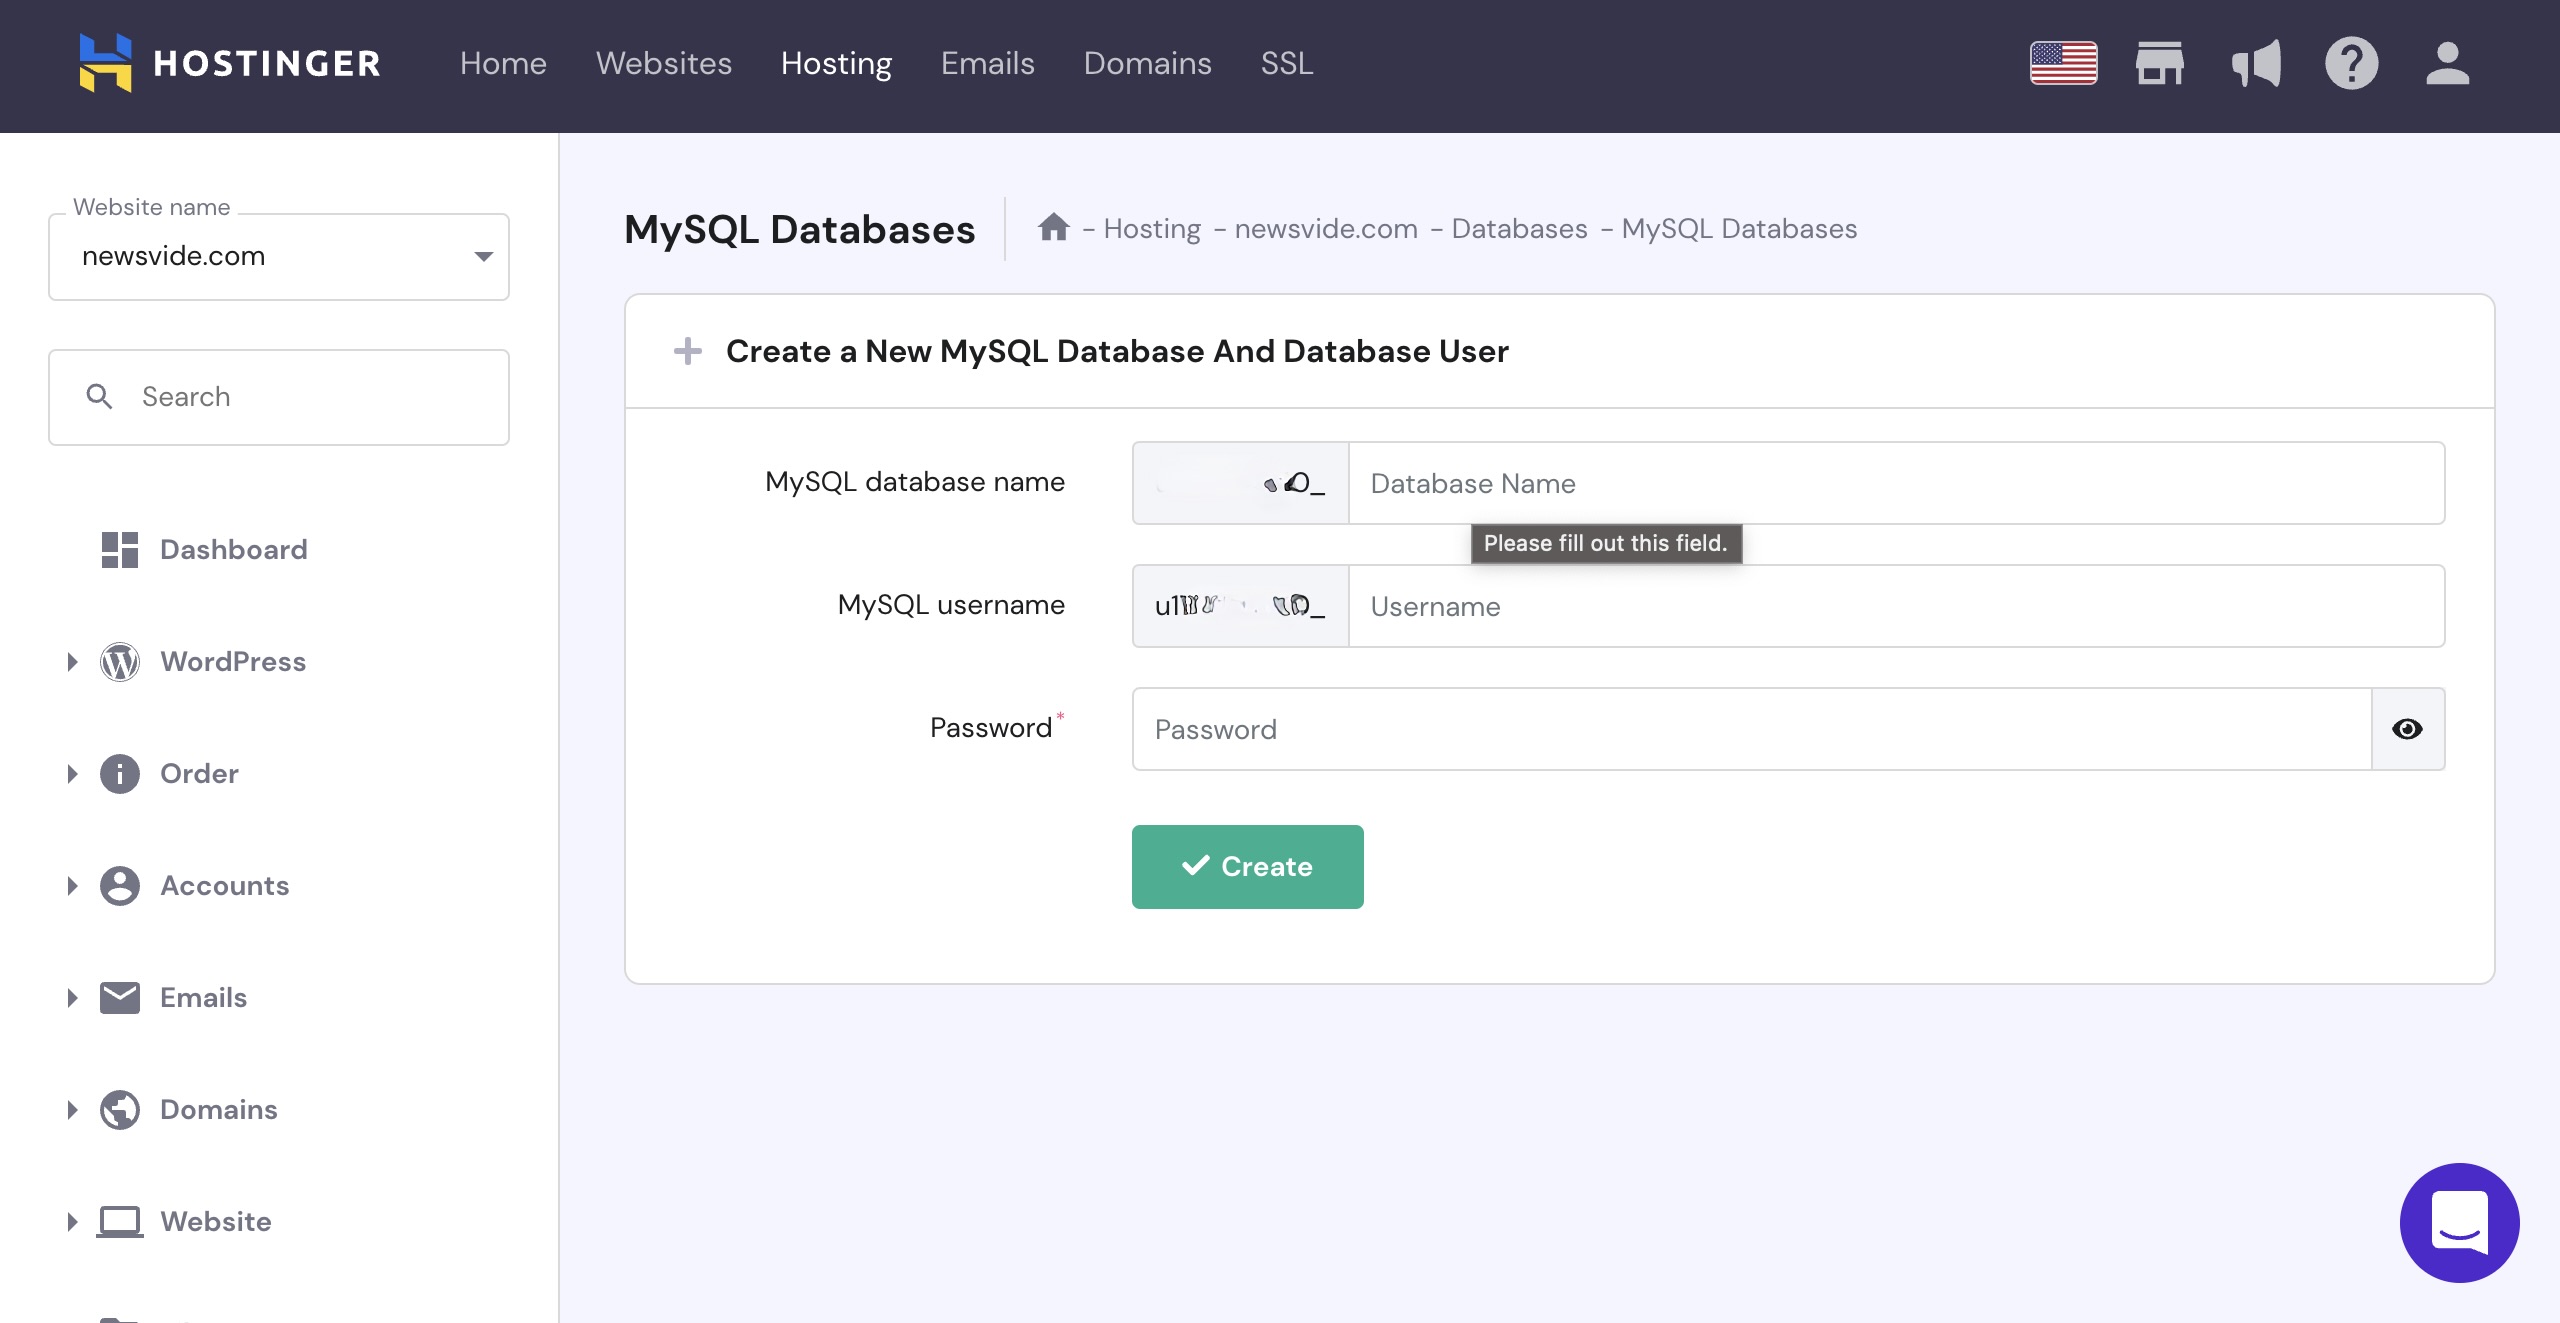
Create Database
This is for Cpanel
1. Click
Database
to create a database
Fill up the form to create a database.
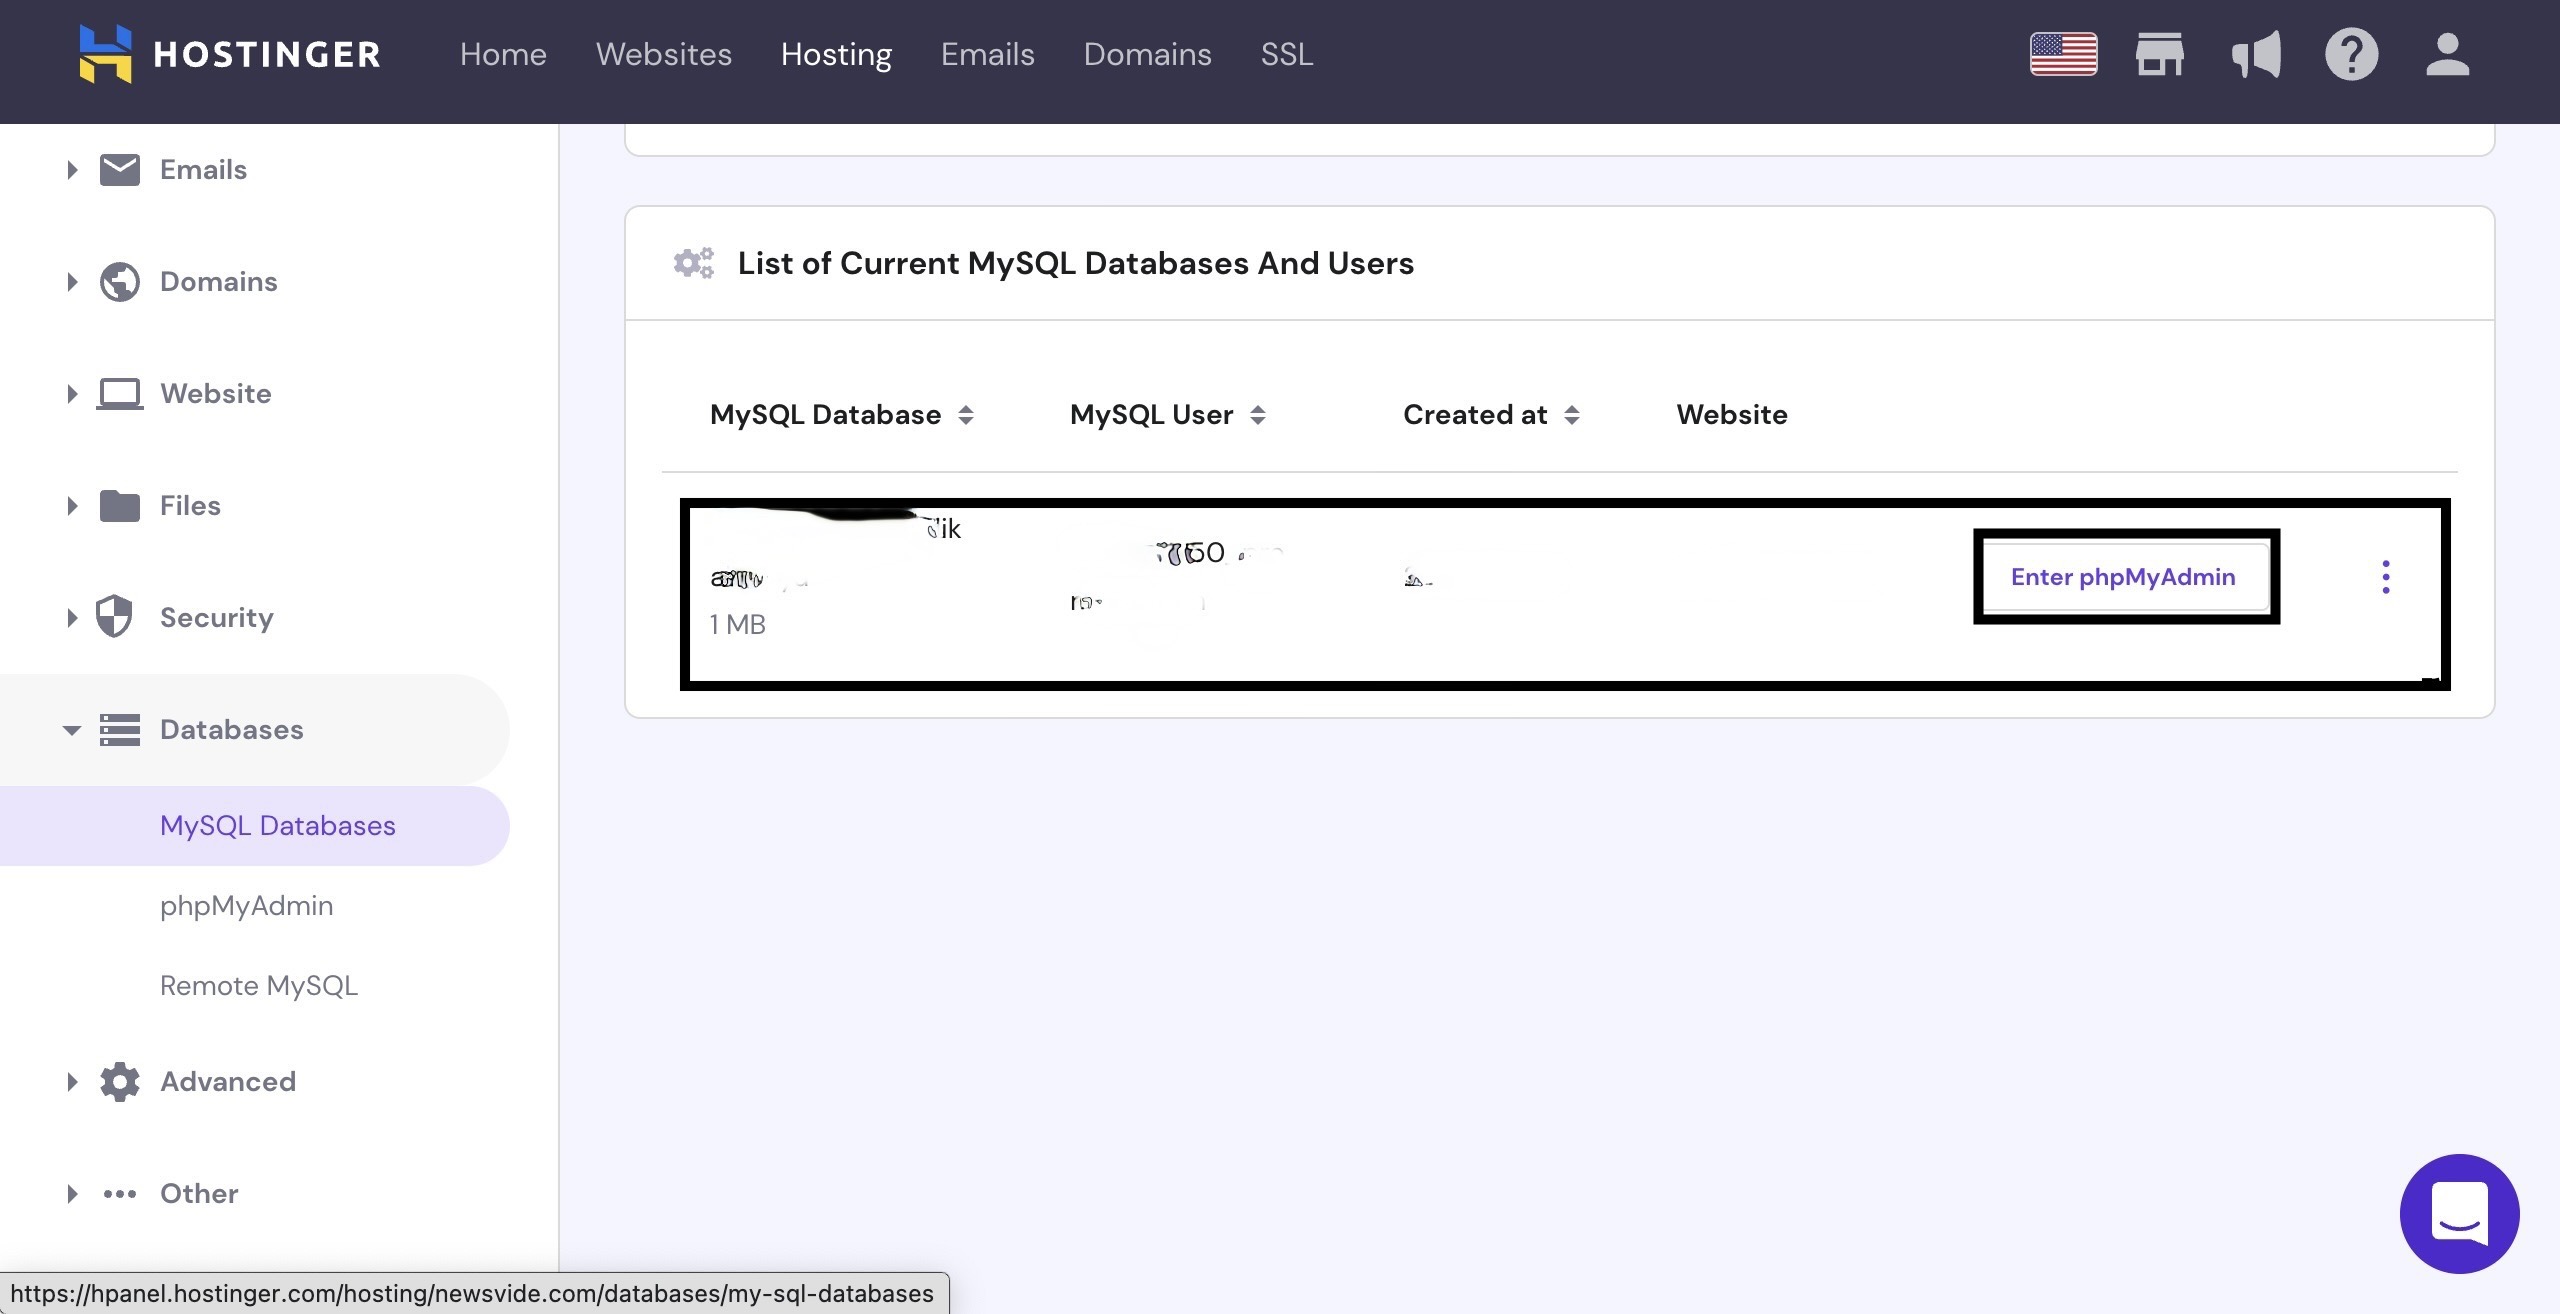
Click Enter
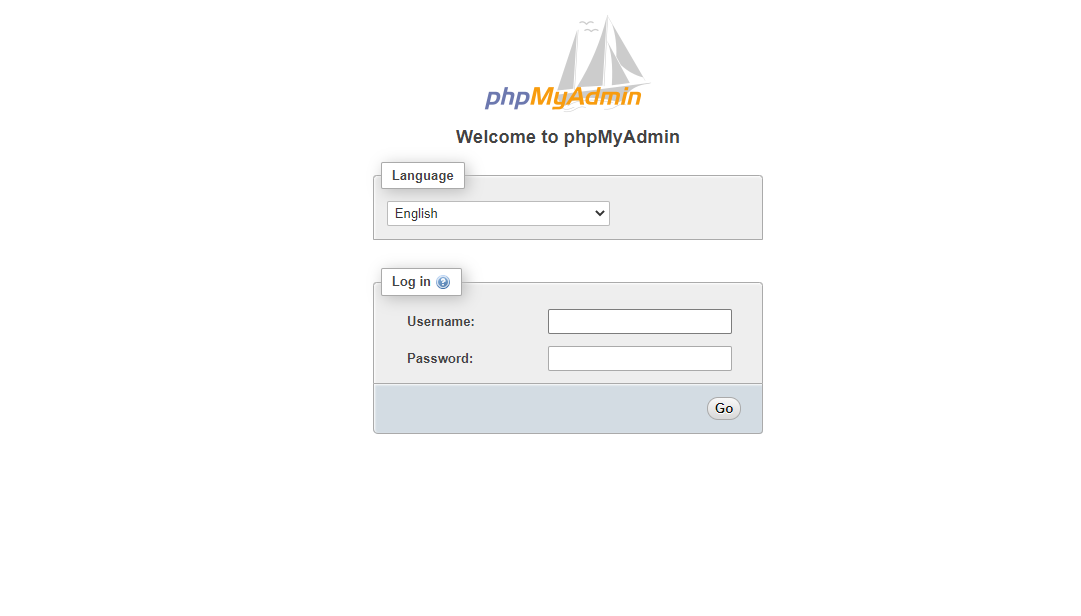
phpMyadmin
to go to phpMyadmin
Login with the database credentials which you have just created few time ago.
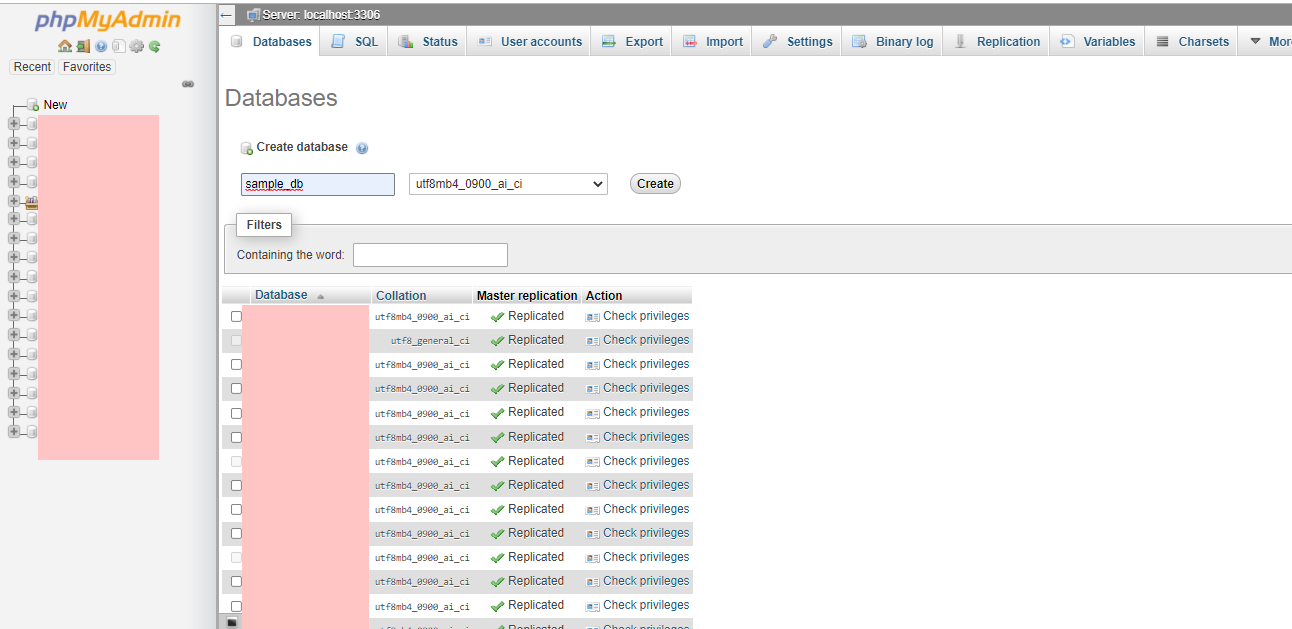
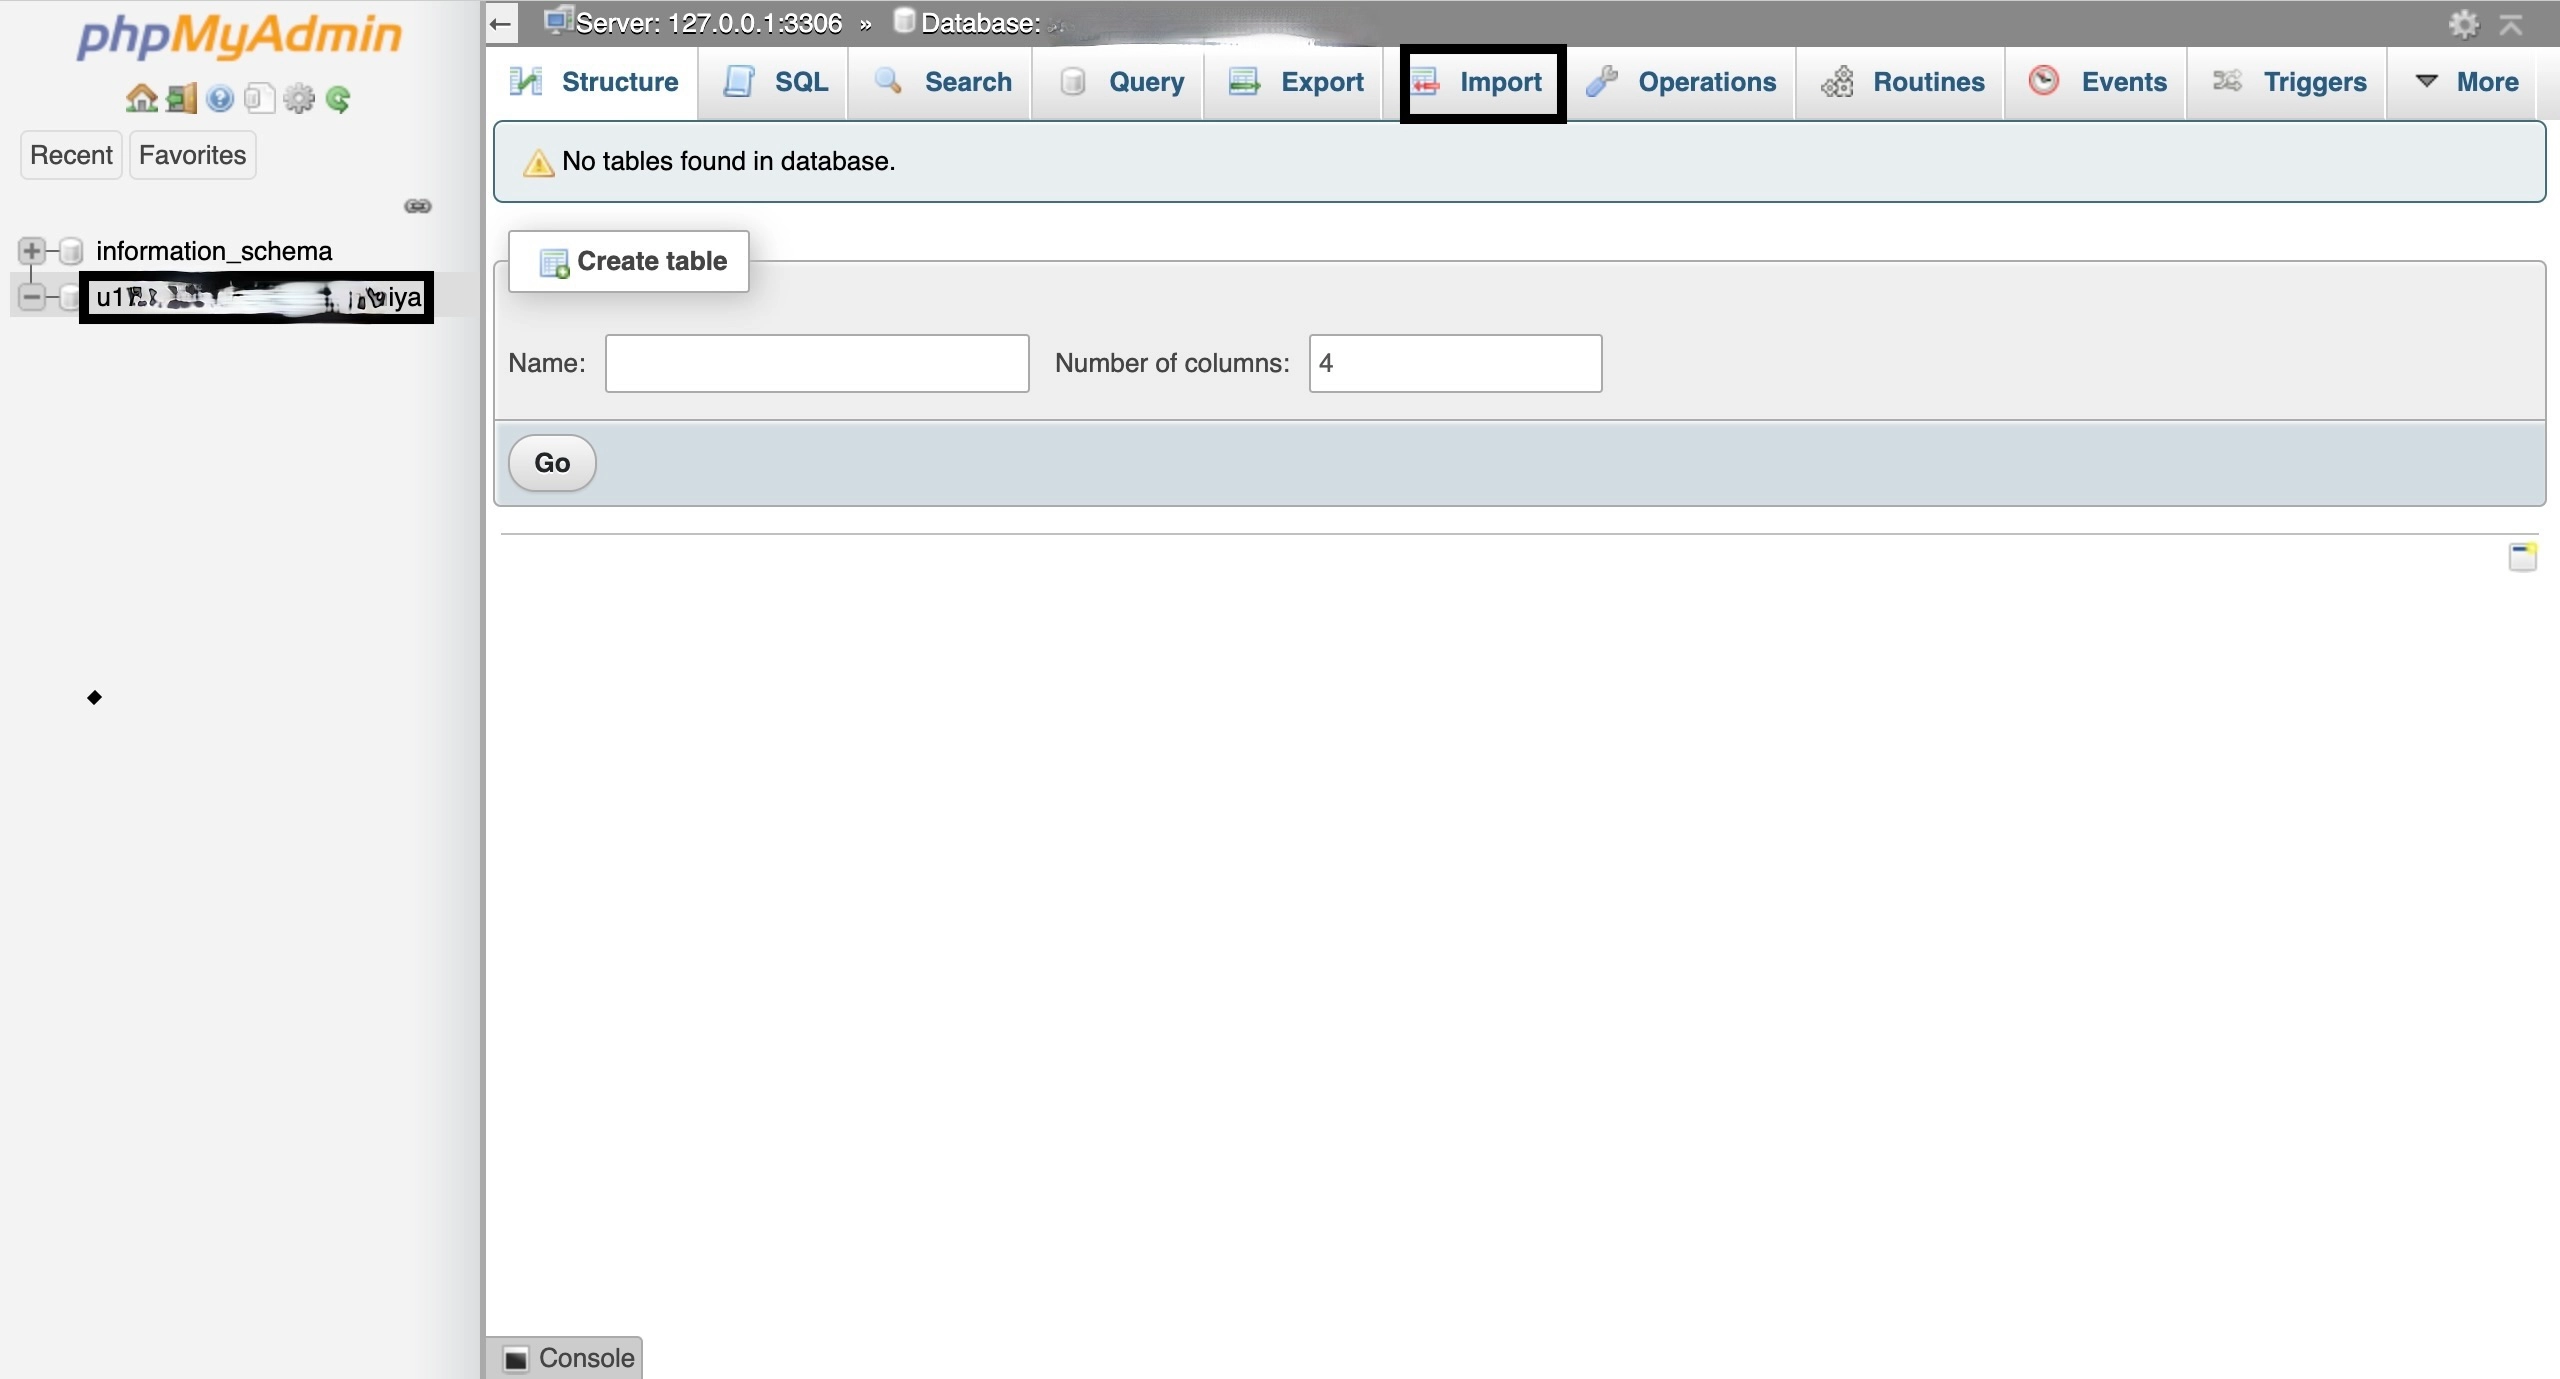
Select your database and import database file which you can find inside your project folder as named DB backup folder
Import Database
This is for Cpanel
Select your database and import database file which you can find inside your project folder as named DB backup folder example.sql file.
Upload PHP Script's
Go to public_html to upload your project.
Upload a your
laravel script.zip
file and unzip the project.
After unzip project go to unzipped folder to setup project environment.
Click
.env
to edit environment and add your database credentials.
Put here your database name, database user name database password.
Web Frontend
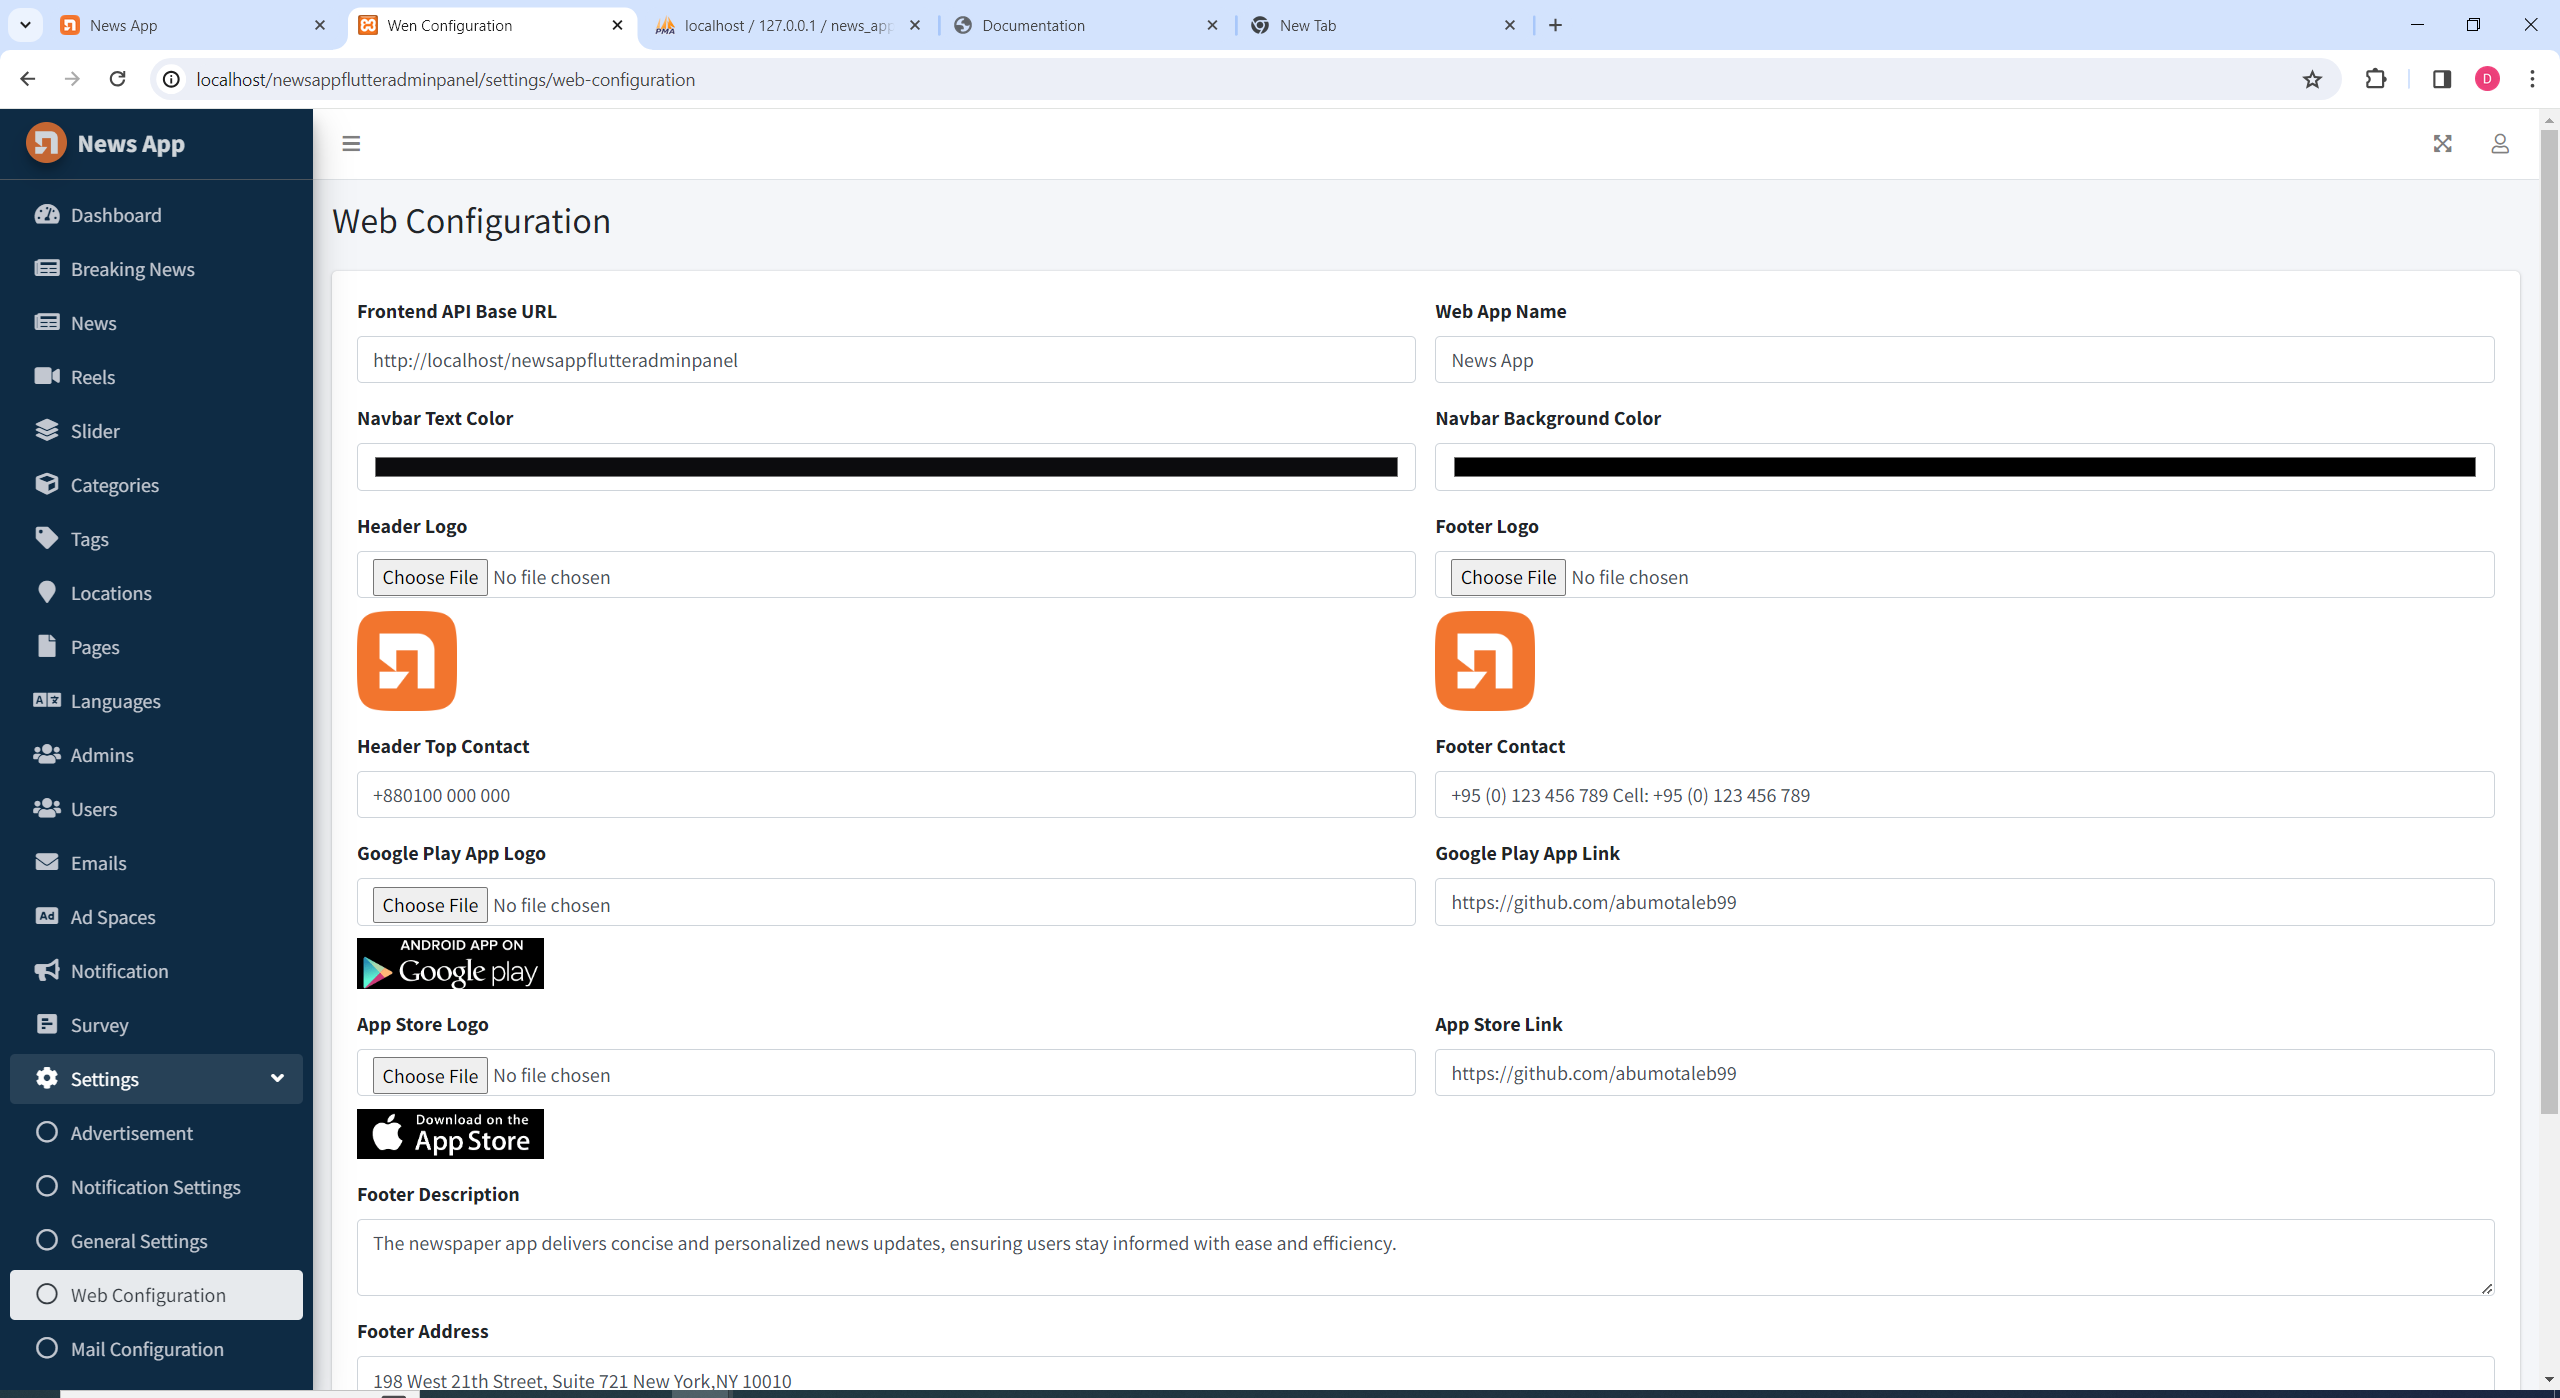
Change Header & Footer Logo
To update the
header and footer logos
on your website, follow these steps:
Go to the dashboard page and access the web configuration section.
Locate the logo settings.
Upload or select the desired logo for the header.
Update the footer logo accordingly.
Update the footer logo accordingly.
Click the "Update" button to save your changes.
Your header and footer logos will now be updated across the website.
Change Navbar Text & Background Color
Modify the appearance of your website's Navbar by adjusting the text and background color. Follow these steps:
Access the dashboard page and navigate to the web configuration section.
Locate the Navbar settings.
Choose the desired text color for the Navbar.
Select the background color that complements your website's design.
Click the "Update" button to save your changes.
Your Navbar will now reflect the updated text and background color across the website.
Change Mobile App Image
Enhance the visual representation of your mobile app by updating the app image. Follow these steps:
Access the dashboard page and navigate to the web configuration section.
Locate the Mobile App settings.
Upload or select the desired image for your mobile app.
Provide the image URL for the mobile app.
Click the "Update" button to save your changes.
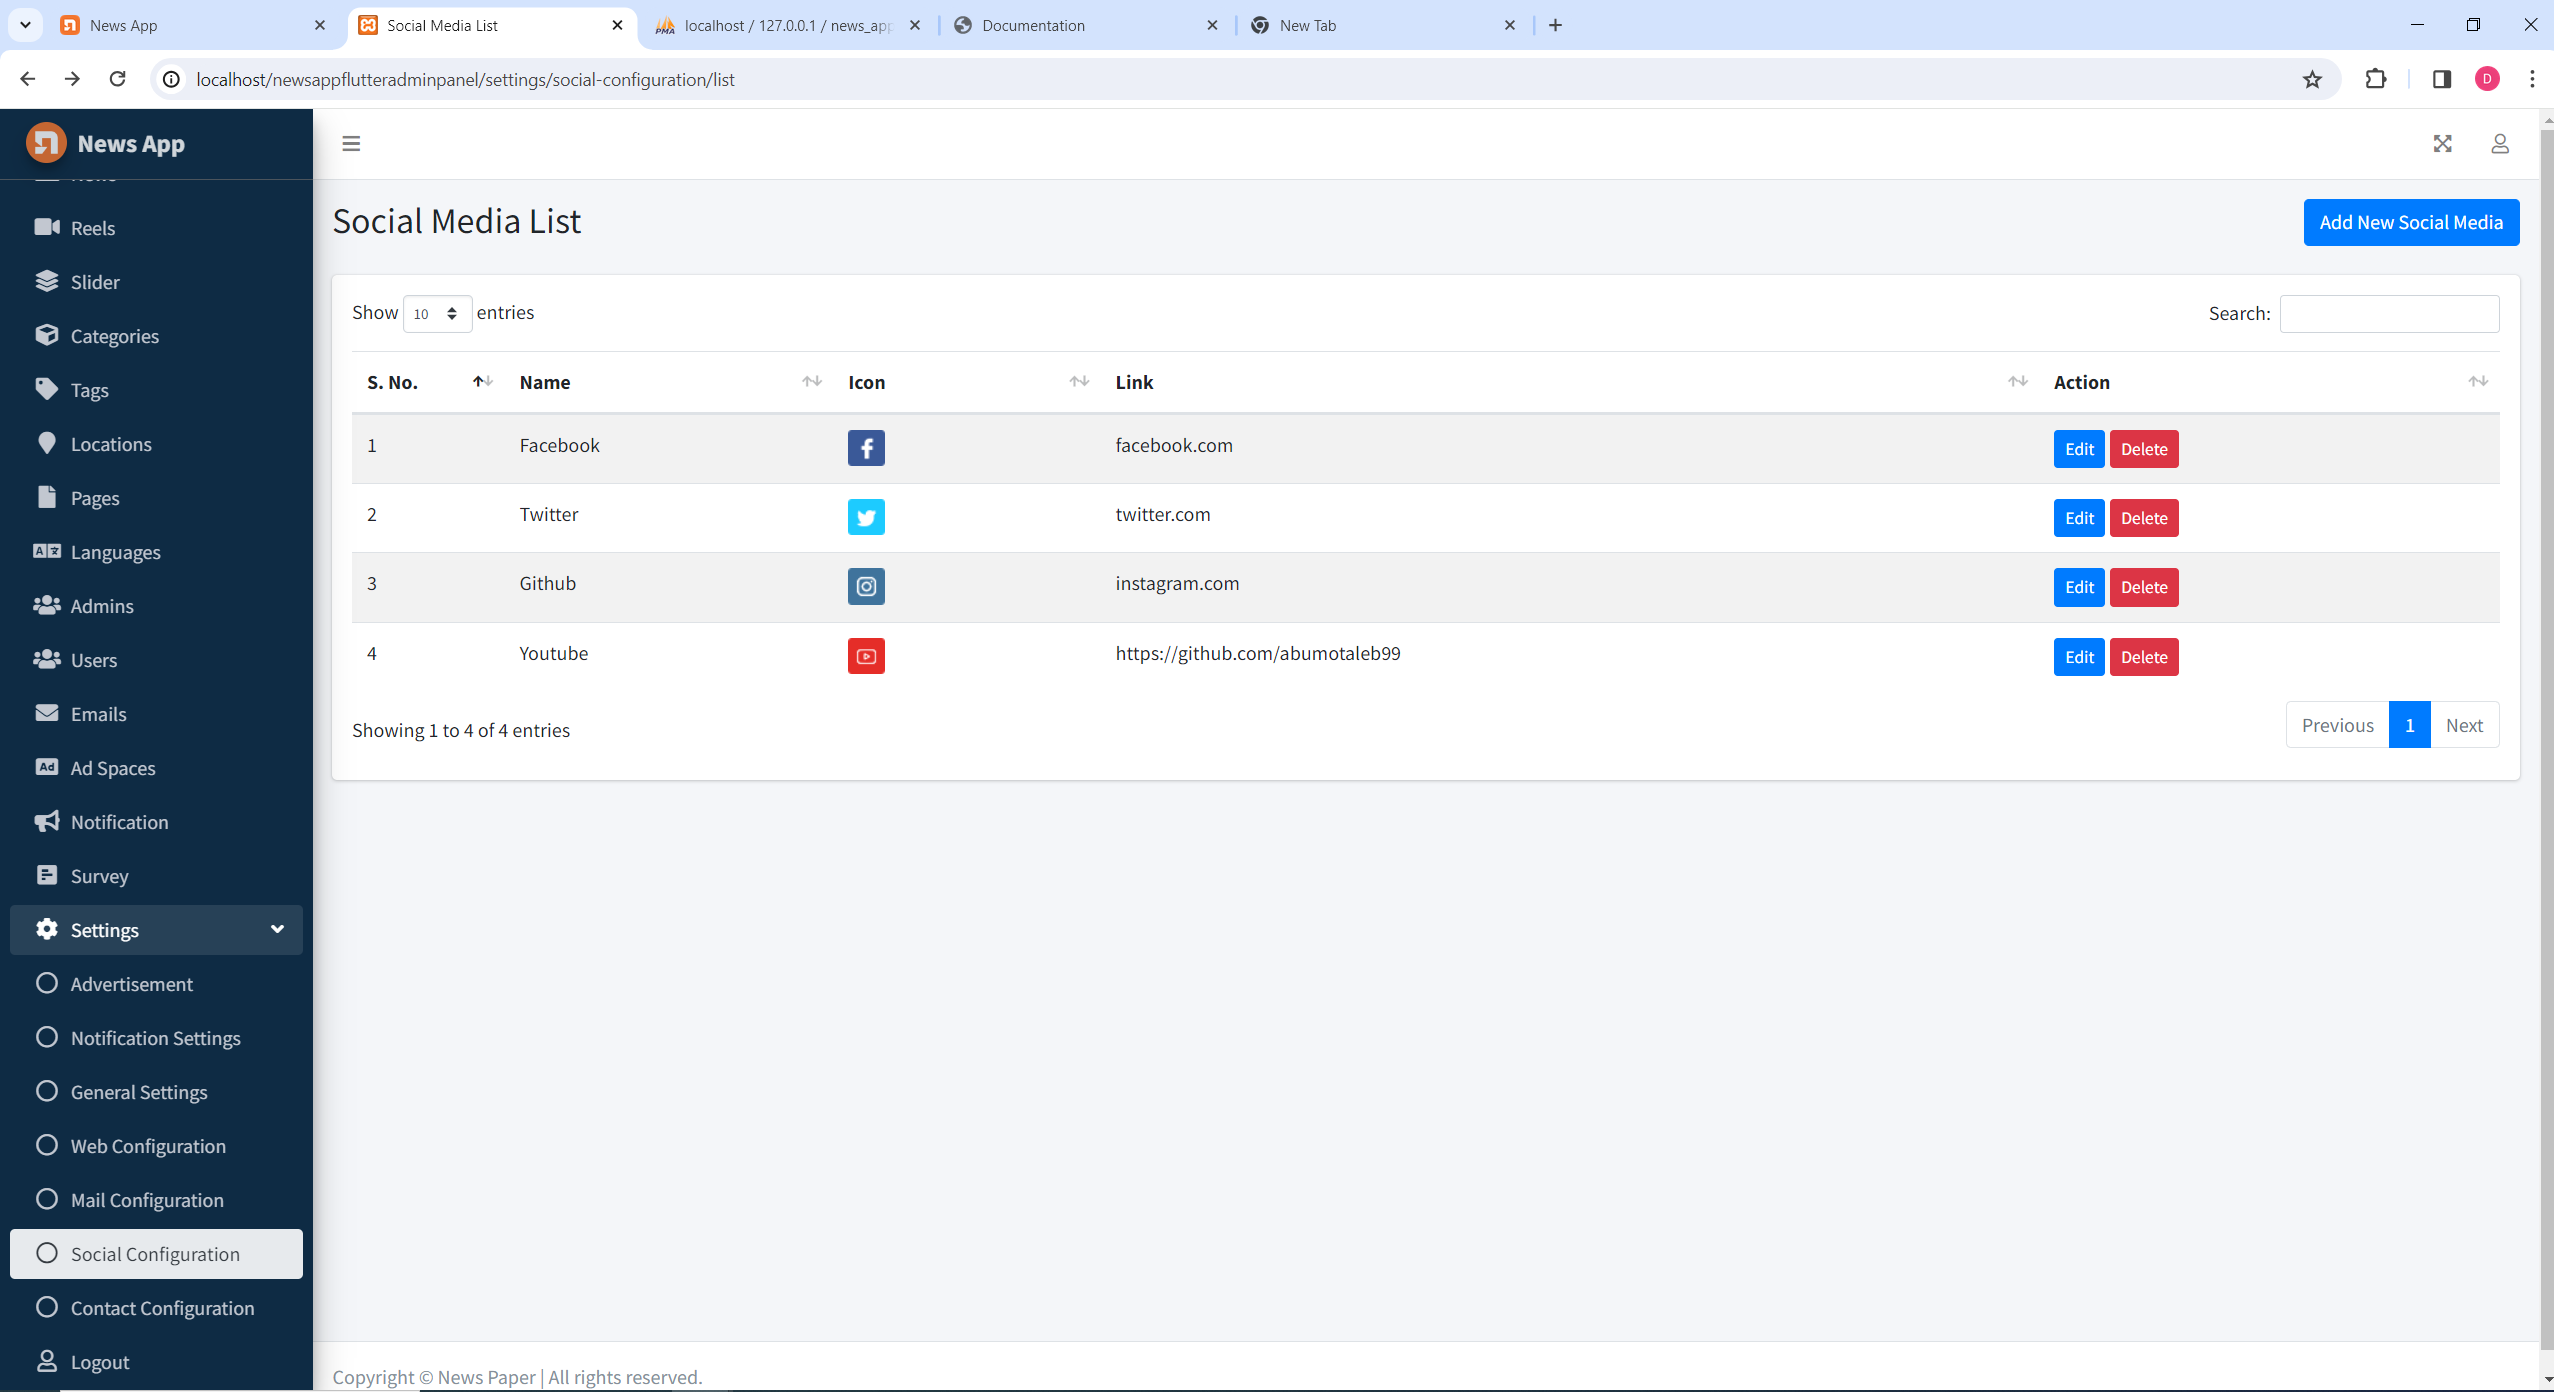
Change Social Icon and Link
Make your website more engaging by updating social icons and links. Follow these steps:
Access the dashboard page and navigate to the social configuration section.
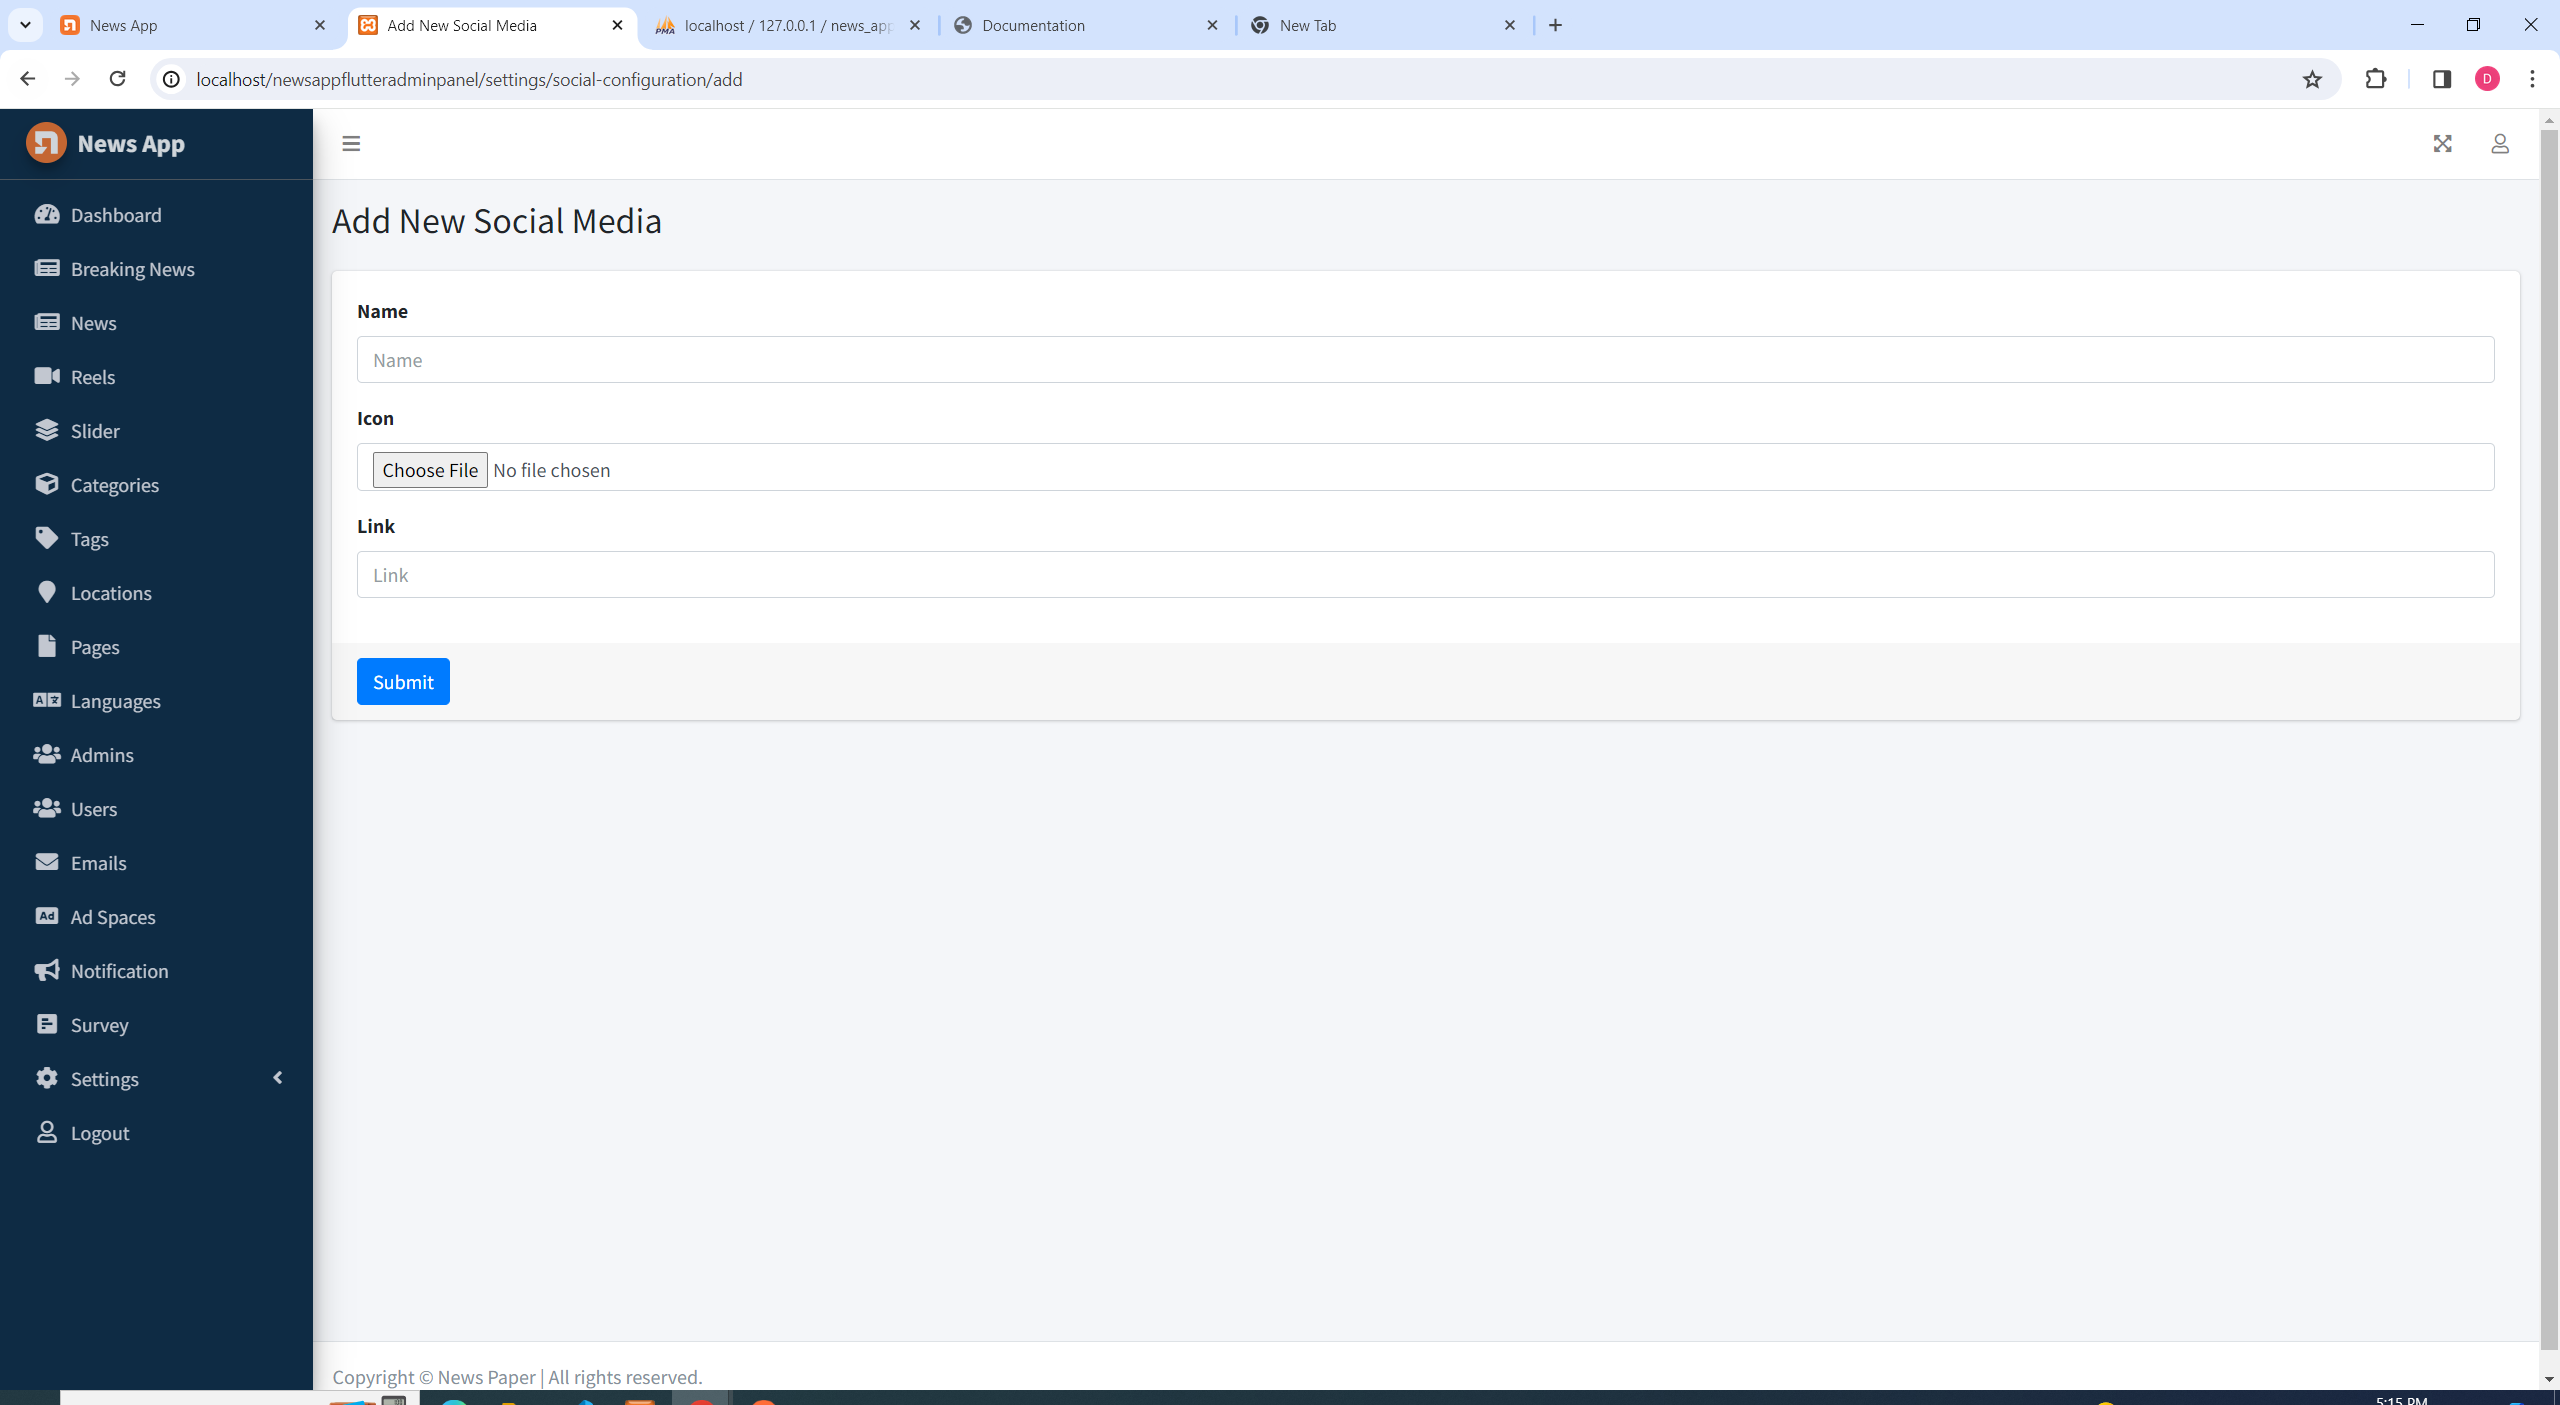
Click the "Add New Social Media" button and select the desired social icon images.
Provide the corresponding social media links for each icon.
Click the "Submit" button to save your new icon and link.
Your website will now display the updated social icons with their respective links, enhancing the overall user experience.
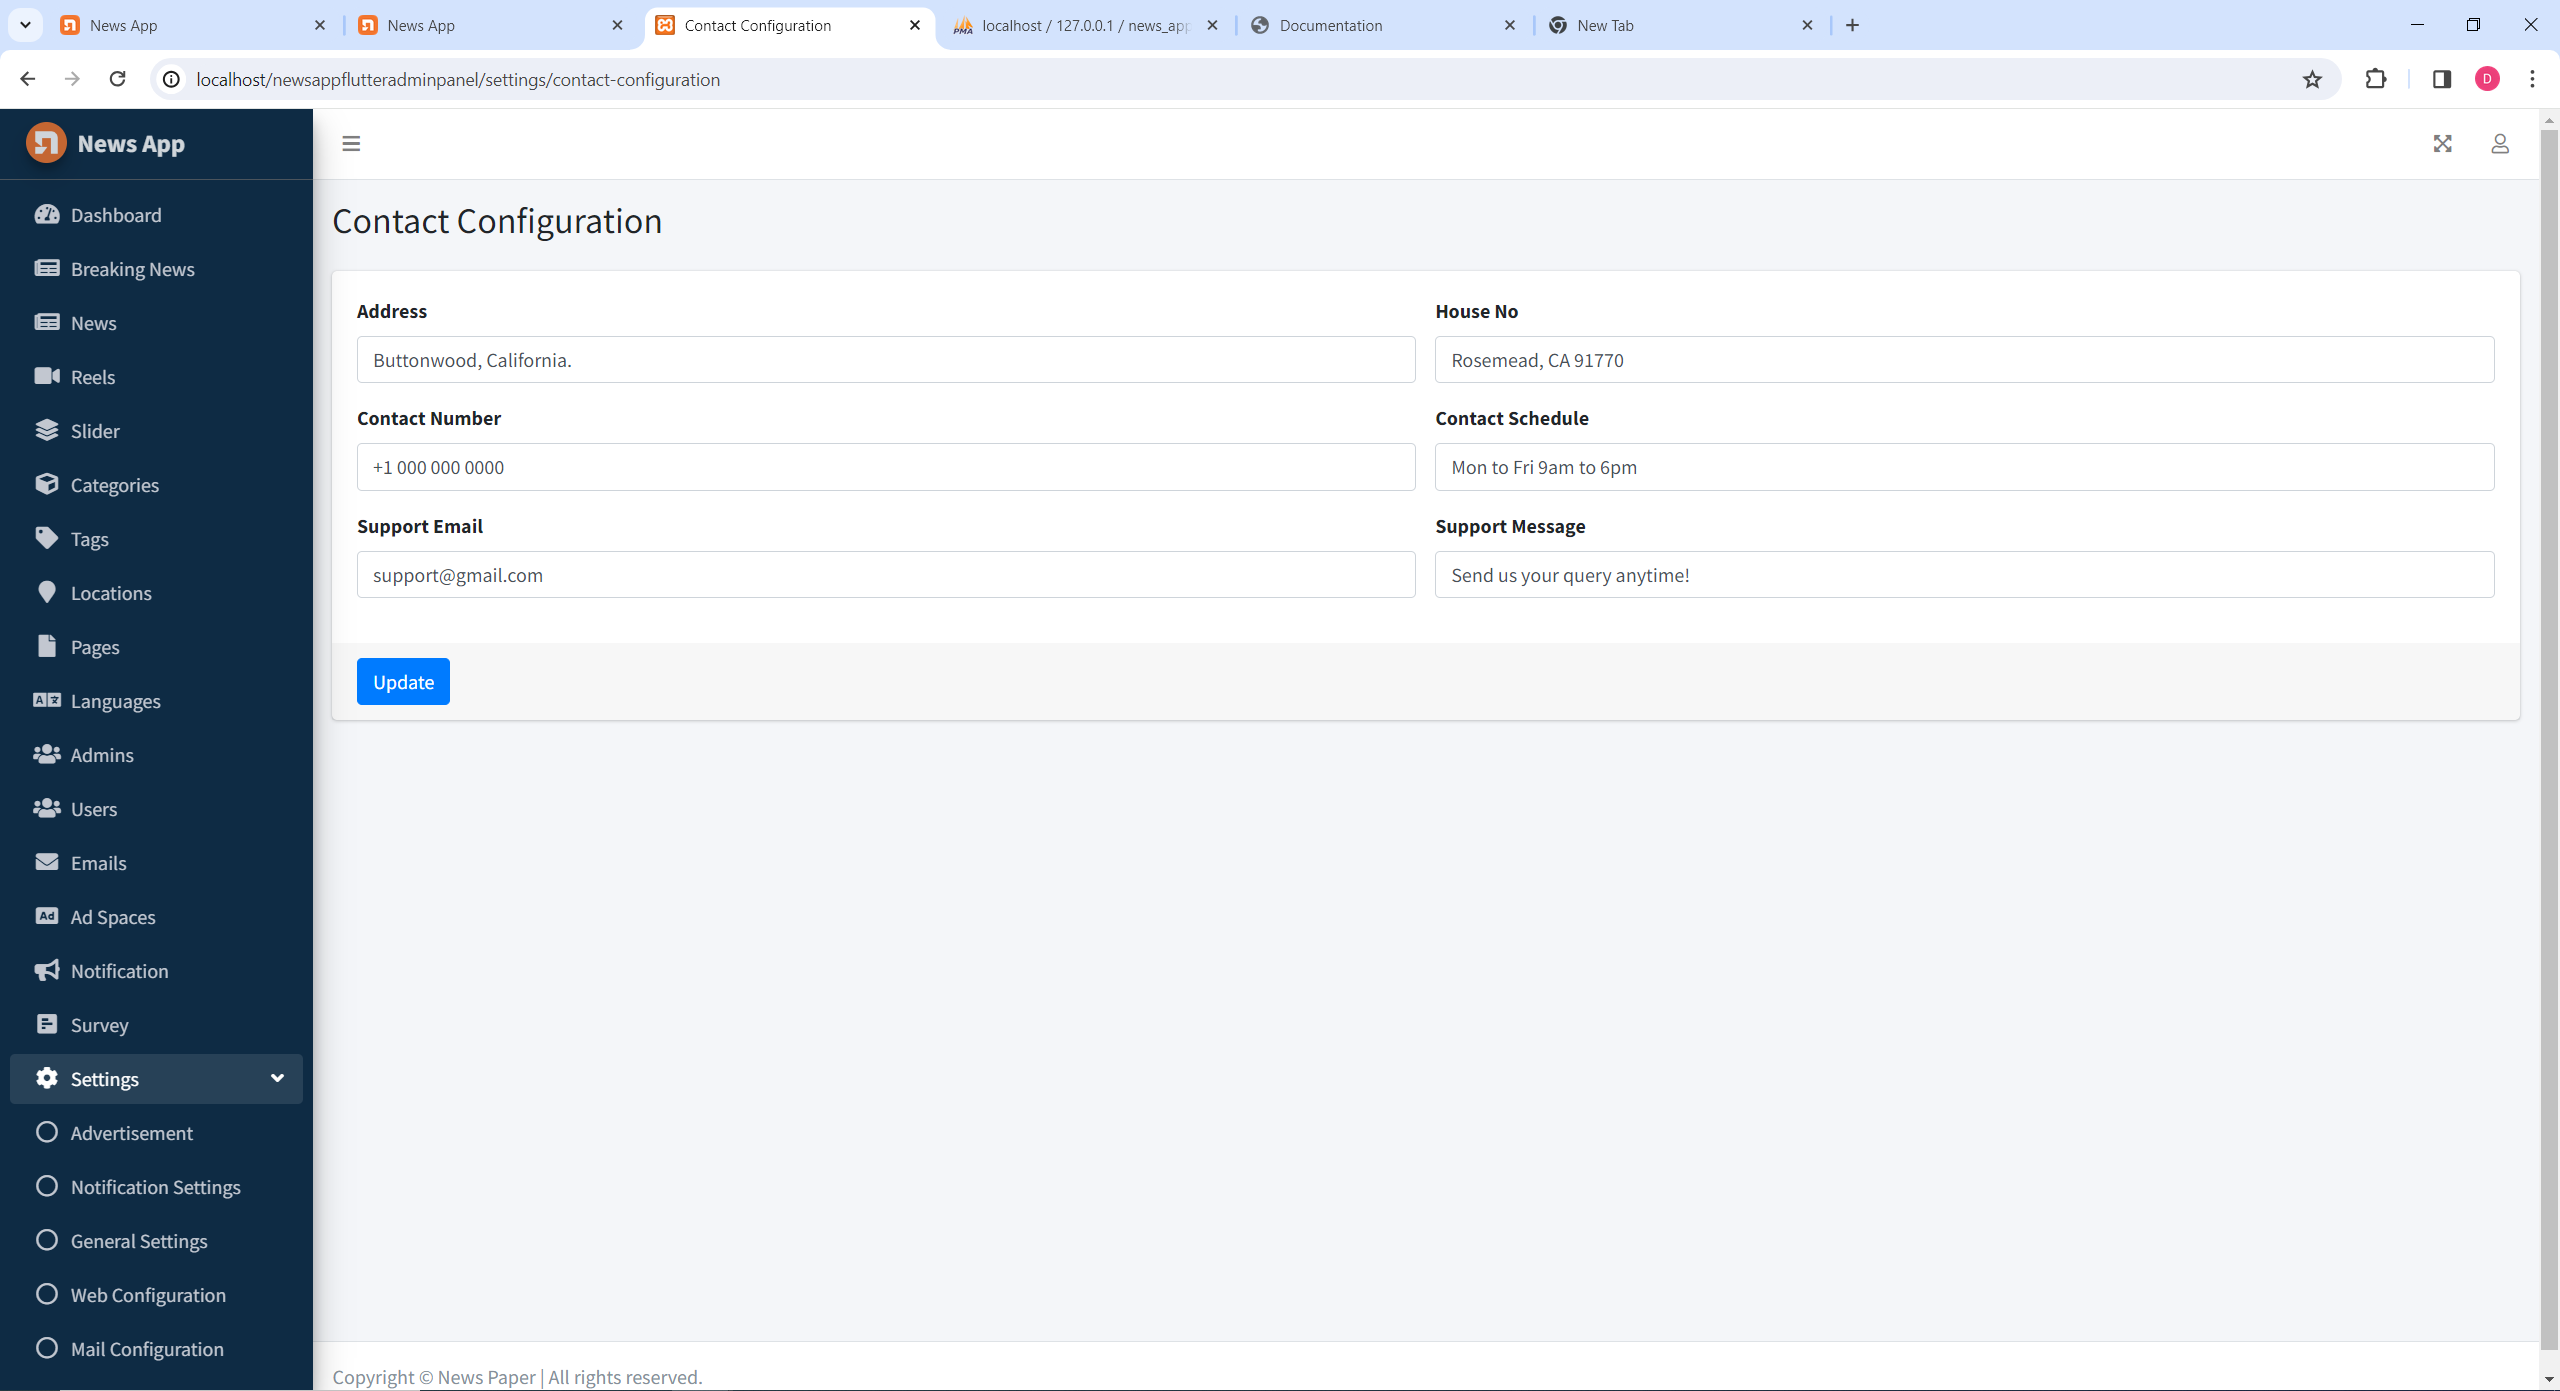
Change Contact Page Details
Ensure users can easily reach you by updating the contact details on your website. Follow these steps:
Access the dashboard page and navigate to the contact configuration section.
Locate the Contact Details settings.
Edit the existing contact information, including address, phone number, and email.
Click the "Update" button to save your changes.
Your website's contact page will now display the updated contact details, providing users with accurate and relevant information.
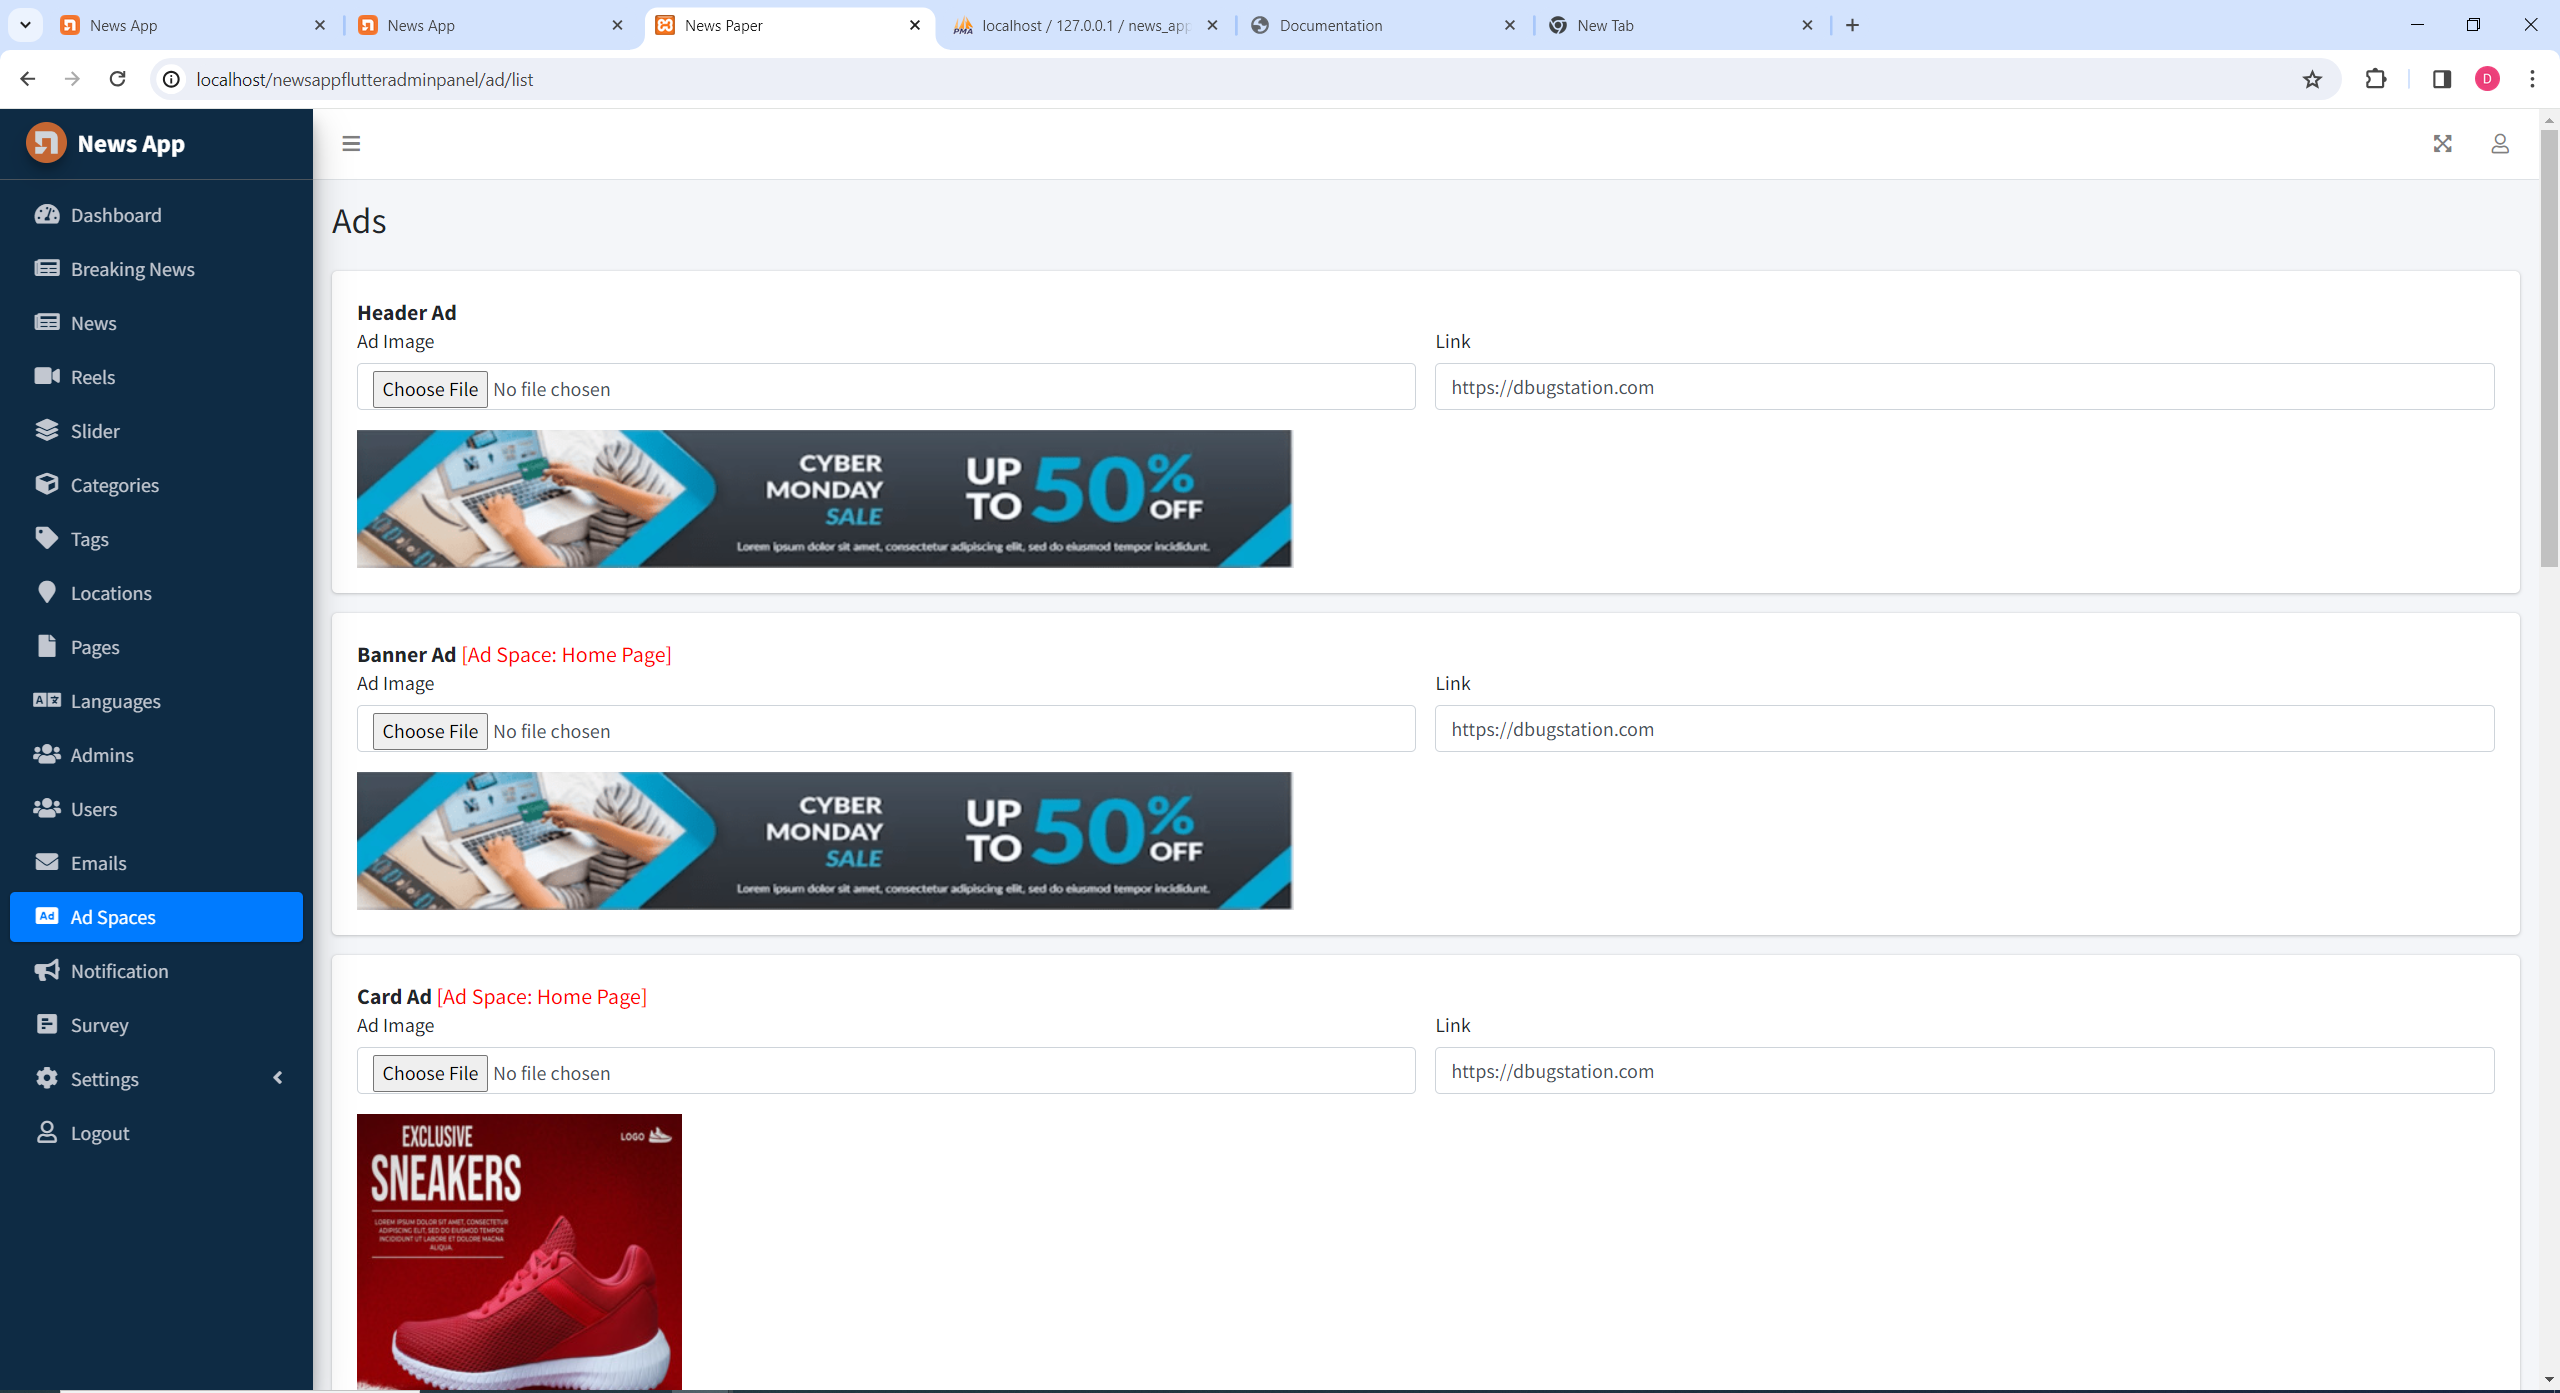
Change Ad and Link
Maximize your website's revenue and visibility by managing ads in dedicated ad spaces. Follow these steps:
Access the dashboard page and locate the Ad Spaces settings.
Choose the specific ad space you want to update.
Edit the existing ad content and provide the destination link for the ad.
Click the "Update" button to save your changes.
Your website's ad spaces will now display the updated ad content with the corresponding destination links, optimizing user engagement and revenue generation.
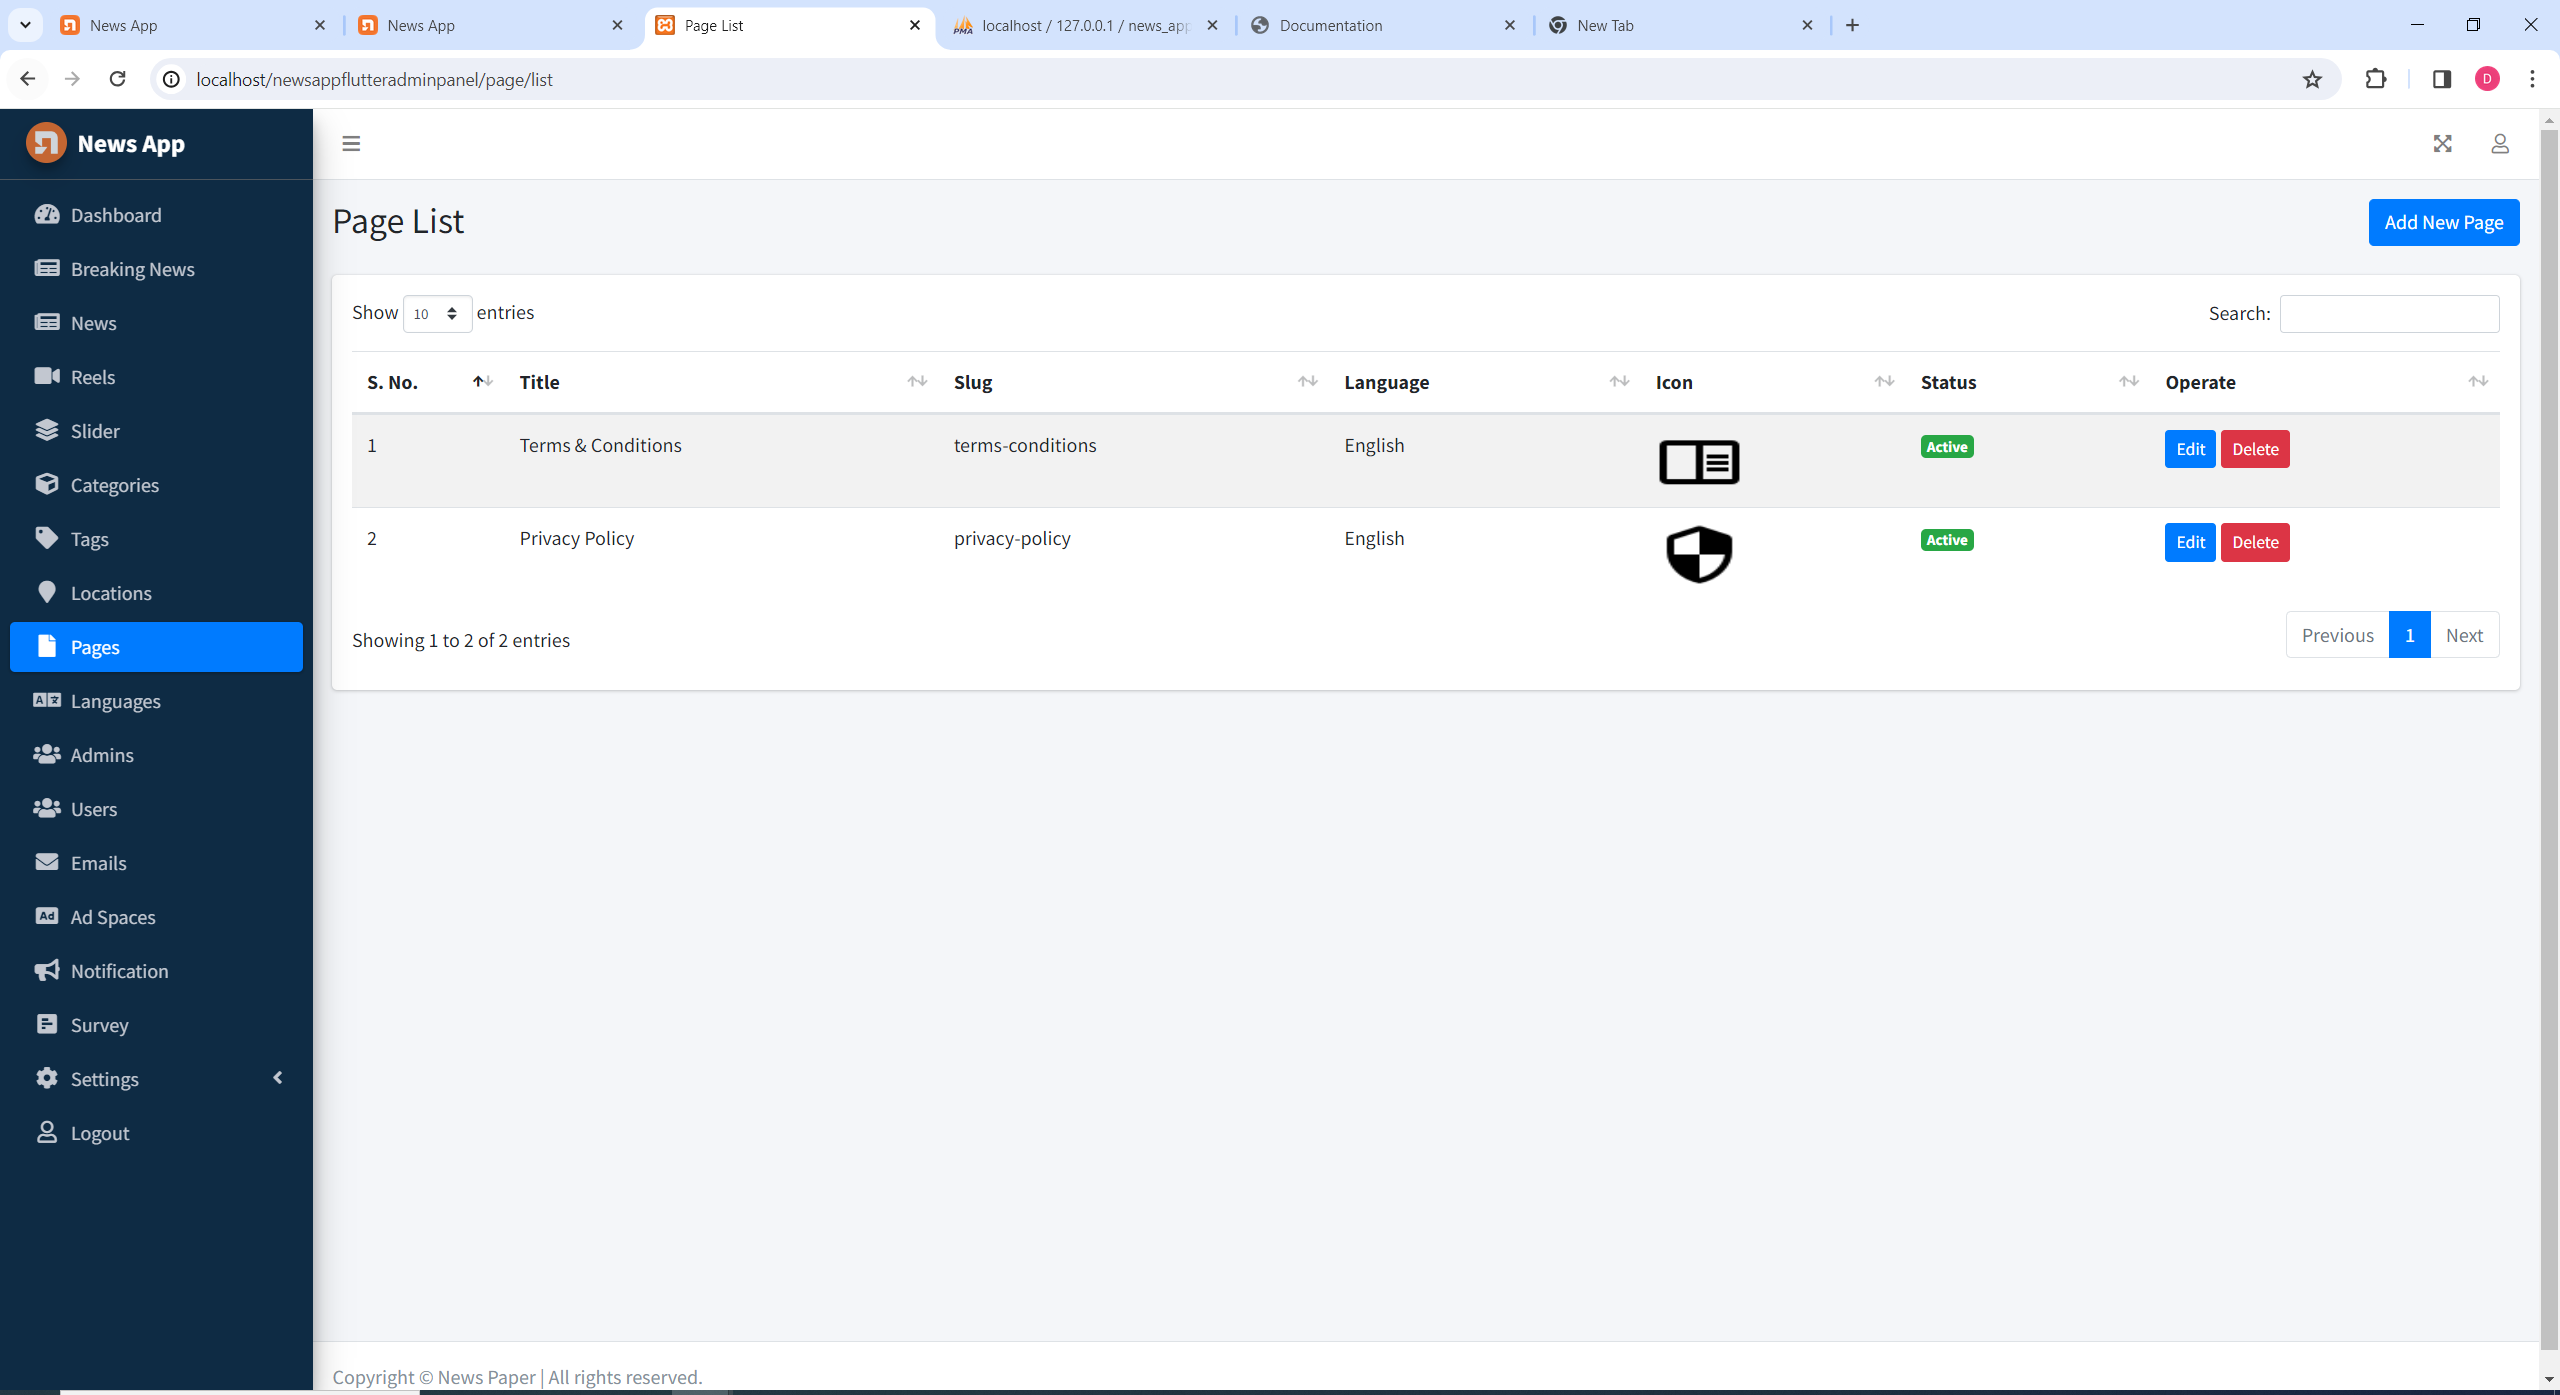
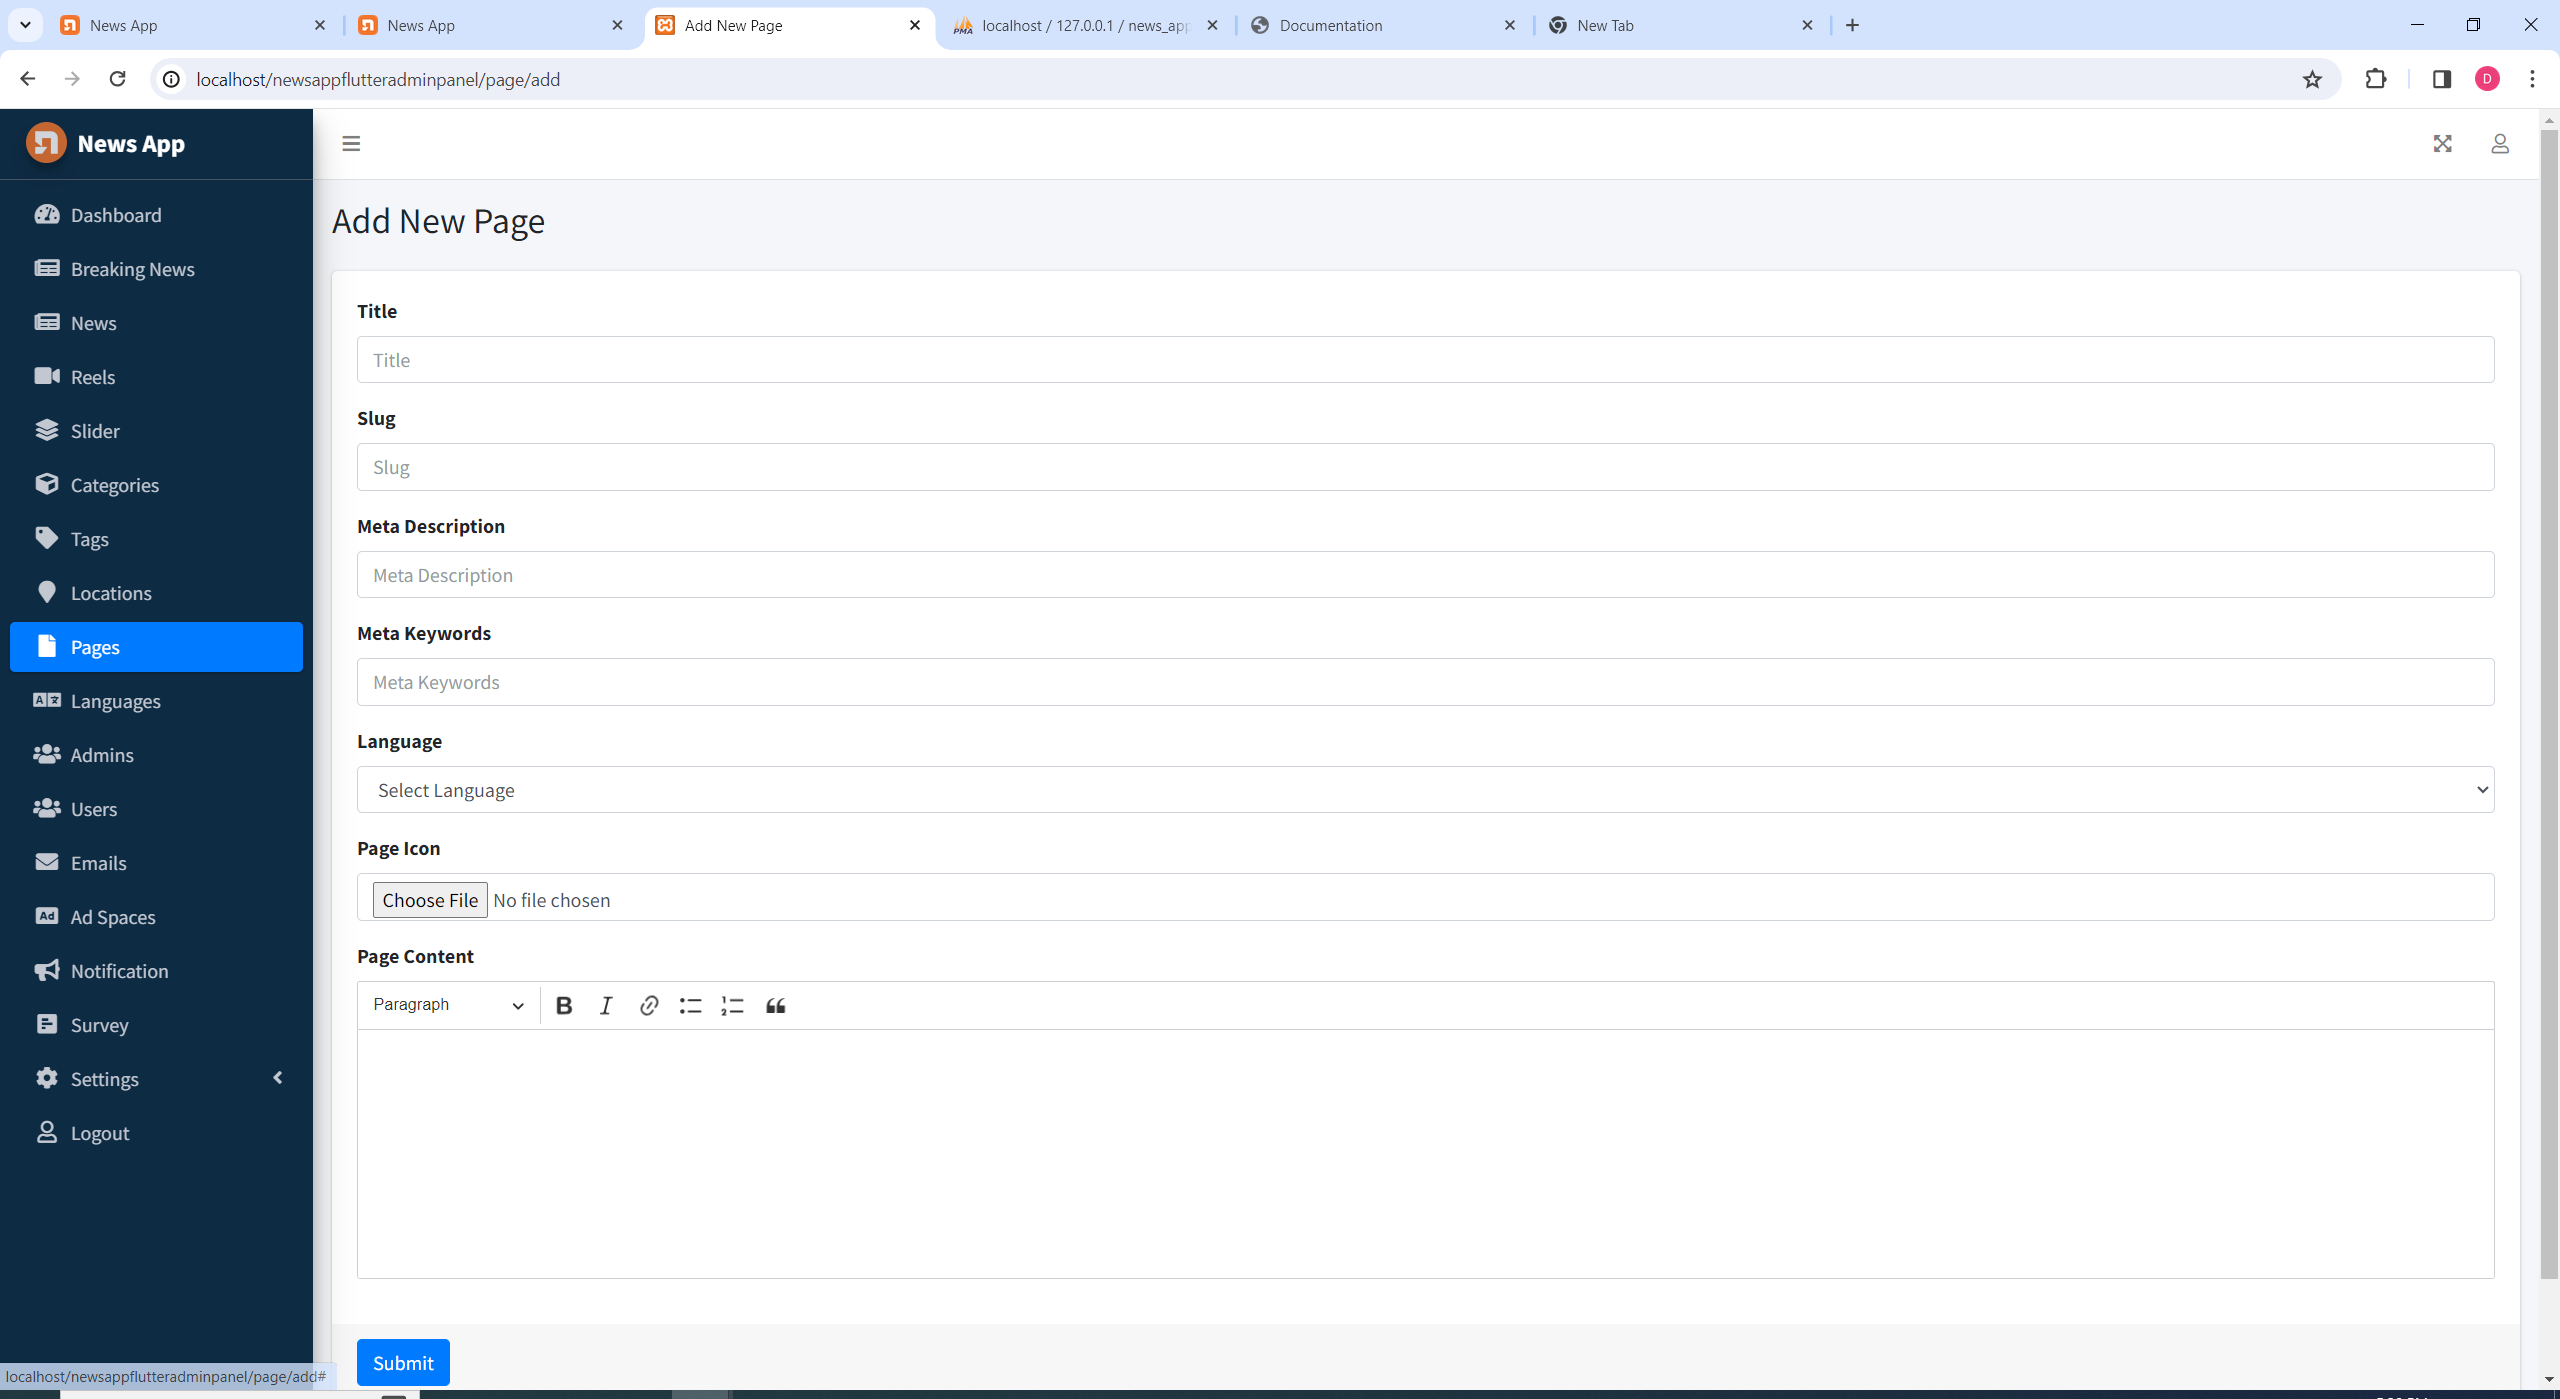
Create Page
To add a new dynamic page to your website, follow these steps:
Go to the dashboard and navigate to the "Pages" section.
Click on the "Add Page" button.
Provide the necessary details such as page title, slug, meta description, meta keywords, icon, and content.
Click the "Submit" button to save your new page.
Your dynamically created page will now be accessible under the "Pages" section in the website's navigation bar.
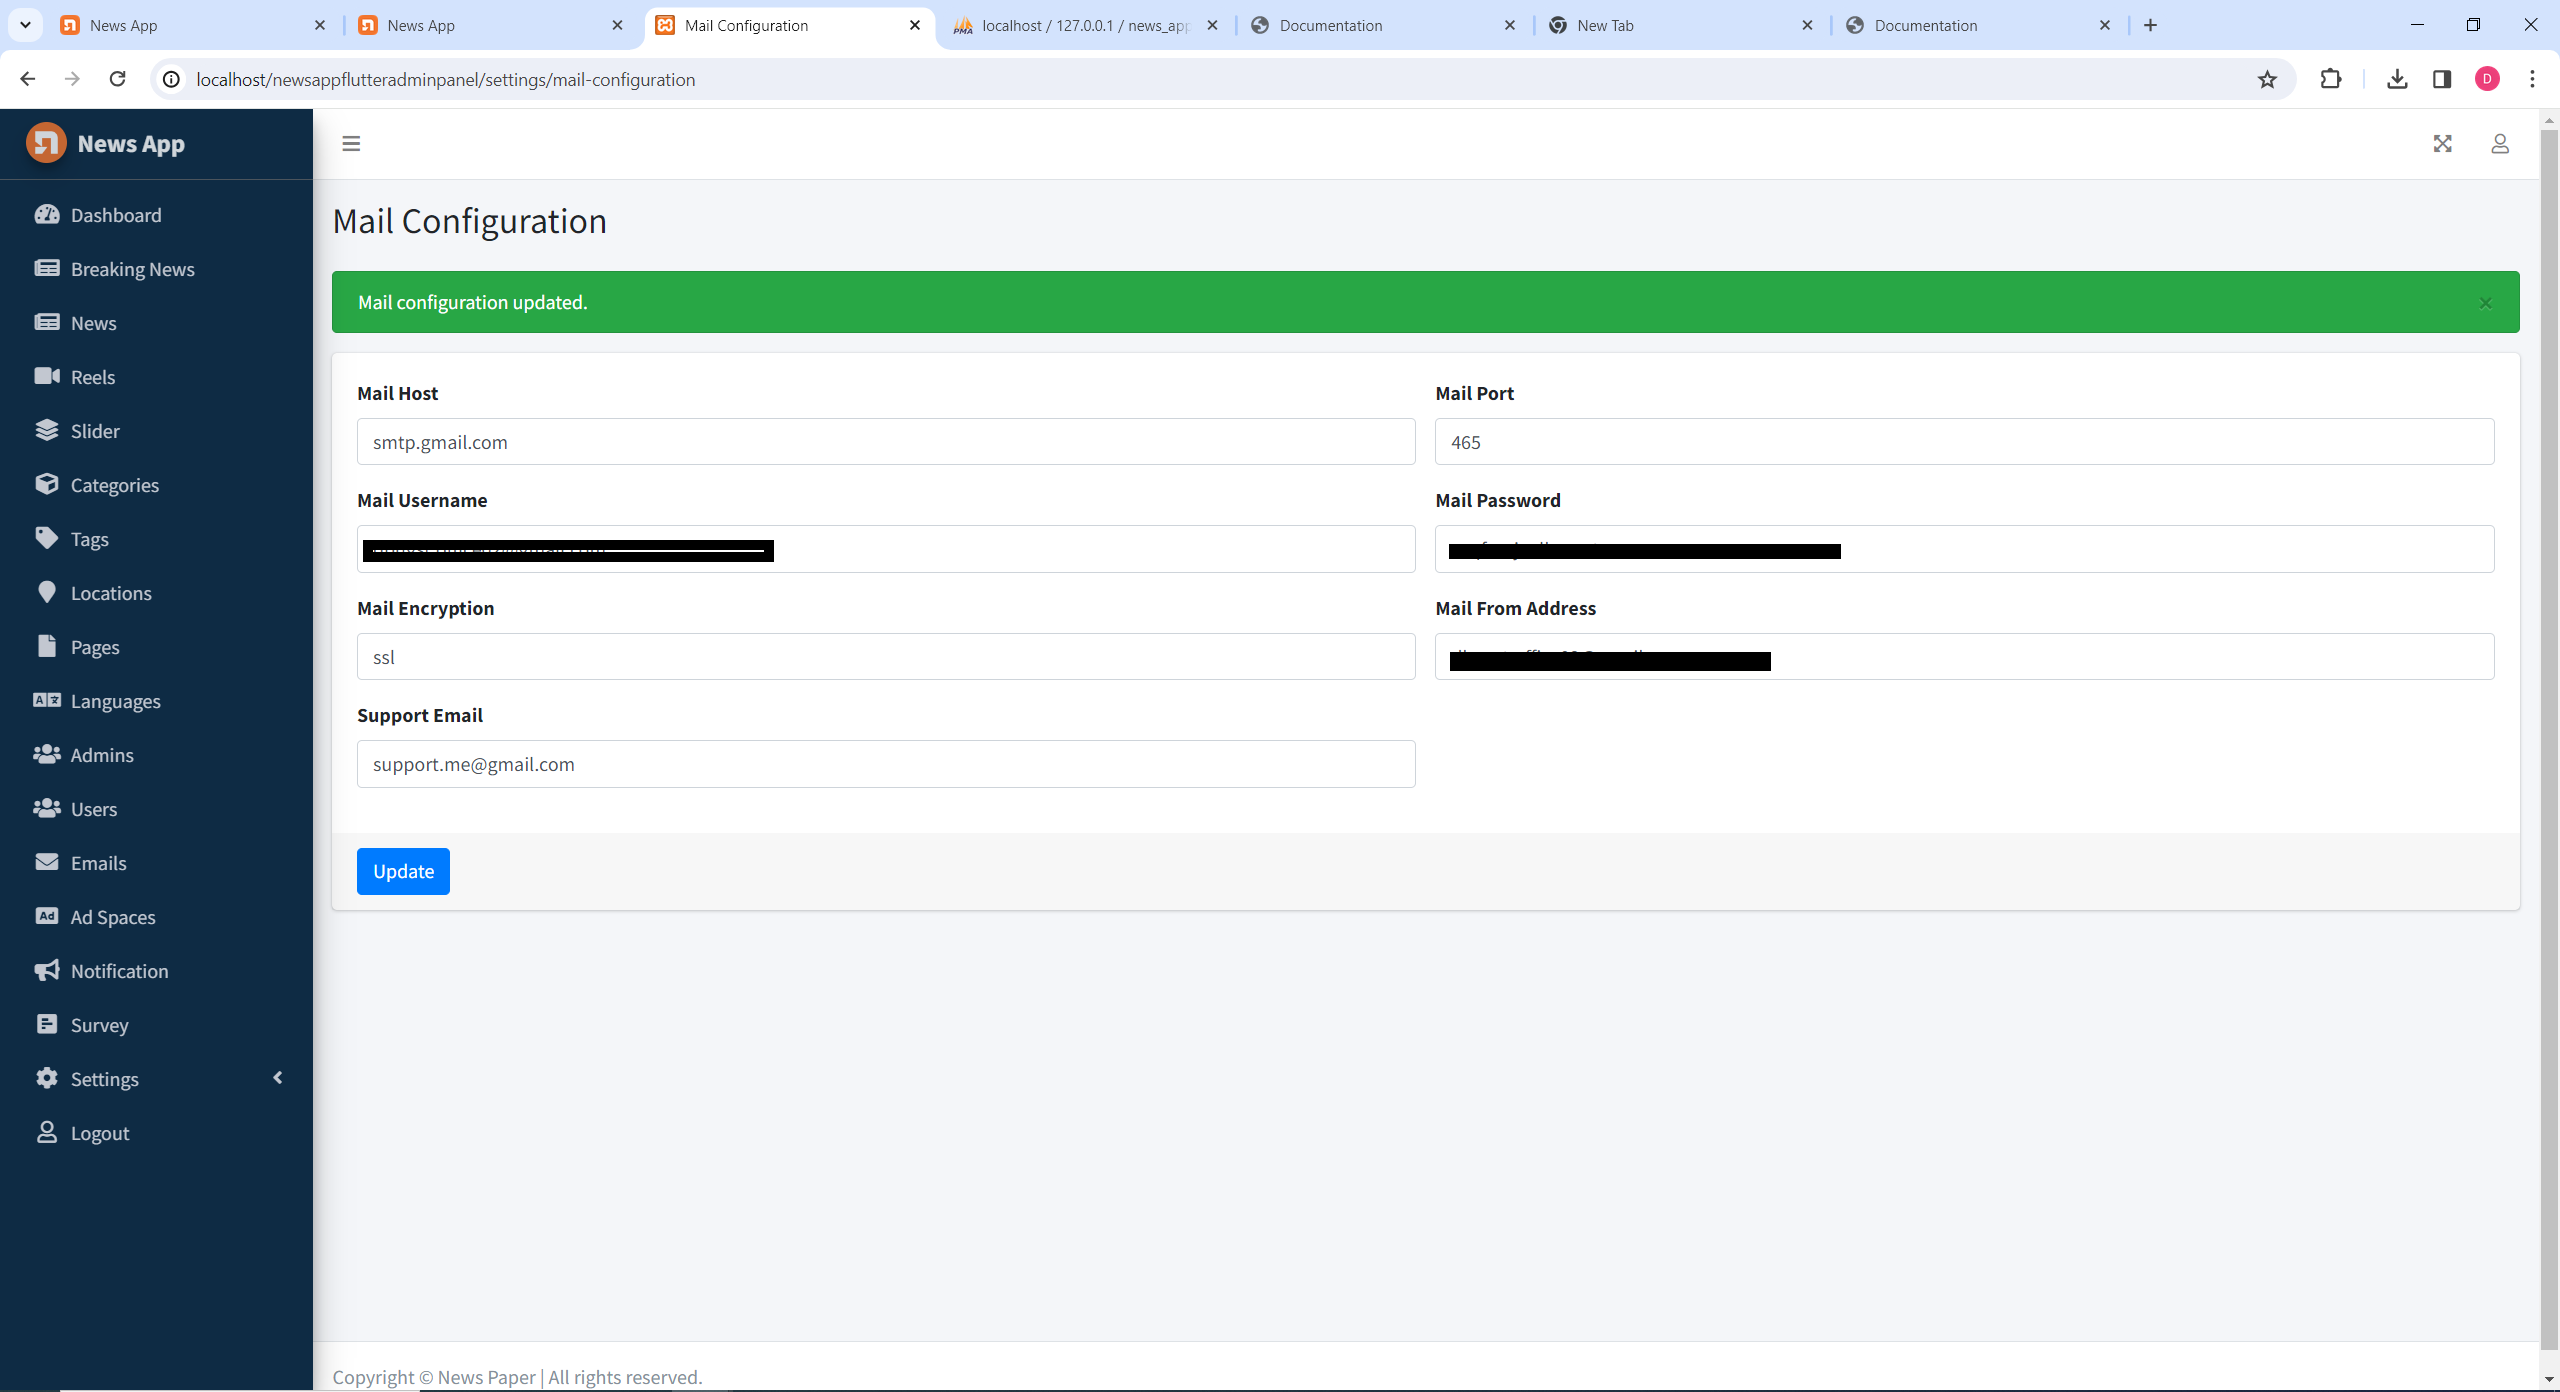
Update Mail Configuration
You can purchase email configuration settings from reputable service providers.
Keep your website's email communication running smoothly by updating the mail configuration. Follow these steps:
Access the dashboard and navigate to the "Mail Configuration" section.
Configure the necessary settings, including mail driver, host, port, username, password, and encryption.
Optionally, customize additional settings based on your email provider's requirements.
Click the "Update" button to save your mail configuration changes.
APIs
Run app
1- In the target selector, select the Android device to run the app. If none are
listed as available, select Tools > Android > AVD Manager and create one
there. For more details, browseManaging AVDs.
Click the Play icon in the Tools section, or call up the Play > Run menu item. Locate
the main Android Studio tools section:
2- If you do not useAndroid Studio or IntelliJ You can use the
command line to run your application with the following command
flutter run
Build and install the application
1- After making all your changes and modifications, save all your projects, open the
console, navigate to your project file and execute the following command to build
your application
flutter build apk --release
If you are publishing the app in the Play Store, it is recommended to use app bundles
or split APK to reduce the size of the app. To create the application package,
run: